User Manual
Page 2
... 4 Installing Batteries 7 Controlling Your DIRECTV® Receiver 7 Setting Up Your DIRECTV Remote 7 Onscreen Remote Setup 8 Controlling Your TV 8 Setting Up the TV Input Key 9 Deactivating the TV Input Select Key 9 Controlling Other Components 9 Searching for TV, AV1 or AV2 Codes 10 Verifying the Codes 11 Changing Volume Lock 11 Locking Volume to AV1, AV2 or TV 11 Restoring Factory Default Settings...
... 4 Installing Batteries 7 Controlling Your DIRECTV® Receiver 7 Setting Up Your DIRECTV Remote 7 Onscreen Remote Setup 8 Controlling Your TV 8 Setting Up the TV Input Key 9 Deactivating the TV Input Select Key 9 Controlling Other Components 9 Searching for TV, AV1 or AV2 Codes 10 Verifying the Codes 11 Changing Volume Lock 11 Locking Volume to AV1, AV2 or TV 11 Restoring Factory Default Settings...
User Manual
Page 5
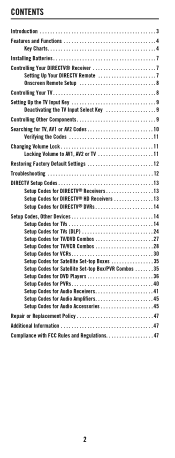
... move around in the Guide to jump 12 hours forward. *Other functions vary-look for your DIRECTV® Receiver's user guide. (Not available on all DIRECTV Receivers.) Press VOL to live TV. Press GREEN* in the Program Guide and menu screens. To... For DVR boxes, LIST takes you to ...Displays various options while viewing live TV or in menu screens or the Program Guide. Press this key... Press SELECT to the previously displayed screen. Press BACK to return to choose highlighted items in the Guide. The volume key is only active when the remote is set up for onscreen hints...
... move around in the Guide to jump 12 hours forward. *Other functions vary-look for your DIRECTV® Receiver's user guide. (Not available on all DIRECTV Receivers.) Press VOL to live TV. Press GREEN* in the Program Guide and menu screens. To... For DVR boxes, LIST takes you to ...Displays various options while viewing live TV or in menu screens or the Program Guide. Press this key... Press SELECT to the previously displayed screen. Press BACK to return to choose highlighted items in the Guide. The volume key is only active when the remote is set up for onscreen hints...
User Manual
Page 11
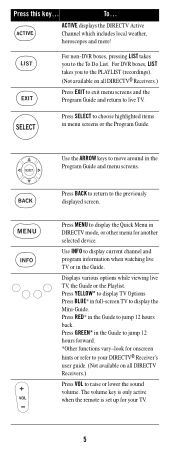
... or performs the action you need is not available. You must use the following steps: 1. Verifying the Codes Once you set up your TV, regardless of the position of times the green light flashes. Enter 9-9-0. (The green light under the selected switch position flashes twice, then ...only with your component responded: 1. 7. Slide the MODE switch to lock the volume. 2. CHANGING VOLUME LOCK Depending on how you have set up the DIRECTV® Universal Remote Control using the above steps, use the remote that the VOL and MUTE keys work only for the component selected by the MODE...
... or performs the action you need is not available. You must use the following steps: 1. Verifying the Codes Once you set up your TV, regardless of the position of times the green light flashes. Enter 9-9-0. (The green light under the selected switch position flashes twice, then ...only with your component responded: 1. 7. Slide the MODE switch to lock the volume. 2. CHANGING VOLUME LOCK Depending on how you have set up the DIRECTV® Universal Remote Control using the above steps, use the remote that the VOL and MUTE keys work only for the component selected by the MODE...
User Manual
Page 12
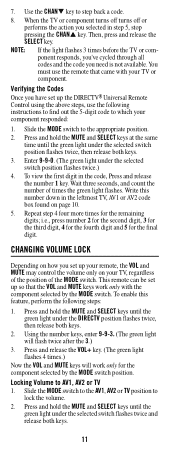
...the device brand being set up TV codes on Sony or Sharp TV/ VCR Combo. SOLUTION: Due to RCA design for certain models (19831987), only the original remote control will not allow the user to lock volume to the DIRECTV mode. SOLUTION: If original remote control required pressing ENTER to ...control. SOLUTION: For power on, these products require setting up . For Sony, use TV code 10093 and VCR code 20048. ...
...the device brand being set up TV codes on Sony or Sharp TV/ VCR Combo. SOLUTION: Due to RCA design for certain models (19831987), only the original remote control will not allow the user to lock volume to the DIRECTV mode. SOLUTION: If original remote control required pressing ENTER to ...control. SOLUTION: For power on, these products require setting up . For Sony, use TV code 10093 and VCR code 20048. ...


