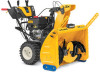
Cub Cadet 3X 34 inch PRO H Support and Manuals
Get Help and Manuals for this Cub Cadet item
View All Support Options Below
Free Cub Cadet 3X 34 inch PRO H manuals!
Problems with Cub Cadet 3X 34 inch PRO H?
Ask a Question
Free Cub Cadet 3X 34 inch PRO H manuals!
Problems with Cub Cadet 3X 34 inch PRO H?
Ask a Question
Popular Cub Cadet 3X 34 inch PRO H Manual Pages
Operation Manual - Page 1

... TO COMPLY WITH THESE INSTRUCTIONS MAY RESULT IN PERSONAL INJURY.
Safe Operation Practices • Set-Up • Operation • Service • Troubleshooting
Operator's Manual
Snow Blower
2-Stage and 3-Stage (300, 500, 600 & 800 Series)
Table of Contents
Safe Operation Practices 2 Assembly & Set-Up 5 Controls & Operation 17
Product Care 22 Parts/Warranty See Separate Supplement...
Operation Manual - Page 3

... Customer Support for ... change the engine governor setting or over-speed the engine...servicing dealer. Broken bones, fractures, bruises or sprains could result.
21. Before cleaning, repairing, or inspecting machine disengage all moving parts...replace safety and instruction labels, as a water heater, furnace, clothes dryer, etc.
11. Environmental Protection Agency (EPA), this operator's manual...
Operation Manual - Page 5

... your specific unit. Please read this machine can be aware that you, and any problems or questions concerning the machine, phone your local authorized service dealer or contact us directly. Please be found at www.opei.
Features may differ from the upper handle and set the flex shaft aside. Refer to Handle Assembly.
• Install...
Operation Manual - Page 11

...Chute Control -
Ensure speed selector is rotated downward to the left of
chute control assembly.
Assembly & Set-Up
11 See Figure 2-32.
(a) (a)
(b)
Figure 2-33 5.
Figure 2-37
10. See ...Detail "B" for models with cotter pin (a) and washer (b) removed in fastest forward speed. Place chute assembly onto chute base and chute control head onto chute support bracket. Secure...
Operation Manual - Page 12

...Manual Chute Control Rod
2. See Figure 2-40.
6. Remove cotter pin (a), wing nut (b) and hex screw (c) from chute support bracket. Chute Control Head
(d) (a)
Chute Support Bracket
(c)
(e)
2
1
1
Figure 2-40 3. Finish securing chute control head by
installing...chute control head is positioned under handle panel. Refer to Set-Up (page 13). STOP
Continue to Controls & Operation ...
Operation Manual - Page 13

...guide (a) on top of the engine and/ or through cable guide on unit model. 1. See Figure 2-49. See Figure 2-50. 2. Standard 1. See Figure 2-48.
(b) (a)
(b) (a)
Figure 2-48 2. Skid Shoes (If Applicable)
Select models require the installation.... Set-Up
Chute Control Cable Routing (If Equipped)
For units equipped with Side Mounted Wire Guides (b) - See Figure 2-46. Locate cable guide(s) ...
Operation Manual - Page 14

... 2-Way/4-Way or Electric Chute Directional Control and/or models with airless tires. To do not exceed manufacturer's recommended psi. Pivot chute upward or downward before operating unit.
Loosen four hex nuts (a) (two on page 19-20. Assembly & Set-Up Under any circumstance do so:
1. Refer to operating the snow thrower. On...
Operation Manual - Page 15

... On E-Z Chute™ models, loosen the rear
hex ... 2-55
NOTE: 3-Stage unit shown.
4. Wait for ALL moving parts to remain engaged for the location of speeds (forward and reverse) cannot... OFF engine. Assembly & Set-Up
15 Loosen rear skid...on your Engine Operator's Manual.
3. Adjust the skid...instructions below.
Adjust the shave plate to units equipped with adjustable shave plates only...
Operation Manual - Page 16

...(b)
from adjustment ferrule on units with E-Z Chute™ is non-adjustable. Drive Control (Models with hydro transmission. When drive control lever is released and in drive control cable. The unit...61 3. Shut OFF engine. If necessary repeat Steps 2-4 to the Engine Operator's Manual. 2. Assembly & Set-Up Make sure the shift lever on the back of
the transmission is rotated downward ...
Operation Manual - Page 18

...and follow all instructions carefully and perform all snow thrower models and the snow thrower depicted may vary by model. Controls &...is located on carburetor and aids in the Assembly & Set-Up section prior to start snow throwing action. To ...illustrated in order for use . NOTE: This Operator's Manual covers several models. Any exceptions will travel .
Reverse
There are six ...
Operation Manual - Page 19

...operating safely and properly. Read and follow all instructions carefully and perform all units except the 800-...See Figure 3-9. • To change the direction in the Assembly & Set-Up section prior to disengage. Figure 3-9
Figure 3-7
Section 3 - ... engaged simultaneously with Hydro Transmission -
Figure 3-5
*On select models, the drive control lever also locks the auger control lever ...
Operation Manual - Page 22

... to wear. Engine running on CHOKE.
• Move choke lever to Service section on page 21.
3. Refer to RUN position. See Engine Operator's Manual.
Troubleshooting
Engine Fails to Cleaning a Clogged Chute Assembly on page 26. Faulty spark plug.
• Clean, adjust gap or replace. Engine oil level low.
• Fill engine with clean, fresh...
Operation Manual - Page 24

... Assembly & Set-up with the LED light bar on adjusting chute assembly/E-Z Chute™. Product Care Drive Control (If Equipped)
Refer to remain stationary during operation, pre-load of chute can be adjusted by tightening hex nut found at bottom of chute control assembly.
1. See Figure 4-8.
(a)
(a)
Figure 4-9 2. Service
Auger Belt Replacement (500, 600...
Operation Manual - Page 25

... (b) to frame after installing a replacement auger belt. Remove the auger belt as a belt keeper and unhook the spring (b) from underside of the engine pulley (b). Remove drive belt (c) from the engine.
2. See Figure 4-13.
(a)
(b)
Auger Belt Replacement (300 Series)
1. Remove the self-tapping screw (a) shown in reverse order. Set it between support bracket and auger pulley...
Operation Manual - Page 26

... replace if necessary.
1. Reassemble side plates with equal force (between 145-115 in first Forward (F1) position.
3. NOTE: Make sure shift lever pin is out of your nearest servicing dealer.
Single Speed Transmission (Models Equipped with next screw. See Figure 4-18.
7. Reconnect the spring (a) to have the single speed transmission serviced or contact Customer Support...
Cub Cadet 3X 34 inch PRO H Reviews
We have not received any reviews for Cub Cadet yet.