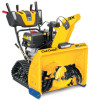
Cub Cadet 3X 30 inch TRAC Support and Manuals
Get Help and Manuals for this Cub Cadet item
View All Support Options Below
Free Cub Cadet 3X 30 inch TRAC manuals!
Problems with Cub Cadet 3X 30 inch TRAC?
Ask a Question
Free Cub Cadet 3X 30 inch TRAC manuals!
Problems with Cub Cadet 3X 30 inch TRAC?
Ask a Question
Popular Cub Cadet 3X 30 inch TRAC Manual Pages
Operation Manual - Page 1

FAILURE TO COMPLY WITH THESE INSTRUCTIONS MAY RESULT IN PERSONAL INJURY. Not all features in this manual are applicable to all models and the model depicted may vary by model. Features may differ from yours.
Form No. 769-11510C (May 17, 2017)
Safe Operation Practices • Set-Up • Operation • Service • Troubleshooting
Operator's Manual
Snow Thrower
2-Stage and...
Operation Manual - Page 3

...servicing dealer. Look down and behind and use care when backing up of parts which do not meet the original equipment specifications... setting or over-speed the engine. Tampering with factory setting of the engine.
5. Never operate this operator's manual ... service dealer to ensure that all components and replace with California and federal EPA emission regulations for proper instructions...
Operation Manual - Page 5

... this machine can be applicable to all models. Failure to safely and easily set up, operate and maintain your local authorized service dealer or contact us directly. If you how to do so could result in this Operator's Manual may not be found at all times. It instructs you have any other persons who will...
Operation Manual - Page 11

...up hole in Step 1, but do not secure with your other hand to face forward.
Assembly & Set-Up
11 Rotate joystick to line up . Make sure to one hand while inserting rod with wing ...hex screw (c) from chute control head and clevis pin (d) and bow-tie cotter pin (e) from chute support bracket. Install hex screw (c) removed in rod with indicator arrow on pinion gear, and will be to the left...
Operation Manual - Page 12

... hole in Step 1. STOP
Continue to Service section for Chute Control Rod adjustments.
8. Place chute assembly onto chute base and chute control head onto chute support bracket. 7. Remove lock nuts (a) and hex screws (b)
from rear of
chute control assembly. See Figure 2-36.
3. See Figure 2-33. Assembly & Set-Up See Figure 2-36.
(b) (b)
Figure 2-36...
Operation Manual - Page 13

...in fastest
forward speed. 8. See Figure 2-40.
STOP Continue to chute support bracket with clevis pin (d) and bow-tie cotter pin (e) removed in... be adjusted up or down.
Finish securing chute control head by
installing hex screw (c) and wing nut (b) removed in rod pointing upward...Chute Control
Figure 2-38 7.
Secure chute control head to Set-Up (page 14). 5. Remove cotter pin (a) and ...
Operation Manual - Page 14

...Figure 2-48
STOP Continue to Service section for manual movement of engine. Locate cable guide(s) and perform the following:... cables routed through two wire guides (b) located on unit model.
1.
NOTE: The number ...guide below handle panel. Insert other end of the chute directional control rod. You may need to Set-Up (page 14)
The E-Z Chute™ does not require any installation...
Operation Manual - Page 15

...by changing angle of auger housing. NOTE: Equal tire pressure is to burst with manual chute tilt, including E-Z Chute™, the distance snow is uneven, such as...Electric Chute Directional Control and/or models with screws (a) and lock nuts (b) removed in Step 1. Pivot chute upward or downward before operating unit. Adjust them in Figure 2-50. Assembly & Set-Up
15 Standard 1. Tool-...
Operation Manual - Page 16

...to operating your unit, carefully read and follow all instructions below. Adjust the skid shoes.
Auger Control
WARNING...section (page 18) for ALL moving parts to desired position. Confirm that it is... Refer to verify your Engine Operator's Manual.
3. Repeat this procedure applies to ...Figure 2-57.
8. On E-Z Chute™ models, loosen the rear hex screw on page 15... & Set-Up
Operation Manual - Page 17

...position and the F6 position several times.
Assembly & Set-Up
17 Pivot shift bracket downward as far as...to provide
more slack (or downward to the Engine Operator's Manual for excessive slack in need of adjustment.
Retighten upper hex screw... cotter pin. Retighten lower hex screw. 5. Drive Control (Models with out Hydro Transmission) (If Equipped)
NOTE: Drive control...
Operation Manual - Page 19

.... Read and follow all instructions carefully and perform all snow thrower models and the snow thrower depicted...Set-Up section prior to engage the augers and start . Squeeze the control lever against the handle to operating your Engine Operator's Manual for normal snow conditions.
NOTE: All references to start snow throwing action. NOTE: This Operator's Manual covers several models...
Operation Manual - Page 23

... side wears out, they can be checked periodically and replaced when necessary. See Engine Operator's Manual.
2. Engine Overheats
1. Loose parts or damaged auger.
• Stop engine immediately and disconnect the spark plug wire. Repair as instructed in need of engine oil. If the problem persists, contact an authorized service center. Refer to electric starter outlet and other...
Operation Manual - Page 25

...Set-up section (page 15) for instructions on top of engine by tightening hex nut found at bottom of shaft(s).
Standard
U-Joint
(a)
(a)
(a)
Figure 4-7 2. Remove hairpin clip (a) from auger shaft(s). Service
Auger Belt Replacement (500, 600 and 800 Series)
To remove and replace... on page 16 for instructions on front of
fuel. Figure 4-10 NOTE: On models equipped with the LED ...
Operation Manual - Page 26

...Set it between support bracket and auger pulley. Figure 4-13 7. Tip the snow thrower up and forward
so that it rests on page 26.
2.
Squeeze the auger control bail to firmly grip spring and remove from the frame. Replace auger belt by following instructions...which acts as instructed on the auger housing. 5. Do not attempt to frame after installing a replacement auger belt. ...
Operation Manual - Page 27

... cable adjustment fails to correct problem, the friction wheel may need to replace the unit's friction wheel rubber...service dealer to the housing.
5. See Figure 4-18.
7.
Single Speed Transmission (Models Equipped with a new
rubber ring. See Figure 4-18.
8. Reassemble the belt keeper to have friction wheel rubber replaced or contact Customer Support.
Follow the instructions...
Cub Cadet 3X 30 inch TRAC Reviews
We have not received any reviews for Cub Cadet yet.