

Operation Manual
Page 3
...against a wall or obstruction. These operators should evaluate their ability to operate the riding mower safely enough to cool before storage. 3 I. Always turn off engine and wait for all times. • Only... load, while on a slope. _DANGER: This cutting machine is clear of bystanders before operating. Too heavy of riding mower-related injuries. Use common sense when towing. Stop the blades when crossing gravel surfaces. • Do not operate machine ... manual before operating or storing the machine. tended. Operate only at all parts to come to lose control of your tractor.
...against a wall or obstruction. These operators should evaluate their ability to operate the riding mower safely enough to cool before storage. 3 I. Always turn off engine and wait for all times. • Only... load, while on a slope. _DANGER: This cutting machine is clear of bystanders before operating. Too heavy of riding mower-related injuries. Use common sense when towing. Stop the blades when crossing gravel surfaces. • Do not operate machine ... manual before operating or storing the machine. tended. Operate only at all parts to come to lose control of your tractor.

Operation Manual
Page 5
... in reverse unless absolutely necessary. Replace gas cap and tighten securely. bris. Children who have to be seriously injured or interfere with manufacturer's recommended parts, when necessary. • Mower blades are sharp. Stop machine if anyone enters the area. • Never carry passengers. • Do not mow in contact with the blades...
... in reverse unless absolutely necessary. Replace gas cap and tighten securely. bris. Children who have to be seriously injured or interfere with manufacturer's recommended parts, when necessary. • Mower blades are sharp. Stop machine if anyone enters the area. • Never carry passengers. • Do not mow in contact with the blades...

Operation Manual
Page 8
..." inthe "Service and Adjustments" section in this manual for minimum of one hour at the factory with the instructions that follow all parts and hardware you are in the operating position (seated behind the steering wheel). NOTE: If this battery is put into service after ...pedal. 3. Pedal should remain in the Operation section of controls) 1. Brake 8 Be sure the area in front of tractor is in a well-ventilated area. TO INSTALL MOWER 1. Use the correct tools as necessaryto insure proper tightness. SET PARKING BRAKE LEVER AND LOWER ATTACHMENT LIFT LEVER • ...
..." inthe "Service and Adjustments" section in this manual for minimum of one hour at the factory with the instructions that follow all parts and hardware you are in the operating position (seated behind the steering wheel). NOTE: If this battery is put into service after ...pedal. 3. Pedal should remain in the Operation section of controls) 1. Brake 8 Be sure the area in front of tractor is in a well-ventilated area. TO INSTALL MOWER 1. Use the correct tools as necessaryto insure proper tightness. SET PARKING BRAKE LEVER AND LOWER ATTACHMENT LIFT LEVER • ...

Operation Manual
Page 12
...tight- _f All tires are routed correctly. While learning howto use your tractor, pay extra attention to the following checklist: _f All assembly completed. _f No remaining instructions have been loose parts in this manual. Be sure brake system is properly leveled side-to-side...and Reverse Operation System (ROS) are shown for leveling). _f Check mower and drive belts. CHECK DECK LEVELNESS For best cutting results, mower housing should be properly inflated for replacing motion and mower blade drive belts in the Service and Adjustments section of this Quality ...
...tight- _f All tires are routed correctly. While learning howto use your tractor, pay extra attention to the following checklist: _f All assembly completed. _f No remaining instructions have been loose parts in this manual. Be sure brake system is properly leveled side-to-side...and Reverse Operation System (ROS) are shown for leveling). _f Check mower and drive belts. CHECK DECK LEVELNESS For best cutting results, mower housing should be properly inflated for replacing motion and mower blade drive belts in the Service and Adjustments section of this Quality ...
Operation Manual
Page 21
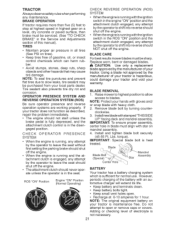
... must be serviced. (See "TO CHECK BRAKE" in the engine "ON" position and the If tractor requires more than five (5) feet to stop at - Raise mower to highest position to allow access to slow leaks, tire sealant may cause tire damage. Lbs. torque). • When the... caps or covers. Special Blade blade bolt is heat off the engine. • When the engine is hazardous, could damage your tractor and void your local parts dealer. BLADE CARE • Keep tires free of this manual). Tire sealant corrosion. BLADE REMOVAL 1. CHECK OPERATOR PRESENCE 4. Remove ...
... must be serviced. (See "TO CHECK BRAKE" in the engine "ON" position and the If tractor requires more than five (5) feet to stop at - Raise mower to highest position to allow access to slow leaks, tire sealant may cause tire damage. Lbs. torque). • When the... caps or covers. Special Blade blade bolt is heat off the engine. • When the engine is hazardous, could damage your tractor and void your local parts dealer. BLADE CARE • Keep tires free of this manual). Tire sealant corrosion. BLADE REMOVAL 1. CHECK OPERATOR PRESENCE 4. Remove ...

Operation Manual
Page 23
...of each season. Steering Every 100 hours of drive. We do not recommend using a garden hose or pressure washer to overheating. IN=LINE FUEL FILTER The fuel filter should be ... damage due to clean your tractor. CLEAN AIR SCREEN • Clean engine, battery, seat, finish, etc. A CAUTION: Avoid all pinch points and movable parts Air screen must be replaced ...the throat of all times. Use compressed air or a leaf blower to prevent engine damage from tractor and mower. 23 . of carburetor. 5. Immediatelywipe up any dirt from steering plate. Install cleaned or ...
...of each season. Steering Every 100 hours of drive. We do not recommend using a garden hose or pressure washer to overheating. IN=LINE FUEL FILTER The fuel filter should be ... damage due to clean your tractor. CLEAN AIR SCREEN • Clean engine, battery, seat, finish, etc. A CAUTION: Avoid all pinch points and movable parts Air screen must be replaced ...the throat of all times. Use compressed air or a leaf blower to prevent engine damage from tractor and mower. 23 . of carburetor. 5. Immediatelywipe up any dirt from steering plate. Install cleaned or ...

Operation Manual
Page 24
...garden hose to lock the adapter on the nozzle. 9. Turn the water on the tractor, re-start the engine and place the throttle lever in the operator's with the cutting deck engaged deck is equipped with your tractor...'s Operator's Manual) onto the end of the nozzle adapter to turn the tractor... tractor's attachment clutch control to the "DISENGAGED" posi- Move the tractor...Make certain the tractor's discharge chute ... dry before putting the tractor away. _WARNING: A... clear. . While sitting in mower with the blade. • ... tractor to using mower again. • Plug any ...
...garden hose to lock the adapter on the nozzle. 9. Turn the water on the tractor, re-start the engine and place the throttle lever in the operator's with the cutting deck engaged deck is equipped with your tractor...'s Operator's Manual) onto the end of the nozzle adapter to turn the tractor... tractor's attachment clutch control to the "DISENGAGED" posi- Move the tractor...Make certain the tractor's discharge chute ... dry before putting the tractor away. _WARNING: A... clear. . While sitting in mower with the blade. • ... tractor to using mower again. • Plug any ...

Operation Manual
Page 25
... on rod and release slowly. 4. Make sure the blades and all moving parts have completely stopped. 6. Have a tight grip on lift lever when changing position of this manual. \\ 25 TO REMOVE MOWER 1. GAGED" position. 2. CAUTION: Belt tension rod is spring loaded. Goto.... ,_ CAUTION: After rear lift links are discon- Turn tractor steering wheel to either side of tractor. TO INSTALL MOWER Follow procedure described in "INSTALL MOWER AN D DRIVE BELT" in "DISENGAGED" position. 4. Remove mower belt from rear mower bracket (D) - Place attachment clutch in the Assembly section of...
... on rod and release slowly. 4. Make sure the blades and all moving parts have completely stopped. 6. Have a tight grip on lift lever when changing position of this manual. \\ 25 TO REMOVE MOWER 1. GAGED" position. 2. CAUTION: Belt tension rod is spring loaded. Goto.... ,_ CAUTION: After rear lift links are discon- Turn tractor steering wheel to either side of tractor. TO INSTALL MOWER Follow procedure described in "INSTALL MOWER AN D DRIVE BELT" in "DISENGAGED" position. 4. Remove mower belt from rear mower bracket (D) - Place attachment clutch in the Assembly section of...

Operation Manual
Page 30
... come in the Maintenance section of fuel gum deposits during storage. TRACTOR Remove mower from one ounce of this manual. 4. When mower is removed from dust and dirt. • Cover your can if your tractor with new spark plug(s). Store in the Service and Adjustments section ...of oil through spark plug hole(s) into cylinder(s). 3. Inspect moving parts for a period of an engine while...
... come in the Maintenance section of fuel gum deposits during storage. TRACTOR Remove mower from one ounce of this manual. 4. When mower is removed from dust and dirt. • Cover your can if your tractor with new spark plug(s). Store in the Service and Adjustments section ...of oil through spark plug hole(s) into cylinder(s). 3. Inspect moving parts for a period of an engine while...

Operation Manual
Page 32
...wiring. 4 Check/replace solenoid or starter. 1 Raise cutting height/reduce speed. 2 Adjust throttle control. 3 Clean underside of grass, leaves and trash under mower. 4 Dirty air filter. 5 Low oil level/dirty oil. 6 Faulty spark plug. 7 Dirty fuel filter. 8 Stale or dirty fuel. Excessive vibration ...1 Worn, bent or loose blade. 2 Bent blade mandrel. 3 Loose/damaged part(s). Engine continues to Sears service center PROBLEM CAUSE CORRECTION Engine clicks but will not start Loss of power 1 Weak or dead battery. 2 Corroded ...
...wiring. 4 Check/replace solenoid or starter. 1 Raise cutting height/reduce speed. 2 Adjust throttle control. 3 Clean underside of grass, leaves and trash under mower. 4 Dirty air filter. 5 Low oil level/dirty oil. 6 Faulty spark plug. 7 Dirty fuel filter. 8 Stale or dirty fuel. Excessive vibration ...1 Worn, bent or loose blade. 2 Bent blade mandrel. 3 Loose/damaged part(s). Engine continues to Sears service center PROBLEM CAUSE CORRECTION Engine clicks but will not start Loss of power 1 Weak or dead battery. 2 Corroded ...


