dx2290 Bios - Compaq Microtower PC
dx2290 Bios
Related Manual Pages


Similar Questions

Bios Problem
I cant enter into bios setup it asks me for password my windows is 10 plz help me
I cant enter into bios setup it asks me for password my windows is 10 plz help me
(Posted by himalayatourjaipur 6 years ago)
The Bios Ignores The Boot Order I'm Defined To It. What Can I Do?
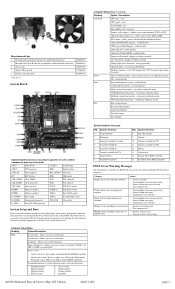
BIOS dx2200 Microtower Pc
BIOS dx2200 Microtower Pc
(Posted by drevinthis 10 years ago)

Have A Bios Password Problem
Have a bios password problem compaq mini CQ10.The error code CNU0092WM5 pls help. Have tried to re...
Have a bios password problem compaq mini CQ10.The error code CNU0092WM5 pls help. Have tried to re...
(Posted by tangwe 11 years ago)