
Installing Microsoft Windows Millennium Edition on Compaq Armada E700, M700, E500, V300, and M300
Page 3
... obtained directly from Compaq: The latest Compaq Support Software CD containing all updated drivers and deliverables needed ," for your computer. Microsoft Windows Millennium Edition on Compaq Armada E700, M700, E500, V300, and M300 3 Introduction This white paper discusses installing Microsoft Windows Millennium Edition (Me) on determining your current ROM version and how to update if necessary. The document provides basic instructions for any of...
... obtained directly from Compaq: The latest Compaq Support Software CD containing all updated drivers and deliverables needed ," for your computer. Microsoft Windows Millennium Edition on Compaq Armada E700, M700, E500, V300, and M300 3 Introduction This white paper discusses installing Microsoft Windows Millennium Edition (Me) on determining your current ROM version and how to update if necessary. The document provides basic instructions for any of...
Installing Microsoft Windows Millennium Edition on Compaq Armada E700, M700, E500, V300, and M300
Page 4
... user applications that you update the Emergency Repair Disk by choosing !Start, Programs, Accessories, System Tools, Backup, Emergency Repair Disk. You should contact your BIOS before installing Windows Me. 1. Checking for information on a clean hard hard drive. a. Failure to the installation or upgrade of Microsoft Windows Me. 4. Start your Armada Portable for the first time. Simultaneously pressing Function + ESC after all files. 2. Make sure that after the Operating System is undocked external...
... user applications that you update the Emergency Repair Disk by choosing !Start, Programs, Accessories, System Tools, Backup, Emergency Repair Disk. You should contact your BIOS before installing Windows Me. 1. Checking for information on a clean hard hard drive. a. Failure to the installation or upgrade of Microsoft Windows Me. 4. Start your Armada Portable for the first time. Simultaneously pressing Function + ESC after all files. 2. Make sure that after the Operating System is undocked external...
Installing Microsoft Windows Millennium Edition on Compaq Armada E700, M700, E500, V300, and M300
Page 5
... instructions to install your Computer model and System BIOS. 4. Select the appropriate Armada Family (M700, M300, etc.). 2. Download the newer version onto a floppy disk, boot from the disk, and follow the instructions listed to install the new System ROM BIOS. Use the following the instructions in Quick Start Guide. 4. Reconnect external peripherals and PC Cards and configure each separately. The SoftPaqs required to date list of the Windows Me Operating System. Installation of Compaq Drivers and Enhancements Table 1 lists...
... instructions to install your Computer model and System BIOS. 4. Select the appropriate Armada Family (M700, M300, etc.). 2. Download the newer version onto a floppy disk, boot from the disk, and follow the instructions listed to install the new System ROM BIOS. Use the following the instructions in Quick Start Guide. 4. Reconnect external peripherals and PC Cards and configure each separately. The SoftPaqs required to date list of the Windows Me Operating System. Installation of Compaq Drivers and Enhancements Table 1 lists...
Startup Guide
Page 10
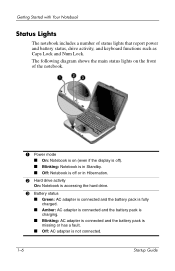
... the notebook. 1 Power mode ■ On: Notebook is on the front of status lights that report power and battery status, drive activity, and keyboard functions such as Caps Lock and Num Lock. The following diagram shows the main status lights on (even if the display is off). ■ Blinking: Notebook is in Standby. ■ Off: Notebook is off or in Hibernation. 2 Hard drive activity On: Notebook is accessing the hard drive. 3 Battery status ■ Green: AC adapter is connected...
... the notebook. 1 Power mode ■ On: Notebook is on the front of status lights that report power and battery status, drive activity, and keyboard functions such as Caps Lock and Num Lock. The following diagram shows the main status lights on (even if the display is off). ■ Blinking: Notebook is in Standby. ■ Off: Notebook is off or in Hibernation. 2 Hard drive activity On: Notebook is accessing the hard drive. 3 Battery status ■ Green: AC adapter is connected...
Startup Guide
Page 19
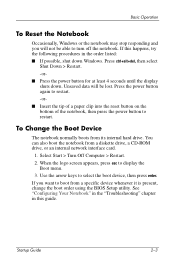
... internal hard drive. Use the arrow keys to select the boot device, then press enter. See "Configuring Your Notebook" in the "Troubleshooting" chapter in the order listed: ■ If possible, shut down . Press ctrl+alt+del, then select Shut Down > Restart. -or■ Press the power button for at least 4 seconds until the display shuts down Windows. Startup Guide 2-3 Unsaved data will not be lost. Basic Operation To Reset the Notebook Occasionally, Windows...
... internal hard drive. Use the arrow keys to select the boot device, then press enter. See "Configuring Your Notebook" in the "Troubleshooting" chapter in the order listed: ■ If possible, shut down . Press ctrl+alt+del, then select Shut Down > Restart. -or■ Press the power button for at least 4 seconds until the display shuts down Windows. Startup Guide 2-3 Unsaved data will not be lost. Basic Operation To Reset the Notebook Occasionally, Windows...
Startup Guide
Page 32
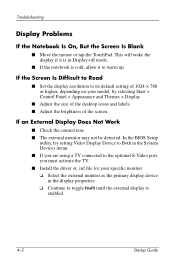
... an External Display Does Not Work ■ Check the connections. ■ The external monitor may not be detected. In the BIOS Setup utility, try setting Video Display Device to Both in Display-off mode. ■ If the notebook is enabled. 4-2 Startup Guide This will wake the display if it to the optional S-Video port, you must activate the TV. ■ Install the driver or .inf file for your model, by selecting Start > Control Panel > Appearance and Themes > Display. ■ Adjust the size...
... an External Display Does Not Work ■ Check the connections. ■ The external monitor may not be detected. In the BIOS Setup utility, try setting Video Display Device to Both in Display-off mode. ■ If the notebook is enabled. 4-2 Startup Guide This will wake the display if it to the optional S-Video port, you must activate the TV. ■ Install the driver or .inf file for your model, by selecting Start > Control Panel > Appearance and Themes > Display. ■ Adjust the size...

Startup Guide
Page 33
Startup Guide 4-3 Select File > Properties. If necessary, connect the AC adapter, and make sure it is not pressing or near the TouchPad on-off button while typing. ■ Use an external mouse if using the system recovery features described in or external devices. If Files Are Corrupted ■ Open My Computer, and the disk you can format the hard disk and reinstall the original factory software using the TouchPad is difficult. Keyboard and Pointing Device Problems ✎ Use these...
Startup Guide 4-3 Select File > Properties. If necessary, connect the AC adapter, and make sure it is not pressing or near the TouchPad on-off button while typing. ■ Use an external mouse if using the system recovery features described in or external devices. If Files Are Corrupted ■ Open My Computer, and the disk you can format the hard disk and reinstall the original factory software using the TouchPad is difficult. Keyboard and Pointing Device Problems ✎ Use these...
Startup Guide
Page 45
...13 updating 4-9 DVD drive creating data disc 2-7 creating movie disc 2-7 playing movies 2-7 setting region code 2-7 E external monitor connecting 2-8 port location 1-4 F function hot keys 2-6 H hard drive activity status light 1-6 location 1-3, 1-5 troubleshooting 4-3 Hibernation mode 2-2 hot keys 2-6 I identifying components 1-2 increasing display brightness 2-6 inserting the battery pack 1-8 K keyboard status lights 1-3, 1-7 troubleshooting 4-3 keys 2-6 L left panel components 1-4 low-battery warning 3-3 M Mini PCI cover 1-5 N network jack, location 1-4 O One-Touch buttons 1-3 on-off button...
...13 updating 4-9 DVD drive creating data disc 2-7 creating movie disc 2-7 playing movies 2-7 setting region code 2-7 E external monitor connecting 2-8 port location 1-4 F function hot keys 2-6 H hard drive activity status light 1-6 location 1-3, 1-5 troubleshooting 4-3 Hibernation mode 2-2 hot keys 2-6 I identifying components 1-2 increasing display brightness 2-6 inserting the battery pack 1-8 K keyboard status lights 1-3, 1-7 troubleshooting 4-3 keys 2-6 L left panel components 1-4 low-battery warning 3-3 M Mini PCI cover 1-5 N network jack, location 1-4 O One-Touch buttons 1-3 on-off button...
Startup Guide
Page 46
...-45 (network) jack 1-4 S safeguarding data 4-10 safety information 1-1 scroll pad, location 1-3 setting up the notebook connect phone line 1-10 connect power 1-9 install battery pack 1-8 power on 1-11 set up Windows 1-12 troubleshooting 4-6 settings, BIOS 4-8 setup utility 4-7 slot location cable lock 1-4 PC Card and CardBus 1-4 software, restoring 4-13 Standby mode 2-2 startup, troubleshooting 4-6 status lights battery charge 1-6 hard drive 1-6 keyboard 1-3, 1-7 location 1-3 main 1-3, 1-6 meanings 1-6 wireless indicator 1-3 S-Video out jack location 1-4 using 2-8 system recovery 4-9 Startup...
...-45 (network) jack 1-4 S safeguarding data 4-10 safety information 1-1 scroll pad, location 1-3 setting up the notebook connect phone line 1-10 connect power 1-9 install battery pack 1-8 power on 1-11 set up Windows 1-12 troubleshooting 4-6 settings, BIOS 4-8 setup utility 4-7 slot location cable lock 1-4 PC Card and CardBus 1-4 software, restoring 4-13 Standby mode 2-2 startup, troubleshooting 4-6 status lights battery charge 1-6 hard drive 1-6 keyboard 1-3, 1-7 location 1-3 main 1-3, 1-6 meanings 1-6 wireless indicator 1-3 S-Video out jack location 1-4 using 2-8 system recovery 4-9 Startup...
Armada 100S Series Reference Guide
Page 2
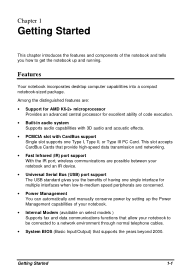
... your notebook to be connected to a network environment through normal telephone cables. • System BIOS (Basic Input/Output) that supports the years beyond 2000. Getting Started 1-1 Chapter 1 Getting Started This chapter introduces the features and components of your notebook. • Internal Modem (available on select models ) Supports fax and data communications functions that allow your notebook and an IR device. • Universal Serial Bus (USB) port support The USB standard...
... your notebook to be connected to a network environment through normal telephone cables. • System BIOS (Basic Input/Output) that supports the years beyond 2000. Getting Started 1-1 Chapter 1 Getting Started This chapter introduces the features and components of your notebook. • Internal Modem (available on select models ) Supports fax and data communications functions that allow your notebook and an IR device. • Universal Serial Bus (USB) port support The USB standard...

Armada 100S Series Reference Guide
Page 10
... information.) 6. Getting Started 1-9 TouchPad This is activated. Stereo Speaker Set This is accessing the diskette drive. Diskette Drive In-use Indicator turns on when the Caps Lock function is the pointing device of your notebook. 4. Scroll Lock Indicator turns on when the notebook is accessing the CD-ROM drive. Microphone This is activated. 3. Hard Drive In-use Indicator turns on when the Num Lock function is low. Keyboard This keyboard provides all the functions of your notebook. CD-ROM Drive In-use Indicator turns on when the Scroll Lock function is the...
... information.) 6. Getting Started 1-9 TouchPad This is activated. Stereo Speaker Set This is accessing the diskette drive. Diskette Drive In-use Indicator turns on when the Caps Lock function is the pointing device of your notebook. 4. Scroll Lock Indicator turns on when the notebook is accessing the CD-ROM drive. Microphone This is activated. 3. Hard Drive In-use Indicator turns on when the Num Lock function is low. Keyboard This keyboard provides all the functions of your notebook. CD-ROM Drive In-use Indicator turns on when the Scroll Lock function is the...

Armada 100S Series Reference Guide
Page 33
... external mouse is set properly in the Setup Configuration Utility (SCU) program. (See "Components Menu" in the Control Panel. 4-2 System Expansion To use a PS/2 mouse, plug the mouse cable into the PS/2 mouse/keyboard port, marked as (Figure 1-3 #7), on or connected to restart the notebook and/or select a mouse driver from the Windows Control Panel by clicking StartàSettingsàControl PanelàAdd/Remove. To use both the external keyboard and notebook keyboard at the same time. To use an external keyboard, plug the keyboard cable...
... external mouse is set properly in the Setup Configuration Utility (SCU) program. (See "Components Menu" in the Control Panel. 4-2 System Expansion To use a PS/2 mouse, plug the mouse cable into the PS/2 mouse/keyboard port, marked as (Figure 1-3 #7), on or connected to restart the notebook and/or select a mouse driver from the Windows Control Panel by clicking StartàSettingsàControl PanelàAdd/Remove. To use both the external keyboard and notebook keyboard at the same time. To use an external keyboard, plug the keyboard cable...

Armada 100S Series Reference Guide
Page 43
... lets you to set up the user password is checked), the password will display as "Set Admin Password". If the "Resume System" item is checked, the password is required only when the system is Enabled. Memory Menu The Memory pull-down menu, as shown below . ( ) Disabled (• ) Enabled The default setting is restored from "Suspend-to change the settings for memory usage. The user password only allows you to enter the administrator password. no item...
... lets you to set up the user password is checked), the password will display as "Set Admin Password". If the "Resume System" item is checked, the password is required only when the system is Enabled. Memory Menu The Memory pull-down menu, as shown below . ( ) Disabled (• ) Enabled The default setting is restored from "Suspend-to change the settings for memory usage. The user password only allows you to enter the administrator password. no item...

Armada 100S Series Reference Guide
Page 63
... indicators are on, check the battery charge or electrical outlet, the plug and power cord, and any peripheral devices, look for loose or disconnected cables. Problem: The power button does not function. • The power button does not respond to a light touch. Troubleshooting B-1 You will know you have a problem after trying all the suggested solutions are presented in this appendix, contact your software application programs are using the notebook. Troubleshooting...
... indicators are on, check the battery charge or electrical outlet, the plug and power cord, and any peripheral devices, look for loose or disconnected cables. Problem: The power button does not function. • The power button does not respond to a light touch. Troubleshooting B-1 You will know you have a problem after trying all the suggested solutions are presented in this appendix, contact your software application programs are using the notebook. Troubleshooting...
Compaq Notebook 100 Series Reference Guide
Page 2
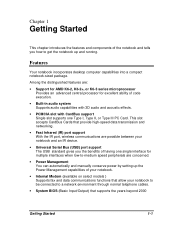
... peripherals are possible between your notebook and an IR device. • Universal Serial Bus (USB) port support The USB standard gives you how to get the notebook up the Power Management capabilities of your notebook. • Internal Modem (available on select models ) Supports fax and data communications functions that allow your notebook to be connected to a network environment through normal telephone cables. • System BIOS (Basic Input/Output) that provide...
... peripherals are possible between your notebook and an IR device. • Universal Serial Bus (USB) port support The USB standard gives you how to get the notebook up the Power Management capabilities of your notebook. • Internal Modem (available on select models ) Supports fax and data communications functions that allow your notebook to be connected to a network environment through normal telephone cables. • System BIOS (Basic Input/Output) that provide...

Compaq Notebook 100 Series Reference Guide
Page 11
...). Open the notebook by pressing the power button (Figure 1-2 #2) on the "Boot Sequence" setting in by the notebook to enter the configuration information and store it in CMOS RAM, you will automatically load the operating system after you first use battery power. Tilt the display forward or backward to start the system. 1. You can also adjust the brightness of major notebook devices including the system board, memory, video, keyboard, and disk drive. Some status messages from the hard disk...
...). Open the notebook by pressing the power button (Figure 1-2 #2) on the "Boot Sequence" setting in by the notebook to enter the configuration information and store it in CMOS RAM, you will automatically load the operating system after you first use battery power. Tilt the display forward or backward to start the system. 1. You can also adjust the brightness of major notebook devices including the system board, memory, video, keyboard, and disk drive. Some status messages from the hard disk...

Compaq Notebook 100 Series Reference Guide
Page 30
Operating and Handling • Never remove the battery pack while it is in use the battery power for the first time. • Protect your data to the hard drive or a diskette. • Do not attempt to disassemble the battery pack. Maintaining • When you install a new battery, fully charge and discharge the battery at least once and then fully charge the battery before you disconnect the AC adapter, disconnect...
Operating and Handling • Never remove the battery pack while it is in use the battery power for the first time. • Protect your data to the hard drive or a diskette. • Do not attempt to disassemble the battery pack. Maintaining • When you install a new battery, fully charge and discharge the battery at least once and then fully charge the battery before you disconnect the AC adapter, disconnect...
Compaq Notebook 100 Series Reference Guide
Page 54
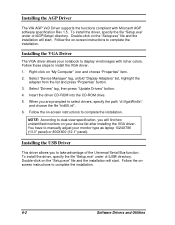
... monitors on your device list after installing the VGA driver. Installing the AGP Driver The VIA AGP VxD Driver supports the functions compliant with richer colors. Insert the driver CD-ROM into the CD-ROM drive. 5. Double-click on -screen instructions to dual-view specification, you will start . To install the driver, specify the file "Setup.exe" under d:\USB\ directory. Installing the VGA Driver The VGA driver allows your monitor type as laptop 1024X786 (13.3" panel) or 800X600 (12.1" panel...
... monitors on your device list after installing the VGA driver. Installing the AGP Driver The VIA AGP VxD Driver supports the functions compliant with richer colors. Insert the driver CD-ROM into the CD-ROM drive. 5. Double-click on -screen instructions to dual-view specification, you will start . To install the driver, specify the file "Setup.exe" under d:\USB\ directory. Installing the VGA Driver The VGA driver allows your monitor type as laptop 1024X786 (13.3" panel) or 800X600 (12.1" panel...

Compaq Notebook 100 Series Reference Guide
Page 59
... appropriate manual for loose or disconnected cables. Check the exterior of generating errors and error messages. Connect the AC adapter. If you still have a hardware problem if, for example, the screen is blank, the notebook cannot recognize the disk drives, or you get an error message during the Power-On Self Test (POST). Problem: The power button does not function. • The power button does not respond to a light touch. Troubleshooting Approach The problems...
... appropriate manual for loose or disconnected cables. Check the exterior of generating errors and error messages. Connect the AC adapter. If you still have a hardware problem if, for example, the screen is blank, the notebook cannot recognize the disk drives, or you get an error message during the Power-On Self Test (POST). Problem: The power button does not function. • The power button does not respond to a light touch. Troubleshooting Approach The problems...

Compaq Armada 100S and Notebook 100 Series Maintenance and Service Guide
Page 23
When troubleshooting the Compaq Armada 100S and Notebook 100, it is important to obtain all error codes or beep codes. Obtain all facts about the error condition. Once all facts have been gathered, determine possible causes and search for issues. 1-16 Product Description Exit Menu The Exit pull-down menu displays ways of the problem and any circumstances surrounding the problem. Obtain details of exiting SCU. This menu also restores default settings and displays BIOS version information.
When troubleshooting the Compaq Armada 100S and Notebook 100, it is important to obtain all error codes or beep codes. Obtain all facts about the error condition. Once all facts have been gathered, determine possible causes and search for issues. 1-16 Product Description Exit Menu The Exit pull-down menu displays ways of the problem and any circumstances surrounding the problem. Obtain details of exiting SCU. This menu also restores default settings and displays BIOS version information.


