
User Guide
Page 3
... the Headset 38 Using the Headset with Your IP Phone 39 Switching Between the Handset/Headset/Speakerphone During a Call 39 Sending Audio to the Phone Speaker 39 Choosing Your Preferred Audio Device 40 Adjusting Call Volume and Muting 40 Adjusting Call Volume 40 Using Mute 40 Placing or Answering a Call 41 Using... Don't Answer the Phone 47 Delaying Call Forwarding When You Don't Answer the Phone 47 Stopping Call Forwarding 47 Changing the Call Forwarding Delay 48 Cisco Small Business IP Phone SPA9XX User Guide 2
... the Headset 38 Using the Headset with Your IP Phone 39 Switching Between the Handset/Headset/Speakerphone During a Call 39 Sending Audio to the Phone Speaker 39 Choosing Your Preferred Audio Device 40 Adjusting Call Volume and Muting 40 Adjusting Call Volume 40 Using Mute 40 Placing or Answering a Call 41 Using... Don't Answer the Phone 47 Delaying Call Forwarding When You Don't Answer the Phone 47 Stopping Call Forwarding 47 Changing the Call Forwarding Delay 48 Cisco Small Business IP Phone SPA9XX User Guide 2
User Guide
Page 5
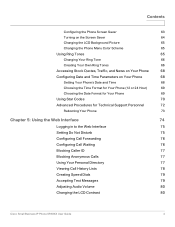
... ID 77 Blocking Anonymous Calls 77 Using Your Personal Directory 77 Viewing Call History Lists 78 Creating Speed Dials 79 Accepting Text Messages 79 Adjusting Audio Volume 80 Changing the LCD Contrast 80 Cisco Small Business IP Phone SPA9XX User Guide 4
... ID 77 Blocking Anonymous Calls 77 Using Your Personal Directory 77 Viewing Call History Lists 78 Creating Speed Dials 79 Accepting Text Messages 79 Adjusting Audio Volume 80 Changing the LCD Contrast 80 Cisco Small Business IP Phone SPA9XX User Guide 4

User Guide
Page 36
.../cfwd Forwards calls coming to pick up (answer) a call at a ringing extension in the Preferred Audio Device menu, shows "Speaker" and "Headset." Picking Up a Call, page 50 IP In some menus, you need to dial a number. Cisco Small Business IP Phone SPA9XX User Guide 35 Using Basic Phone Functions Understanding Your Phone...
.../cfwd Forwards calls coming to pick up (answer) a call at a ringing extension in the Preferred Audio Device menu, shows "Speaker" and "Headset." Picking Up a Call, page 50 IP In some menus, you need to dial a number. Cisco Small Business IP Phone SPA9XX User Guide 35 Using Basic Phone Functions Understanding Your Phone...

User Guide
Page 40
...from the handset to the speakerphone, make sure the speakerphone or headset light is lifted. STEP 3 Choose Send Audio to enable or disable the feature. Using Basic Phone Functions Using Phone Hardware and Accessories 3 Using the Headset ...headset with the SPA IP Phone may vary. Switching Between the Handset/Headset/Speakerphone During a Call Any of these audio devices can be used . To use a wired headset, press the Headset button on the hook when using the... or listening through the headset. STEP 4 Press Y/N to Speaker > Edit. Cisco Small Business IP Phone SPA9XX User Guide 39
...from the handset to the speakerphone, make sure the speakerphone or headset light is lifted. STEP 3 Choose Send Audio to enable or disable the feature. Using Basic Phone Functions Using Phone Hardware and Accessories 3 Using the Headset ...headset with the SPA IP Phone may vary. Switching Between the Handset/Headset/Speakerphone During a Call Any of these audio devices can be used . To use a wired headset, press the Headset button on the hook when using the... or listening through the headset. STEP 4 Press Y/N to Speaker > Edit. Cisco Small Business IP Phone SPA9XX User Guide 39

User Guide
Page 41
Cisco Small Business IP Phone SPA9XX User Guide 40 When the option you are on a call, press + on the phone. STEP 5 Press Save. Pressing the Volume ... and press Edit. The button lights red. Using Basic Phone Functions Adjusting Call Volume and Muting 3 Choosing Your Preferred Audio Device This option designates the headset or speaker phone as the preferred audio device when the handset is displayed, press OK. STEP 2 Select Preferences. Adjusting Call Volume To adjust the volume while...
Cisco Small Business IP Phone SPA9XX User Guide 40 When the option you are on a call, press + on the phone. STEP 5 Press Save. Pressing the Volume ... and press Edit. The button lights red. Using Basic Phone Functions Adjusting Call Volume and Muting 3 Choosing Your Preferred Audio Device This option designates the headset or speaker phone as the preferred audio device when the handset is displayed, press OK. STEP 2 Select Preferences. Adjusting Call Volume To adjust the volume while...

User Guide
Page 62
... Voice System. STEP 6 Press Save. Paging Another Phone To page another phone, dial *96 plus the extension of a Cisco SPA9000 Voice Network to use this feature. Cisco Small Business IP Phone SPA9XX User Guide 61 If the phone you are paging. Configuring Auto Answer To configure your phone and the phone that.... STEP 5 Press OK. STEP 3 Choose Auto Answer Page and press Edit. When your phone is paged, the phone emits a series of beeps, and two-way audio is not set up to auto answer pages: STEP 1 Press the Setup button.
... Voice System. STEP 6 Press Save. Paging Another Phone To page another phone, dial *96 plus the extension of a Cisco SPA9000 Voice Network to use this feature. Cisco Small Business IP Phone SPA9XX User Guide 61 If the phone you are paging. Configuring Auto Answer To configure your phone and the phone that.... STEP 5 Press OK. STEP 3 Choose Auto Answer Page and press Edit. When your phone is paged, the phone emits a series of beeps, and two-way audio is not set up to auto answer pages: STEP 1 Press the Setup button.

User Guide
Page 68
...Advanced Phone Features Using Ring Tones 4 STEP 7 (Optional) Click Preview to preview the ring tone. STEP 3 Click Browse and navigate to squeeze or stretch the audio. STEP 4 Click Load. STEP 6 (Optional) Click Preview to preview the ring tone. Click OK when the success status message appears. Enter the file name...next to the ring tone you want to create the ring tone and save the file to squeeze or stretch the audio. STEP 2 Enter the IP address of the phone. Cisco Small Business IP Phone SPA9XX User Guide 67 Click Options to change the start or end positions, or to your...
...Advanced Phone Features Using Ring Tones 4 STEP 7 (Optional) Click Preview to preview the ring tone. STEP 3 Click Browse and navigate to squeeze or stretch the audio. STEP 4 Click Load. STEP 6 (Optional) Click Preview to preview the ring tone. Click OK when the success status message appears. Enter the file name...next to the ring tone you want to create the ring tone and save the file to squeeze or stretch the audio. STEP 2 Enter the IP address of the phone. Cisco Small Business IP Phone SPA9XX User Guide 67 Click Options to change the start or end positions, or to your...

User Guide
Page 75
...chapter contains the following sections: • Logging in to configure some features of your phone using a web browser. 5 Using the Web Interface Your Cisco IP Phone provides a web interface to the phone that allows you to the Web Interface, page 75 • Setting Do Not Disturb, page 75...page 77 • Viewing Call History Lists, page 78 • Creating Speed Dials, page 79 • Accepting Text Messages, page 79 • Adjusting Audio Volume, page 80 • Changing the LCD Contrast, page 80 • Changing the Phone Menu Color Scheme, page 81 • Configuring the Phone Screen ...
...chapter contains the following sections: • Logging in to configure some features of your phone using a web browser. 5 Using the Web Interface Your Cisco IP Phone provides a web interface to the phone that allows you to the Web Interface, page 75 • Setting Do Not Disturb, page 75...page 77 • Viewing Call History Lists, page 78 • Creating Speed Dials, page 79 • Accepting Text Messages, page 79 • Adjusting Audio Volume, page 80 • Changing the LCD Contrast, page 80 • Changing the Phone Menu Color Scheme, page 81 • Configuring the Phone Screen ...

User Guide
Page 81
... 2 Click Submit All Changes. STEP 2 Click Submit All Changes. Using the Web Interface Adjusting Audio Volume 5 Adjusting Audio Volume STEP 1 Log in to the web interface. In the User tab, under Audio Volume, you can adjust the LCD contrast by entering a number between 1 and 10, with ...1 being the lowest. Changing the LCD Contrast STEP 1 Log in to the web interface. In the User tab, under Audio Volume, you can adjust the following settings: • Ringer Volume • Speaker Volume • Handset Volume • Headset Volume Enter a volume between...
... 2 Click Submit All Changes. STEP 2 Click Submit All Changes. Using the Web Interface Adjusting Audio Volume 5 Adjusting Audio Volume STEP 1 Log in to the web interface. In the User tab, under Audio Volume, you can adjust the LCD contrast by entering a number between 1 and 10, with ...1 being the lowest. Changing the LCD Contrast STEP 1 Log in to the web interface. In the User tab, under Audio Volume, you can adjust the following settings: • Ringer Volume • Speaker Volume • Handset Volume • Headset Volume Enter a volume between...