
User Guide
Page 4
... Number to Your Directory 55 Setting or Changing a Phone Password 56 Accessing Voicemail 56 Chapter 4: Using Advanced Phone Features 57 Configuring Privacy and Security Features 58 Blocking Caller ID 58 Blocking Anonymous Calls 58 Using Secure Call 59 Enabling Dial Assistance 59 Creating Speed Dials... 60 Using Speed Dials 60 Using the Paging Feature 61 Paging Another Phone 61 Configuring Auto Answer 61 Monitoring/Accessing Another Phone from Your Phone 62 Customizing Your LCD Screen...
... Number to Your Directory 55 Setting or Changing a Phone Password 56 Accessing Voicemail 56 Chapter 4: Using Advanced Phone Features 57 Configuring Privacy and Security Features 58 Blocking Caller ID 58 Blocking Anonymous Calls 58 Using Secure Call 59 Enabling Dial Assistance 59 Creating Speed Dials... 60 Using Speed Dials 60 Using the Paging Feature 61 Paging Another Phone 61 Configuring Auto Answer 61 Monitoring/Accessing Another Phone from Your Phone 62 Customizing Your LCD Screen...

User Guide
Page 7
...; Chapter 1-Getting Started (this chapter)-Gives a description of this book and an overview of the Cisco SPA9000 Voice System IP Phones. • Chapter 2, "Installing Your Phone" • Chapter 3, "Using Basic Phone Functions" • Chapter 4, "Using Advanced Phone Features" • Chapter 5, "Using the Web Interface" • Chapter 6, "Using the SPA932 Attendant Console" •...
...; Chapter 1-Getting Started (this chapter)-Gives a description of this book and an overview of the Cisco SPA9000 Voice System IP Phones. • Chapter 2, "Installing Your Phone" • Chapter 3, "Using Basic Phone Functions" • Chapter 4, "Using Advanced Phone Features" • Chapter 5, "Using the Web Interface" • Chapter 6, "Using the SPA932 Attendant Console" •...
User Guide
Page 8
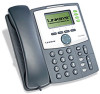
...features: Cisco SPA IP Phones Model Number of Number of the Cisco SPA9000 Voice System IP Phones 1 IP phones also have additional Ethernet ports that allow a computer to be connected to the network through the IP phone. Also provides customizable photo album. *The SPA941 and SPA942... provide support for 4 lines starting with firmware release 5.2. Cisco Small Business IP Phone SPA9XX User Guide 7 Some models have special features not available in the "Upgrading Your Phone's Firmware" section ...
...features: Cisco SPA IP Phones Model Number of Number of the Cisco SPA9000 Voice System IP Phones 1 IP phones also have additional Ethernet ports that allow a computer to be connected to the network through the IP phone. Also provides customizable photo album. *The SPA941 and SPA942... provide support for 4 lines starting with firmware release 5.2. Cisco Small Business IP Phone SPA9XX User Guide 7 Some models have special features not available in the "Upgrading Your Phone's Firmware" section ...
User Guide
Page 23
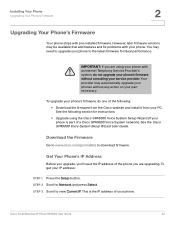
...'s firmware, do not upgrade your phone's firmware without any action on your IP address: STEP 1 Press the Setup button. See the Cisco SPA9000 Voice System Setup Wizard User Guide. To get your part necessary. Get Your Phone's IP Address Before you upgrade, you are upgrading.... You may be available that add features and fix problems with pre-installed firmware. See the following : • Download the firmware from the Cisco website and install it from your service provider. Cisco Small Business IP Phone SPA9XX User Guide 22 However, later...
...'s firmware, do not upgrade your phone's firmware without any action on your IP address: STEP 1 Press the Setup button. See the Cisco SPA9000 Voice System Setup Wizard User Guide. To get your part necessary. Get Your Phone's IP Address Before you upgrade, you are upgrading.... You may be available that add features and fix problems with pre-installed firmware. See the following : • Download the firmware from the Cisco website and install it from your service provider. Cisco Small Business IP Phone SPA9XX User Guide 22 However, later...

User Guide
Page 33
...dial phone numbers, enter letters, and choose menu items. Press to scroll through items shown on SPA92x) Indicates phone line status. Cisco Small Business IP Phone SPA9XX User Guide 32 Your phone may vary, but typically, when lit: • Green: Line is ...to access voice mail (must be used). Using Basic Phone Functions Understanding Your Phone's Lines and Buttons 3 Table 1 IP Phone Components # Phone Feature 1 Handset 2 Message Waiting Indicator 3 LCD Screen 4 Line keys 5 Softkey buttons 6 Navigation button 7 Keypad 8 Messages button 9 Hold button ...
...dial phone numbers, enter letters, and choose menu items. Press to scroll through items shown on SPA92x) Indicates phone line status. Cisco Small Business IP Phone SPA9XX User Guide 32 Your phone may vary, but typically, when lit: • Green: Line is ...to access voice mail (must be used). Using Basic Phone Functions Understanding Your Phone's Lines and Buttons 3 Table 1 IP Phone Components # Phone Feature 1 Handset 2 Message Waiting Indicator 3 LCD Screen 4 Line keys 5 Softkey buttons 6 Navigation button 7 Keypad 8 Messages button 9 Hold button ...

User Guide
Page 34
... button lights red. Using Basic Phone Functions Understanding Your Phone's Lines and Buttons 3 Table 1 IP Phone Components # Phone Feature 10 Setup button 11 Mute button 12 Volume button 13 Headset button 14 Speaker button Description Press to access the phone's configuration... phone. Table 2 Typical SPA IP Phone Softkey Buttons Button Function For More Information > Moves forward a single n/a character without deleting. Cisco Small Business IP Phone SPA9XX User Guide 33 Push to scroll and view additional softkey buttons. Add Adds a new item (for n/a ...
... button lights red. Using Basic Phone Functions Understanding Your Phone's Lines and Buttons 3 Table 1 IP Phone Components # Phone Feature 10 Setup button 11 Mute button 12 Volume button 13 Headset button 14 Speaker button Description Press to access the phone's configuration... phone. Table 2 Typical SPA IP Phone Softkey Buttons Button Function For More Information > Moves forward a single n/a character without deleting. Cisco Small Business IP Phone SPA9XX User Guide 33 Push to scroll and view additional softkey buttons. Add Adds a new item (for n/a ...

User Guide
Page 36
...the Phone Directories, page 52 DND Do Not Disturb; n/a Num In some menus, you n/a can edit numbers or letters, or enable or disable a feature. Forward/cfwd Forwards calls coming to pick up (answer) a call at a ringing extension in the Preferred Audio Device menu, shows "Speaker" and "Headset... dial a number. Forwarding Calls, page 45 GrPickup/grPick Allows you are editing a field that sub-menu. (For example, in your phone. Cisco Small Business IP Phone SPA9XX User Guide 35 Picking Up a Call, page 50 IP In some menus, you need to n/a press this if ...
...the Phone Directories, page 52 DND Do Not Disturb; n/a Num In some menus, you n/a can edit numbers or letters, or enable or disable a feature. Forward/cfwd Forwards calls coming to pick up (answer) a call at a ringing extension in the Preferred Audio Device menu, shows "Speaker" and "Headset... dial a number. Forwarding Calls, page 45 GrPickup/grPick Allows you are editing a field that sub-menu. (For example, in your phone. Cisco Small Business IP Phone SPA9XX User Guide 35 Picking Up a Call, page 50 IP In some menus, you need to n/a press this if ...

User Guide
Page 40
.... To use a wired headset, press the Headset button on the hook when using the speakerphone or headset function. STEP 1 Press the Setup button. Cisco Small Business IP Phone SPA9XX User Guide 39 STEP 4 Press Y/N to Speaker > Edit. Switching Between the Handset/Headset/Speakerphone During a Call Any of... these audio devices can be used during a call. STEP 5 Press OK. STEP 3 Choose Send Audio to enable or disable the feature. Using Basic Phone Functions Using Phone Hardware and Accessories 3 Using the Headset with the SPA IP Phone may vary. Only one device at a time ...
.... To use a wired headset, press the Headset button on the hook when using the speakerphone or headset function. STEP 1 Press the Setup button. Cisco Small Business IP Phone SPA9XX User Guide 39 STEP 4 Press Y/N to Speaker > Edit. Switching Between the Handset/Headset/Speakerphone During a Call Any of... these audio devices can be used during a call. STEP 5 Press OK. STEP 3 Choose Send Audio to enable or disable the feature. Using Basic Phone Functions Using Phone Hardware and Accessories 3 Using the Headset with the SPA IP Phone may vary. Only one device at a time ...

User Guide
Page 42
STEP 2 Press Dial to complete the call ). (Not applicable to scroll down and highlight a phone number on enabling this feature. Cisco Small Business IP Phone SPA9XX User Guide 41 To place or answer a call, do one of closely-matched phone numbers on a call and another call , ...
STEP 2 Press Dial to complete the call ). (Not applicable to scroll down and highlight a phone number on enabling this feature. Cisco Small Business IP Phone SPA9XX User Guide 41 To place or answer a call, do one of closely-matched phone numbers on a call and another call , ...

User Guide
Page 45
... redial another number: STEP 1 Press the Redial button and select the desired number. When you want to return and press Dial. Press the Setup button. Cisco Small Business IP Phone SPA9XX User Guide 44 Viewing and Returning Missed Calls The LCD screen on page 44.) To return a missed call: • If..., press the Call Rtn button to return the call. • If the LCD screen does not show a missed call, you can also turn off this feature -
... redial another number: STEP 1 Press the Redial button and select the desired number. When you want to return and press Dial. Press the Setup button. Cisco Small Business IP Phone SPA9XX User Guide 44 Viewing and Returning Missed Calls The LCD screen on page 44.) To return a missed call: • If..., press the Call Rtn button to return the call. • If the LCD screen does not show a missed call, you can also turn off this feature -

User Guide
Page 46
... On and Off This option controls the Missed Call notification that appears on page 76. To access this option: STEP 1 Press the Setup button. Cisco Small Business IP Phone SPA9XX User Guide 45 see the "Configuring Call Forwarding" section on your PC using the IP Phone Web Interface; c. STEP ...Press OK. You can forward all missed calls: • If the LCD screen shows a missed call, press the Miss button to enable or disable the feature. Using Basic Phone Functions Turning the Missed Calls Shortcut On and Off 3 To view a list of missed calls. • If the LCD screen does ...
... On and Off This option controls the Missed Call notification that appears on page 76. To access this option: STEP 1 Press the Setup button. Cisco Small Business IP Phone SPA9XX User Guide 45 see the "Configuring Call Forwarding" section on your PC using the IP Phone Web Interface; c. STEP ...Press OK. You can forward all missed calls: • If the LCD screen shows a missed call, press the Miss button to enable or disable the feature. Using Basic Phone Functions Turning the Missed Calls Shortcut On and Off 3 To view a list of missed calls. • If the LCD screen does ...

User Guide
Page 49
... Ans Delay, and press the Edit button. STEP 6 Press Save. 3 Setting Do Not Disturb Use the Do Not Disturb feature to choose Yes. or • Press the Setup button and select Preferences. Cisco Small Business IP Phone SPA9XX User Guide 48 Changing the Call Forwarding Delay To change the forwarding delay: STEP...
... Ans Delay, and press the Edit button. STEP 6 Press Save. 3 Setting Do Not Disturb Use the Do Not Disturb feature to choose Yes. or • Press the Setup button and select Preferences. Cisco Small Business IP Phone SPA9XX User Guide 48 Changing the Call Forwarding Delay To change the forwarding delay: STEP...

User Guide
Page 58
... 58 • Creating Speed Dials, page 60 • Using Speed Dials, page 60 • Using the Paging Feature, page 61 • Monitoring/Accessing Another Phone from Your Phone, page 62 • Customizing Your LCD Screen, page 62 • Using Ring Tones, page 65...Stock Quotes, Traffic, and News on Your Phone, page 68 • Configuring Date and Time Parameters on your IP Phone. 4 Using Advanced Phone Features This chapter describes how to configure advanced features on Your Phone, page 68 • Using Star Codes, page 70 • Advanced Procedures for Technical Support Personnel, page 72...
... 58 • Creating Speed Dials, page 60 • Using Speed Dials, page 60 • Using the Paging Feature, page 61 • Monitoring/Accessing Another Phone from Your Phone, page 62 • Customizing Your LCD Screen, page 62 • Using Ring Tones, page 65...Stock Quotes, Traffic, and News on Your Phone, page 68 • Configuring Date and Time Parameters on your IP Phone. 4 Using Advanced Phone Features This chapter describes how to configure advanced features on Your Phone, page 68 • Using Star Codes, page 70 • Advanced Procedures for Technical Support Personnel, page 72...

User Guide
Page 59
...Select Preferences. STEP 4 Press Y/N to choose Yes. STEP 3 Choose Block Anonymous Call and press Edit. Using Advanced Phone Features Configuring Privacy and Security Features 4 Configuring Privacy and Security Features You can block Caller ID from ringing your phone. (For example, if a caller set his phone to the person you ... your phone so that your PC and the IP Phone Web Interface. Cisco Small Business IP Phone SPA9XX User Guide 58 STEP 5 Press OK. Blocking Caller ID You can also configure these features using your phone number will not appear to not display Caller ID, ...
...Select Preferences. STEP 4 Press Y/N to choose Yes. STEP 3 Choose Block Anonymous Call and press Edit. Using Advanced Phone Features Configuring Privacy and Security Features 4 Configuring Privacy and Security Features You can block Caller ID from ringing your phone. (For example, if a caller set his phone to the person you ... your phone so that your PC and the IP Phone Web Interface. Cisco Small Business IP Phone SPA9XX User Guide 58 STEP 5 Press OK. Blocking Caller ID You can also configure these features using your phone number will not appear to not display Caller ID, ...

User Guide
Page 60
... enable dial assistance: STEP 1 Press the Setup button. Cisco Small Business IP Phone SPA9XX User Guide 59 To use secure call . STEP 2 Select Preferences. STEP 2 Select Preferences. Using Advanced Phone Features Configuring Privacy and Security Features STEP 5 Press OK. When you dial, you place ...Press Save. 4 Using Secure Call With the secure call feature, the active call is available. STEP 4 Press Y/N to enable this feature. Before enabling Secure Call, ask your service provider must be part of a Cisco SPA9000 Voice Network and your service provider if Secure Call ...
... enable dial assistance: STEP 1 Press the Setup button. Cisco Small Business IP Phone SPA9XX User Guide 59 To use secure call . STEP 2 Select Preferences. STEP 2 Select Preferences. Using Advanced Phone Features Configuring Privacy and Security Features STEP 5 Press OK. When you dial, you place ...Press Save. 4 Using Secure Call With the secure call feature, the active call is available. STEP 4 Press Y/N to enable this feature. Before enabling Secure Call, ask your service provider must be part of a Cisco SPA9000 Voice Network and your service provider if Secure Call ...

User Guide
Page 61
...8226; Press the Setup button, select Speed Dial, choose the number, and press Dial. To edit a previously existing speed dial, select it. Using Advanced Phone Features Creating Speed Dials 4 STEP 4 Press Y/N to 8 speed dials. Creating Speed Dials You can configure up to choose Yes. STEP 4 Press Edit. STEP 5...3 For a new speed dial, scroll to complete the call one of your PC and the IP Phone Web Interface. STEP 2 Select Speed Dial. Cisco Small Business IP Phone SPA9XX User Guide 60 To create or edit a speed dial: STEP 1 Press the Setup button. Using Speed Dials To call...
...8226; Press the Setup button, select Speed Dial, choose the number, and press Dial. To edit a previously existing speed dial, select it. Using Advanced Phone Features Creating Speed Dials 4 STEP 4 Press Y/N to 8 speed dials. Creating Speed Dials You can configure up to choose Yes. STEP 4 Press Edit. STEP 5...3 For a new speed dial, scroll to complete the call one of your PC and the IP Phone Web Interface. STEP 2 Select Speed Dial. Cisco Small Business IP Phone SPA9XX User Guide 60 To create or edit a speed dial: STEP 1 Press the Setup button. Using Speed Dials To call...

User Guide
Page 62
...Choose Auto Answer Page and press Edit. Cisco Small Business IP Phone SPA9XX User Guide 61 Using Advanced Phone Features Using the Paging Feature 4 Using the Paging Feature Your IP phone can automatically answer pages from other Cisco SPA phones in the Cisco SPA9000 Voice System. When your phone ...is paged, the phone emits a series of a Cisco SPA9000 Voice Network to choose...
...Choose Auto Answer Page and press Edit. Cisco Small Business IP Phone SPA9XX User Guide 61 Using Advanced Phone Features Using the Paging Feature 4 Using the Paging Feature Your IP phone can automatically answer pages from other Cisco SPA phones in the Cisco SPA9000 Voice System. When your phone ...is paged, the phone emits a series of a Cisco SPA9000 Voice Network to choose...

User Guide
Page 63
...line, the LED color shows you the status of his extension. Pressing the Right navigation button increases the contrast. Using Advanced Phone Features Monitoring/Accessing Another Phone from Your Phone 4 Monitoring/Accessing Another Phone from Your Phone Your system administrator may configure your phone so ...steady): Line is active or in several ways. STEP 2 Use the navigation button to highlight LCD Contrast, and press the Select button. Cisco Small Business IP Phone SPA9XX User Guide 62 See "Changing the LCD Contrast," on your phone are assigned to display the status of ...
...line, the LED color shows you the status of his extension. Pressing the Right navigation button increases the contrast. Using Advanced Phone Features Monitoring/Accessing Another Phone from Your Phone 4 Monitoring/Accessing Another Phone from Your Phone Your system administrator may configure your phone so ...steady): Line is active or in several ways. STEP 2 Use the navigation button to highlight LCD Contrast, and press the Select button. Cisco Small Business IP Phone SPA9XX User Guide 62 See "Changing the LCD Contrast," on your phone are assigned to display the status of ...

User Guide
Page 64
... dark after the phone is idle. STEP 1 Press the Setup button. STEP 3 Choose Back Light Timer and press Edit. STEP 2 Select Preferences. Using Advanced Phone Features Customizing Your LCD Screen 4 Setting the Backlight Timer You can be idle before the backlight should shut off after a specified time when the phone is...
... dark after the phone is idle. STEP 1 Press the Setup button. STEP 3 Choose Back Light Timer and press Edit. STEP 2 Select Preferences. Using Advanced Phone Features Customizing Your LCD Screen 4 Setting the Backlight Timer You can be idle before the backlight should shut off after a specified time when the phone is...

User Guide
Page 65
Cisco Small Business IP Phone SPA9XX User Guide 64 STEP 3 Press OK. STEP 2 Enter the time, in seconds, to Screen Saver Mode and press Activate. STEP 3 ... Saver Icon and press Edit. STEP 4 Press Save. Turning on the Screen Saver To immediately turn on if your phone is displayed. Using Advanced Phone Features Customizing Your LCD Screen 4 To specify the amount of time before the screen saver starts.
Cisco Small Business IP Phone SPA9XX User Guide 64 STEP 3 Press OK. STEP 2 Enter the time, in seconds, to Screen Saver Mode and press Activate. STEP 3 ... Saver Icon and press Edit. STEP 4 Press Save. Turning on the Screen Saver To immediately turn on if your phone is displayed. Using Advanced Phone Features Customizing Your LCD Screen 4 To specify the amount of time before the screen saver starts.