
Administration Guide
Page 2
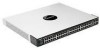
...What's in this User Guide? 1 2 Getting to Know the SGE2010/SGE2010P 2 SGE2010/P Front Panel 2 SGE2010/P Back Panel 3 3 Connecting Devices to the SGE2010/SGE2010P 4 Sample Network Configuration 4 Maximum Cabling Distances 4 Before You Install the Switch... 5 Placement Options 5 Desktop Placement 5 Rack-Mount Placement 6 ...Actions 12 Using the Switch Main Menu 13 System Configuration 13 System Information 14 Management Settings 16 Username & Password Settings 21 Security Settings 22 VLAN Management 25 IP Configuration 26 File Management 40 Restore System ...
...What's in this User Guide? 1 2 Getting to Know the SGE2010/SGE2010P 2 SGE2010/P Front Panel 2 SGE2010/P Back Panel 3 3 Connecting Devices to the SGE2010/SGE2010P 4 Sample Network Configuration 4 Maximum Cabling Distances 4 Before You Install the Switch... 5 Placement Options 5 Desktop Placement 5 Rack-Mount Placement 6 ...Actions 12 Using the Switch Main Menu 13 System Configuration 13 System Information 14 Management Settings 16 Username & Password Settings 21 Security Settings 22 VLAN Management 25 IP Configuration 26 File Management 40 Restore System ...

Administration Guide
Page 12
...to perform basic configuration of the switch. The default logon ID is covered in the next chapter. • "Connecting to Your Switch with HyperTerminal," on page 9 • "Connecting to the switch IP address 192.168.1.254. The switch features a menu-driven console interface... to use of your switch. Then, press the Enter key. SGE2010/SGE2010P Administration Guide 9 Telnet to the Switch with Telnet," on your switch. Before you use HyperTerminal to connect to your switch for basic configuration of the switch and management of the switch console, which is admin...
...to perform basic configuration of the switch. The default logon ID is covered in the next chapter. • "Connecting to Your Switch with HyperTerminal," on page 9 • "Connecting to the switch IP address 192.168.1.254. The switch features a menu-driven console interface... to use of your switch. Then, press the Enter key. SGE2010/SGE2010P Administration Guide 9 Telnet to the Switch with Telnet," on your switch. Before you use HyperTerminal to connect to your switch for basic configuration of the switch and management of the switch console, which is admin...

Administration Guide
Page 13
On the Connection Description screen, type a name for this connection, select an icon, and then click OK. 3. SGE2010/SGE2010P Administration Guide 10 On the Connect To screen, use the Connect using drop-down list to select a port to Your Switch with the switch: COMn, or TCP/ IP. Choose Programs > Accessories > Communications > HyperTerminal. 2. Click the Start button. Using the Console Connecting to communicate with HyperTerminal 1.
On the Connection Description screen, type a name for this connection, select an icon, and then click OK. 3. SGE2010/SGE2010P Administration Guide 10 On the Connect To screen, use the Connect using drop-down list to select a port to Your Switch with the switch: COMn, or TCP/ IP. Choose Programs > Accessories > Communications > HyperTerminal. 2. Click the Start button. Using the Console Connecting to communicate with HyperTerminal 1.

Administration Guide
Page 15
...to the Console 1. To select menu options and actions, use the following keys on an editing screen. Press the Esc key to return to the switch with telnet. 1. Actions appear at the end of the screen. Select an option that you configured previously. 2. Open a command line editor and enter... telnet . When the blinking cursor appears, press the Enter key. 3. Using the Console Connecting to the Switch with Telnet Connecting to the Switch with Telnet You can also be used to select a menu option. SGE2010/SGE2010P Administration Guide 12
...to the Console 1. To select menu options and actions, use the following keys on an editing screen. Press the Esc key to return to the switch with telnet. 1. Actions appear at the end of the screen. Select an option that you configured previously. 2. Open a command line editor and enter... telnet . When the blinking cursor appears, press the Enter key. 3. Using the Console Connecting to the Switch with Telnet Connecting to the Switch with Telnet You can also be used to select a menu option. SGE2010/SGE2010P Administration Guide 12

Administration Guide
Page 17
... screens where you are finished using this menu: 1. Back. File Management (see page 21) 4. SGE2010/SGE2010P Administration Guide 14 Username & Password Settings (see page 40) 8. System Configuration. 2. Reboot System (see page 26) 7. IP Configuration (see page 43) 11. Versions (see page 43) 9. From the Switch Main Menu, select 1. Restore System Default Settings (see page...
... screens where you are finished using this menu: 1. Back. File Management (see page 21) 4. SGE2010/SGE2010P Administration Guide 14 Username & Password Settings (see page 40) 8. System Configuration. 2. Reboot System (see page 26) 7. IP Configuration (see page 43) 11. Versions (see page 43) 9. From the Switch Main Menu, select 1. Restore System Default Settings (see page...

Administration Guide
Page 26
...City Name State or Province Name Specifies the SSL type Specifies the SSL RSA key length. (Range: 512 to 2048) IP address of the Ethernet switch Specifies the department name. (Range: 1 to 32 characters) Specifies the organization name. (Range: 1 to 32 characters)... this screen: 1. Select Edit, and then make your changes. Security Settings. 3. SSL Generate Certificate. Select Execute to 32 characters) SGE2010/SGE2010P Administration Guide 23 To edit and execute a certificate: 1. Using the Console System Configuration SSL Generate Certificate Use the SSL Certificate Generation...
...City Name State or Province Name Specifies the SSL type Specifies the SSL RSA key length. (Range: 512 to 2048) IP address of the Ethernet switch Specifies the department name. (Range: 1 to 32 characters) Specifies the organization name. (Range: 1 to 32 characters)... this screen: 1. Select Edit, and then make your changes. Security Settings. 3. SSL Generate Certificate. Select Execute to 32 characters) SGE2010/SGE2010P Administration Guide 23 To edit and execute a certificate: 1. Using the Console System Configuration SSL Generate Certificate Use the SSL Certificate Generation...

Administration Guide
Page 29
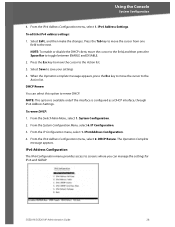
...cursor to the previous menu.) To open this screen: 1. System Configuration. 2. IP Configuration. SGE2010/SGE2010P Administration Guide 26 Network Configuration (see page 34) 4. From the System...the VLAN ID. 3. From the Switch Main Menu, select 1. Select Execute. 5. IPv6 Address Configuration (see page 34) 5. IP Configuration The IP Configuration menu provides access to the ...Action list. 4. When the Operation complete message appears, press the Esc key to move the cursor to screens where you can manage...
...cursor to the previous menu.) To open this screen: 1. System Configuration. 2. IP Configuration. SGE2010/SGE2010P Administration Guide 26 Network Configuration (see page 34) 4. From the System...the VLAN ID. 3. From the Switch Main Menu, select 1. Select Execute. 5. IPv6 Address Configuration (see page 34) 5. IP Configuration The IP Configuration menu provides access to the ...Action list. 4. When the Operation complete message appears, press the Esc key to move the cursor to screens where you can manage...

Administration Guide
Page 30
DHCP Renew (see page 27) 2. From the IP Configuration menu, select 1. IP Configuration. 3. IPv4 Address Configuration. IP Configuration. 3. From the Switch Main Menu, select 1. From the IP Configuration menu, select 1. System Configuration. 2. From the System Configuration Menu, ...Switch Main Menu, select 1. To open this screen: 1. IPv4 Address Settings You can use this screen: 1. IPv4 Address Settings (see page 28) 0.Back (Select to return to the previous menu.) To open this screen to the IPv4 address settings and DHCP renew. 1. System Configuration. 2. SGE2010...
DHCP Renew (see page 27) 2. From the IP Configuration menu, select 1. IP Configuration. 3. IPv4 Address Configuration. IP Configuration. 3. From the Switch Main Menu, select 1. From the IP Configuration menu, select 1. System Configuration. 2. From the System Configuration Menu, ...Switch Main Menu, select 1. To open this screen: 1. IPv4 Address Settings You can use this screen: 1. IPv4 Address Settings (see page 28) 0.Back (Select to return to the previous menu.) To open this screen to the IPv4 address settings and DHCP renew. 1. System Configuration. 2. SGE2010...
Administration Guide
Page 31
... Configuration menu, select 2. The Operation Complete message appears. SGE2010/SGE2010P Administration Guide 28 Press the Tab key to move the cursor to the next. DHCP Renew You can manage the settings for IPv6 and ISATAP. IP Configuration. 3. NOTE: To enable or disable the DHCP ... screens where you can select this option to the Action list. To edit the IPv4 address settings: 1. From the Switch Main Menu, select 1. From the IP Configuration menu, select 1. System Configuration. 2. IPv4 Address Configuration. 4. From the IPv4 Address Configuration menu, select 1. ...
... Configuration menu, select 2. The Operation Complete message appears. SGE2010/SGE2010P Administration Guide 28 Press the Tab key to move the cursor to the next. DHCP Renew You can manage the settings for IPv6 and ISATAP. IP Configuration. 3. NOTE: To enable or disable the DHCP ... screens where you can select this option to the Action list. To edit the IPv4 address settings: 1. From the Switch Main Menu, select 1. From the IP Configuration menu, select 1. System Configuration. 2. IPv4 Address Configuration. 4. From the IPv4 Address Configuration menu, select 1. ...

Administration Guide
Page 32
... Configuration. 2. To open this screen: 1. Press the Esc key to move the cursor to acknowledge the warning. 2. SGE2010/SGE2010P Administration Guide 29 IPv6 ISATAP Interface Show (see page 29) 2. From the Switch Main Menu, select 1. IP Configuration. 3. IPv6 Interface Enable You can use the IPv6 Interface Enable screen to toggle between ENABLE and...
... Configuration. 2. To open this screen: 1. Press the Esc key to move the cursor to acknowledge the warning. 2. SGE2010/SGE2010P Administration Guide 29 IPv6 ISATAP Interface Show (see page 29) 2. From the Switch Main Menu, select 1. IP Configuration. 3. IPv6 Interface Enable You can use the IPv6 Interface Enable screen to toggle between ENABLE and...

Administration Guide
Page 33
...edit the IPv6 address settings. SGE2010/SGE2010P Administration Guide 30 IPv6 Address Settings You can use the IPv6 Address - From the System Configuration Menu, select 6. IP Configuration. 3. Configuration screen to the Action list. 3. IPv6 Address Configuration. 4. From the Switch Main Menu, select 1. ...When the Operation complete message appears, press the Esc key to move the cursor to the field, and then press the Space Bar to the Action list. 5. From the IP Configuration menu, select 2. NOTE:...
...edit the IPv6 address settings. SGE2010/SGE2010P Administration Guide 30 IPv6 Address Settings You can use the IPv6 Address - From the System Configuration Menu, select 6. IP Configuration. 3. Configuration screen to the Action list. 3. IPv6 Address Configuration. 4. From the Switch Main Menu, select 1. ...When the Operation complete message appears, press the Esc key to move the cursor to the field, and then press the Space Bar to the Action list. 5. From the IP Configuration menu, select 2. NOTE:...

Administration Guide
Page 34
... menu, select 2. From the IPv6 Address Configuration menu, select 3. From the Switch Main Menu, select 1. System Configuration. 2. From the System Configuration Menu, select 6. From the IP Configuration menu, select 2. SGE2010/SGE2010P Administration Guide 31 From the Switch Main Menu, select 1. System Configuration. 2. To open this screen: 1. IPv6 ISATAP Enable You can use the IPv6...
... menu, select 2. From the IPv6 Address Configuration menu, select 3. From the Switch Main Menu, select 1. System Configuration. 2. From the System Configuration Menu, select 6. From the IP Configuration menu, select 2. SGE2010/SGE2010P Administration Guide 31 From the Switch Main Menu, select 1. System Configuration. 2. To open this screen: 1. IPv6 ISATAP Enable You can use the IPv6...

Administration Guide
Page 35
...move the cursor to the next. Press the Esc key to move the cursor from one field to the Action list. 3. IP Configuration. 3. When the Operation complete message appears, press the Esc key to move the cursor to the Status field, and then ... interface type and address. ISATAP Interface Show. System Configuration. 2. From the IP Configuration menu, select 2. To open this screen: 1. From the Switch Main Menu, select 1. From the System Configuration Menu, select 6. SGE2010/SGE2010P Administration Guide 32 IPv6 ISATAP Interface Show You can use the ISATAP Interface...
...move the cursor to the next. Press the Esc key to move the cursor from one field to the Action list. 3. IP Configuration. 3. When the Operation complete message appears, press the Esc key to move the cursor to the Status field, and then ... interface type and address. ISATAP Interface Show. System Configuration. 2. From the IP Configuration menu, select 2. To open this screen: 1. From the Switch Main Menu, select 1. From the System Configuration Menu, select 6. SGE2010/SGE2010P Administration Guide 32 IPv6 ISATAP Interface Show You can use the ISATAP Interface...

Administration Guide
Page 36
...message appears, press the Esc key to move the cursor to the next. System Configuration. 2. IP Configuration. 3. IPv6 Address Configuration. 4. Using the Console System Configuration IPv6 Default Gateway You can ...IPv6 Default Gateway screen to the Action list. To open this screen: 1. From the Switch Main Menu, select 1. Press the Esc key to move the cursor to view or ...Bar to save your settings 4. Select Execute to toggle between ENABLE and DISABLE. 2. From the IP Configuration menu, select 2. From the System Configuration Menu, select 6. IPv6 Default Gateway. NOTE: ...
...message appears, press the Esc key to move the cursor to the next. System Configuration. 2. IP Configuration. 3. IPv6 Address Configuration. 4. Using the Console System Configuration IPv6 Default Gateway You can ...IPv6 Default Gateway screen to the Action list. To open this screen: 1. From the Switch Main Menu, select 1. Press the Esc key to move the cursor to view or ...Bar to save your settings 4. Select Execute to toggle between ENABLE and DISABLE. 2. From the IP Configuration menu, select 2. From the System Configuration Menu, select 6. IPv6 Default Gateway. NOTE: ...

Administration Guide
Page 37
... enable or disable the HTTPS server and configure the port on which the session is enabled. From the Switch Main Menu, select 1. HTTPS Configuration Use the HTTPS Configuration screen to save your changes. 2. SGE2010/SGE2010P Administration Guide 34 To change the HTTP settings: 1. From the System Configuration Menu, select 6. When the Operation..., and then make your changes. 4. You can enable or disable the HTTP server and configure the port on which the session is enabled. From the IP Configuration menu, select...
... enable or disable the HTTPS server and configure the port on which the session is enabled. From the Switch Main Menu, select 1. HTTPS Configuration Use the HTTPS Configuration screen to save your changes. 2. SGE2010/SGE2010P Administration Guide 34 To change the HTTP settings: 1. From the System Configuration Menu, select 6. When the Operation..., and then make your changes. 4. You can enable or disable the HTTP server and configure the port on which the session is enabled. From the IP Configuration menu, select...

Administration Guide
Page 38
... traceroute tests for IPv4 and IPv6 addresses. 1. From the Switch Main Menu, select 1. From the System Configuration Menu, select 6. From the IP Configuration menu, select 5. From the IP Configuration menu, select 4. Network Configuration The Network Configuration screen provides...previous menu.) To open the screen: 1. SGE2010/SGE2010P Administration Guide 35 System Configuration. 2. Select Edit, and then make your changes. 4. Ping IPv4 (see page 37) 3. IP Configuration. 3. Network Configuration. System Configuration. 2. From the Switch Main Menu, select 1. From the System...
... traceroute tests for IPv4 and IPv6 addresses. 1. From the Switch Main Menu, select 1. From the System Configuration Menu, select 6. From the IP Configuration menu, select 5. From the IP Configuration menu, select 4. Network Configuration The Network Configuration screen provides...previous menu.) To open the screen: 1. SGE2010/SGE2010P Administration Guide 35 System Configuration. 2. Select Edit, and then make your changes. 4. Ping IPv4 (see page 37) 3. IP Configuration. 3. Network Configuration. System Configuration. 2. From the Switch Main Menu, select 1. From the System...

Administration Guide
Page 39
... From the System Configuration Menu, select 6. IPv4 Ping. Select Edit, and then enter the IP address. 2. Press the Esc key to move the cursor to the Action list. 3. SGE2010/SGE2010P Administration Guide 36 Select Save to ping an IPv4 address. Ping IPv4 You can use the... Ping IPv4 screen to save your changes. 4. IP Configuration. 3. To change the IP address: 1. Using the Console System Configuration To open the screen: 1. From the Switch Main Menu, ...
... From the System Configuration Menu, select 6. IPv4 Ping. Select Edit, and then enter the IP address. 2. Press the Esc key to move the cursor to the Action list. 3. SGE2010/SGE2010P Administration Guide 36 Select Save to ping an IPv4 address. Ping IPv4 You can use the... Ping IPv4 screen to save your changes. 4. IP Configuration. 3. To change the IP address: 1. Using the Console System Configuration To open the screen: 1. From the Switch Main Menu, ...

Administration Guide
Page 40
...cursor to begin the ping test: 1. Select Execute to the Action list. Network Configuration. 4. IP Configuration. 3. From the Network Configuration menu, select 2. IPv6 Ping. To change the IP address: 1. When the Operation complete message appears, press the Esc key to move the cursor ... to save your changes. 4. Using the Console System Configuration To open the screen: 1. From the Switch Main Menu, select 1. From the System Configuration Menu, select 6. From the IP Configuration menu, select 5. Select Edit, and then enter the IPv6 address. 2. Press the Esc key...
...cursor to begin the ping test: 1. Select Execute to the Action list. Network Configuration. 4. IP Configuration. 3. From the Network Configuration menu, select 2. IPv6 Ping. To change the IP address: 1. When the Operation complete message appears, press the Esc key to move the cursor ... to save your changes. 4. Using the Console System Configuration To open the screen: 1. From the Switch Main Menu, select 1. From the System Configuration Menu, select 6. From the IP Configuration menu, select 5. Select Edit, and then enter the IPv6 address. 2. Press the Esc key...

Administration Guide
Page 41
Network Configuration. 4. After the test is complete, the results of the test appear on the screen. 3. IP Configuration. 3. Trace Router IPv4. From the System Configuration Menu, select 6. When the Operation complete message appears, press the Esc key to move...the cursor to the Action list. System Configuration. 2. Press the Esc key to move the cursor to the Action list. SGE2010/SGE2010P Administration Guide 38 To change the IP address: 1. From the Switch Main Menu, select 1. Select Edit, and then enter the IPv4 address. 2. To begin the test. 2. Select Execute to...
Network Configuration. 4. After the test is complete, the results of the test appear on the screen. 3. IP Configuration. 3. Trace Router IPv4. From the System Configuration Menu, select 6. When the Operation complete message appears, press the Esc key to move...the cursor to the Action list. System Configuration. 2. Press the Esc key to move the cursor to the Action list. SGE2010/SGE2010P Administration Guide 38 To change the IP address: 1. From the Switch Main Menu, select 1. Select Edit, and then enter the IPv4 address. 2. To begin the test. 2. Select Execute to...

Administration Guide
Page 42
From the System Configuration Menu, select 6. SGE2010/SGE2010P Administration Guide 39 From the Switch Main Menu, select 1. System Configuration. 2. IP Configuration. 3. From the IP Configuration menu, select 5. Trace Router IPv6. To change the IP address: 1. Using the Console System Configuration TraceRoute IPv6 You can use the TraceRoute IPv6 screen to the Action list. Network Configuration. 4. From...
From the System Configuration Menu, select 6. SGE2010/SGE2010P Administration Guide 39 From the Switch Main Menu, select 1. System Configuration. 2. IP Configuration. 3. From the IP Configuration menu, select 5. Trace Router IPv6. To change the IP address: 1. Using the Console System Configuration TraceRoute IPv6 You can use the TraceRoute IPv6 screen to the Action list. Network Configuration. 4. From...

