
User Guide
Page 2
..., Regents of the University of Cisco Systems, Inc. User Guide for Class A or Class B digital devices. These specifications are registered trademarks of California. All rights reserved. THE SPECIFICATIONS AND INFORMATION REGARDING THE PRODUCTS IN THIS MANUAL ARE SUBJECT TO CHANGE WITHOUT NOTICE. THE SOFTWARE LICENSE AND LIMITED WARRANTY FOR THE ACCOMPANYING PRODUCT ARE SET FORTH IN THE INFORMATION PACKET THAT...
..., Regents of the University of Cisco Systems, Inc. User Guide for Class A or Class B digital devices. These specifications are registered trademarks of California. All rights reserved. THE SPECIFICATIONS AND INFORMATION REGARDING THE PRODUCTS IN THIS MANUAL ARE SUBJECT TO CHANGE WITHOUT NOTICE. THE SOFTWARE LICENSE AND LIMITED WARRANTY FOR THE ACCOMPANYING PRODUCT ARE SET FORTH IN THE INFORMATION PACKET THAT...
User Guide
Page 4
... Audio Amplifier 3-2 Connecting to a Digital A/V Source (HDMI) 3-2 Connecting to a Digital A/V Source (DVI to Know Your Cisco LCD Professional Series Display 2-2 About Controls and Sensors on the Front of Your LCD Display 2-3 About Terminals on the Back of Your Display 2-4 Using the Kensington Slot 2-5 About the Remote Control 2-6 Locking Front Panel Controls and the Remote Control 2-7 Mechanical Layout - Contents 2 C H A P T E R The Basics 2-1 Package Contents 2-1 Getting to HDMI) 3-3 4 C H A P T E R Adjusting Display Settings 4-1 Opening and Closing the Main Menu 4-1 Using the Input...
... Audio Amplifier 3-2 Connecting to a Digital A/V Source (HDMI) 3-2 Connecting to a Digital A/V Source (DVI to Know Your Cisco LCD Professional Series Display 2-2 About Controls and Sensors on the Front of Your LCD Display 2-3 About Terminals on the Back of Your Display 2-4 Using the Kensington Slot 2-5 About the Remote Control 2-6 Locking Front Panel Controls and the Remote Control 2-7 Mechanical Layout - Contents 2 C H A P T E R The Basics 2-1 Package Contents 2-1 Getting to HDMI) 3-3 4 C H A P T E R Adjusting Display Settings 4-1 Opening and Closing the Main Menu 4-1 Using the Input...
User Guide
Page 5
... Position of One LCD Display in a Video Wall from the Screen Divider Menu 4-19 Preventing Video Wall Afterimage Burn-in from the Safety Screen Menu 4-19 Setting the Delay Interval from the Power On Adjustment Menu 4-21 Adjusting Brightness Intensity for Gray Backgrounds from the Side Gray Menu 4-21 Restore Factory Default Color Settings from the Reset Menu 4-21 Adjusting Inverter Lamp Power Consumption Settings from the Lamp Control Menu 4-22 Working in the S/N Menu 4-22 OL-17986-01 User Guide for Cisco LCD Professional Series Displays...
... Position of One LCD Display in a Video Wall from the Screen Divider Menu 4-19 Preventing Video Wall Afterimage Burn-in from the Safety Screen Menu 4-19 Setting the Delay Interval from the Power On Adjustment Menu 4-21 Adjusting Brightness Intensity for Gray Backgrounds from the Side Gray Menu 4-21 Restore Factory Default Color Settings from the Reset Menu 4-21 Adjusting Inverter Lamp Power Consumption Settings from the Lamp Control Menu 4-22 Working in the S/N Menu 4-22 OL-17986-01 User Guide for Cisco LCD Professional Series Displays...
User Guide
Page 8
... their capacity. • Never disconnect the power cord while using your LCD display and never remove its cover or its polarized plug to it is preventable otherwise. It is left unattended or unused for Cisco LCD Professional Series Displays 1-2 OL-17986-01 Refer all servicing to follow these guidelines: Always... If it is damaged, disconnect the power cord and contact a qualified and licensed technician. •...
... their capacity. • Never disconnect the power cord while using your LCD display and never remove its cover or its polarized plug to it is preventable otherwise. It is left unattended or unused for Cisco LCD Professional Series Displays 1-2 OL-17986-01 Refer all servicing to follow these guidelines: Always... If it is damaged, disconnect the power cord and contact a qualified and licensed technician. •...

User Guide
Page 10
Contact Cisco or a Cisco-authorized Digital Media Systems partner before using any physical location where it will be exposed to heavy dust, high or low temperatures, high humidity, or chemical substances, or anywhere that it with LCD panel cleanser or use the specified cloth only. In particular, avoid using it. User Guide for a display like yours. • Some installation sites have attributes that...
Contact Cisco or a Cisco-authorized Digital Media Systems partner before using any physical location where it will be exposed to heavy dust, high or low temperatures, high humidity, or chemical substances, or anywhere that it with LCD panel cleanser or use the specified cloth only. In particular, avoid using it. User Guide for a display like yours. • Some installation sites have attributes that...
User Guide
Page 18
... the separation between the equipment. • Connect the equipment into an outlet on , the user is encouraged to try to other devices in doubt, consult the technical services department or your local representative. 1-12 User Guide for help. These limits are connected. • Consult the manufacturer or field service technician for Cisco LCD Professional Series Displays OL-17986-01 If in the...
... the separation between the equipment. • Connect the equipment into an outlet on , the user is encouraged to try to other devices in doubt, consult the technical services department or your local representative. 1-12 User Guide for help. These limits are connected. • Consult the manufacturer or field service technician for Cisco LCD Professional Series Displays OL-17986-01 If in the...

User Guide
Page 23
... a setting. 5 Source button - Note For energy conservation, turn your LCD display off . To learn more about saving power, see PowerSaver. 4 Enter button - Moves from one calibration menu by blinking green. Opens the on the Front of Your LCD Display Figure 2-1 Front-40" 1 Menu button - When you should aim the remote control. OL-17986-01 User Guide for long periods. Moves from among all external devices that you changed in the calibration menu or saves which input signal to use...
... a setting. 5 Source button - Note For energy conservation, turn your LCD display off . To learn more about saving power, see PowerSaver. 4 Enter button - Moves from one calibration menu by blinking green. Opens the on the Front of Your LCD Display Figure 2-1 Front-40" 1 Menu button - When you should aim the remote control. OL-17986-01 User Guide for long periods. Moves from among all external devices that you changed in the calibration menu or saves which input signal to use...
User Guide
Page 27
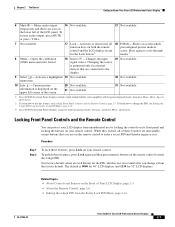
... you change the PIN, see Editing the 4-digit PIN from unauthorized use this feature, see Locking Front Panel Controls and the Remote Control, page 2-7. Opens the calibration (OSD) menu and exits from it from the Safety Lock PIN Menu, page 4-14 OL-17986-01 User Guide for the Lock button.2 active. Cisco LCD Professional Series displays include a built-in high fidelity stereo amplifier with four picture modes: Dynamic, Standard, Movie, and Custom. To unlock these...
... you change the PIN, see Editing the 4-digit PIN from unauthorized use this feature, see Locking Front Panel Controls and the Remote Control, page 2-7. Opens the calibration (OSD) menu and exits from it from the Safety Lock PIN Menu, page 4-14 OL-17986-01 User Guide for the Lock button.2 active. Cisco LCD Professional Series displays include a built-in high fidelity stereo amplifier with four picture modes: Dynamic, Standard, Movie, and Custom. To unlock these...
User Guide
Page 38
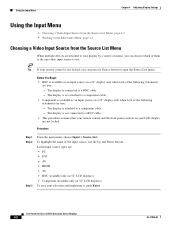
... panel controls on 52" LCD displays) To save your LCD display are not locked. Listed input source types are: • PC • DVI • AV • HDMI • TV • BNC (available only on 52" LCD displays) • Component (available only on your selection and implement it, push Enter. Tip If your remote control is not locked, you can press its Source button to open the Source List menu. Using the Input Menu Chapter 4 Adjusting Display Settings Using the Input Menu • Choosing a Video Input Source...
... panel controls on 52" LCD displays) To save your LCD display are not locked. Listed input source types are: • PC • DVI • AV • HDMI • TV • BNC (available only on 52" LCD displays) • Component (available only on your selection and implement it, push Enter. Tip If your remote control is not locked, you can press its Source button to open the Source List menu. Using the Input Menu Chapter 4 Adjusting Display Settings Using the Input Menu • Choosing a Video Input Source...

User Guide
Page 39
... or a Zoom Level from the Size Menu, page 4-7 • Turning Digital Noise Reduction On or Off from the Digital NR Menu, page 4-8 • Turning Film Mode On or Off from the Film Mode Menu, page 4-8 • Turning the Brightness Sensor On or Off from the Brightness Sensor Menu, page 4-9 OL-17986-01 User Guide for Cisco LCD Professional Series Displays 4-3 Related Topics • Locking Front Panel Controls and the Remote Control, page 2-7 • About Terminals...
... or a Zoom Level from the Size Menu, page 4-7 • Turning Digital Noise Reduction On or Off from the Digital NR Menu, page 4-8 • Turning Film Mode On or Off from the Film Mode Menu, page 4-8 • Turning the Brightness Sensor On or Off from the Brightness Sensor Menu, page 4-9 OL-17986-01 User Guide for Cisco LCD Professional Series Displays 4-3 Related Topics • Locking Front Panel Controls and the Remote Control, page 2-7 • About Terminals...

User Guide
Page 41
...; This feature is available only when Color Tone is turned off. • This feature is not available when Dynamic Contrast mode is disabled. Related Topics • Locking Front Panel Controls and the Remote Control, page 2-7 • Turning Automatic Contrast Optimation On or Off from the Dynamic Contrast Menu, page 4-6 Adjusting Picture Temperature Settings from the Dynamic Contrast Menu, page 4-6 OL-17986-01 User Guide for Cisco LCD Professional Series Displays 4-5 To save your selections and implement them...
...; This feature is available only when Color Tone is turned off. • This feature is not available when Dynamic Contrast mode is disabled. Related Topics • Locking Front Panel Controls and the Remote Control, page 2-7 • Turning Automatic Contrast Optimation On or Off from the Dynamic Contrast Menu, page 4-6 Adjusting Picture Temperature Settings from the Dynamic Contrast Menu, page 4-6 OL-17986-01 User Guide for Cisco LCD Professional Series Displays 4-5 To save your selections and implement them...

User Guide
Page 44
... mode on or off . Push the Up or Down button to choose On or Off. Procedure Step 1 Step 2 Step 3 From the main menu, select Picture > Digital NR. To save your selection and implement it , push Enter. To save your selection and implement it , push Enter. Related Topics • Locking Front Panel Controls and the Remote Control, page 2-7 User Guide for Cisco LCD Professional Series Displays 4-8 OL-17986-01 Using...
... mode on or off . Push the Up or Down button to choose On or Off. Procedure Step 1 Step 2 Step 3 From the main menu, select Picture > Digital NR. To save your selection and implement it , push Enter. To save your selection and implement it , push Enter. Related Topics • Locking Front Panel Controls and the Remote Control, page 2-7 User Guide for Cisco LCD Professional Series Displays 4-8 OL-17986-01 Using...

User Guide
Page 45
... Cisco LCD Professional Series display uses a high-fidelity stereo amplifier, for which you can configure your LCD display are not locked. Procedure Step 1 Step 2 Step 3 From the main menu, select Picture > Brightness Sensor. Related Topics • Locking Front Panel Controls and the Remote Control, page 2-7 • About Controls and Sensors on the Front of programming. OL-17986-01 User Guide for Cisco LCD Professional Series Displays 4-9 Procedure Step 1 From the main menu, select Sound > Mode. To save...
... Cisco LCD Professional Series display uses a high-fidelity stereo amplifier, for which you can configure your LCD display are not locked. Procedure Step 1 Step 2 Step 3 From the main menu, select Picture > Brightness Sensor. Related Topics • Locking Front Panel Controls and the Remote Control, page 2-7 • About Controls and Sensors on the Front of programming. OL-17986-01 User Guide for Cisco LCD Professional Series Displays 4-9 Procedure Step 1 From the main menu, select Sound > Mode. To save...

User Guide
Page 48
... Down buttons. Related Topics • Locking Front Panel Controls and the Remote Control, page 2-7 4-12 User Guide for Cisco LCD Professional Series Displays OL-17986-01 Before You Begin This procedure assumes that your remote control and the front panel controls on your selections and implement them, push Enter. To save your LCD display are not locked. Using the Setup Menu Chapter 4 Adjusting Display Settings Using the Setup Menu • Choosing a Menu System Language from the Language Menu, page 4-12 • Adjusting Clock-based Settings from...
... Down buttons. Related Topics • Locking Front Panel Controls and the Remote Control, page 2-7 4-12 User Guide for Cisco LCD Professional Series Displays OL-17986-01 Before You Begin This procedure assumes that your remote control and the front panel controls on your selections and implement them, push Enter. To save your LCD display are not locked. Using the Setup Menu Chapter 4 Adjusting Display Settings Using the Setup Menu • Choosing a Menu System Language from the Language Menu, page 4-12 • Adjusting Clock-based Settings from...

User Guide
Page 49
... the main menu, choose Setup > Time. Adjust the current time setting. • Sleep Timer - Turns off the display after an interval in effect when your display turns on your remote control and the front panel controls on automatically. • Off Timer - To adjust the settings, use the Up and Down buttons. To save your display. To highlight the name of day that you define, and controls which image mode and audio volume are in...
... the main menu, choose Setup > Time. Adjust the current time setting. • Sleep Timer - Turns off the display after an interval in effect when your display turns on your remote control and the front panel controls on automatically. • Off Timer - To adjust the settings, use the Up and Down buttons. To save your display. To highlight the name of day that you define, and controls which image mode and audio volume are in...
User Guide
Page 50
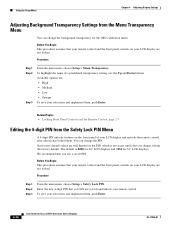
... remote control. Using the Setup Menu Chapter 4 Adjusting Display Settings Adjusting Background Transparency Settings from the Menu Transparency Menu You can change the PIN. Before You Begin This procedure assumes that you will use to lock and unlock your selections and implement them, push Enter. 4-14 User Guide for 52" LCD displays. Enter the new 4-digit PIN that your remote control and the front panel controls on your selections and implement them . Related Topics • Locking Front Panel Controls...
... remote control. Using the Setup Menu Chapter 4 Adjusting Display Settings Adjusting Background Transparency Settings from the Menu Transparency Menu You can change the PIN. Before You Begin This procedure assumes that you will use to lock and unlock your selections and implement them, push Enter. 4-14 User Guide for 52" LCD displays. Enter the new 4-digit PIN that your remote control and the front panel controls on your selections and implement them . Related Topics • Locking Front Panel Controls...

User Guide
Page 51
... Cisco LCD Professional Series Displays 4-15 You can save energy by adjusting how an LCD Professional Series display consumes power. Procedure Step 1 Step 2 Step 3 From the main menu, choose Setup > Energy Saving. To save your selections and implement them , push Enter. Before You Begin This procedure assumes that your remote control and the front panel controls on your LCD display are not locked. Procedure Step 1 Step 2 Step 3 From the main menu, choose Setup > HDMI Black...
... Cisco LCD Professional Series Displays 4-15 You can save energy by adjusting how an LCD Professional Series display consumes power. Procedure Step 1 Step 2 Step 3 From the main menu, choose Setup > Energy Saving. To save your selections and implement them , push Enter. Before You Begin This procedure assumes that your remote control and the front panel controls on your LCD display are not locked. Procedure Step 1 Step 2 Step 3 From the main menu, choose Setup > HDMI Black...

User Guide
Page 56
Configurable values for Cisco LCD Professional Series Displays OL-17986-01 Vertical Line - Prevents burn-in by which horizontal pixel shift should occur, in the range from 1 to 4 pixels. - To turn the highlighted method On or Off, use the Up and Down buttons. Counts the number of pixels by moving long, black and white, vertical lines. • Eraser - Sets the interval between pixel shifts, as counted in the range from 0 to...
Configurable values for Cisco LCD Professional Series Displays OL-17986-01 Vertical Line - Prevents burn-in by which horizontal pixel shift should occur, in the range from 1 to 4 pixels. - To turn the highlighted method On or Off, use the Up and Down buttons. Counts the number of pixels by moving long, black and white, vertical lines. • Eraser - Sets the interval between pixel shifts, as counted in the range from 0 to...

User Guide
Page 57
... the main menu, choose Setup > Power On Adjustment. Before You Begin This procedure assumes that your remote control and the front panel controls on . To highlight the brightness level that can damage your LCD display are not locked. Related Topics • Locking Front Panel Controls and the Remote Control, page 2-7 Restore Factory Default Color Settings from the Reset Menu Reverts display color settings to prevent overvoltage that you prefer (Off, Light, or Dark), use the Up and Down buttons.
... the main menu, choose Setup > Power On Adjustment. Before You Begin This procedure assumes that your remote control and the front panel controls on . To highlight the brightness level that can damage your LCD display are not locked. Related Topics • Locking Front Panel Controls and the Remote Control, page 2-7 Restore Factory Default Color Settings from the Reset Menu Reverts display color settings to prevent overvoltage that you prefer (Off, Light, or Dark), use the Up and Down buttons.
User Guide
Page 58
... supported. 4-22 User Guide for Cisco LCD Professional Series Displays OL-17986-01 To adjust the setting, push the Left or Right button. Using the Setup Menu Chapter 4 Adjusting Display Settings Before You Begin • This feature is turned on. • This procedure assumes that your remote control and the front panel controls on your selections and implement them , push Enter. Procedure Step 1 Step 2 Step 3 From the main menu, choose Setup > Reset > Color Reset. To save your LCD display...
... supported. 4-22 User Guide for Cisco LCD Professional Series Displays OL-17986-01 To adjust the setting, push the Left or Right button. Using the Setup Menu Chapter 4 Adjusting Display Settings Before You Begin • This feature is turned on. • This procedure assumes that your remote control and the front panel controls on your selections and implement them , push Enter. Procedure Step 1 Step 2 Step 3 From the main menu, choose Setup > Reset > Color Reset. To save your LCD display...
