
Hardware Installation Guide
Page 4
... Access Points 2-4 Deploying the Access Points on the Wireless Network 2-5 Access Point Layout and Connectors 2-6 Mounting Overview 2-7 Mounting on a Horizontal or Vertical Surface 2-9 Mounting Below a Suspended Ceiling 2-10 Mounting Above a Suspended Ceiling 2-11 Mounting Access Point on a Desktop or Shelf 2-14 Cable Security Bracket 2-14 Removing the Cable Security Bracket 2-15 Attaching the Access Point to the Mounting Plate 2-16 Securing the Access Point 2-17 Using a Security Cable 2-17 Securing the Access Point...
... Access Points 2-4 Deploying the Access Points on the Wireless Network 2-5 Access Point Layout and Connectors 2-6 Mounting Overview 2-7 Mounting on a Horizontal or Vertical Surface 2-9 Mounting Below a Suspended Ceiling 2-10 Mounting Above a Suspended Ceiling 2-11 Mounting Access Point on a Desktop or Shelf 2-14 Cable Security Bracket 2-14 Removing the Cable Security Bracket 2-15 Attaching the Access Point to the Mounting Plate 2-16 Securing the Access Point 2-17 Using a Security Cable 2-17 Securing the Access Point...

Hardware Installation Guide
Page 22
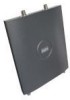
... in three common wireless network configurations. Cisco Aironet 1240AG Series Access Point Hardware Installation Guide 1-8 OL-8371-05 The cable security bracket is as a root unit connected to a ceiling or wall. Figure 1-5 Access Point with Mounting Plate and Cable Security Bracket 135496 2.4 GHz LEFT STATUS ETHERRANDEIOT 1 ETHERNET 48VDC 2.4 GHz RIGHT / PRIMARY 2 3 1 Mounting plate 2 Cable security bracket 3 Access point Network Examples with Autonomous Access Points Chapter 1 Overview...
... in three common wireless network configurations. Cisco Aironet 1240AG Series Access Point Hardware Installation Guide 1-8 OL-8371-05 The cable security bracket is as a root unit connected to a ceiling or wall. Figure 1-5 Access Point with Mounting Plate and Cable Security Bracket 135496 2.4 GHz LEFT STATUS ETHERRANDEIOT 1 ETHERNET 48VDC 2.4 GHz RIGHT / PRIMARY 2 3 1 Mounting plate 2 Cable security bracket 3 Access point Network Examples with Autonomous Access Points Chapter 1 Overview...
Hardware Installation Guide
Page 29
..., page 2-11 • Mounting Access Point on a Desktop or Shelf, page 2-14 • Cable Security Bracket, page 2-14 • Attaching the Access Point to the Mounting Plate, page 2-16 • Securing the Access Point, page 2-17 • Connecting the Ethernet and Power Cables, page 2-20 • Powering Up the Access Point, page 2-22 OL-8371-05 Cisco Aironet 1240AG Series Access Point Hardware Installation Guide 2-1
..., page 2-11 • Mounting Access Point on a Desktop or Shelf, page 2-14 • Cable Security Bracket, page 2-14 • Attaching the Access Point to the Mounting Plate, page 2-16 • Securing the Access Point, page 2-17 • Connecting the Ethernet and Power Cables, page 2-20 • Powering Up the Access Point, page 2-22 OL-8371-05 Cisco Aironet 1240AG Series Access Point Hardware Installation Guide 2-1

Hardware Installation Guide
Page 31
Check each item for ground stud on mounting bracket) - Package Contents Each access point package contains the following items: • Cisco Aironet 1240AG Series Access Point or Cisco Aironet 1240AG Series Lightweight Access Point • Cisco Aironet 1240AG Series Power Module (universal power module)-optional • Mounting hardware kit - pan head Phillips machine screws - Ensure that all items listed in the "Package Contents" section are included...
Check each item for ground stud on mounting bracket) - Package Contents Each access point package contains the following items: • Cisco Aironet 1240AG Series Access Point or Cisco Aironet 1240AG Series Lightweight Access Point • Cisco Aironet 1240AG Series Power Module (universal power module)-optional • Mounting hardware kit - pan head Phillips machine screws - Ensure that all items listed in the "Package Contents" section are included...

Hardware Installation Guide
Page 37
Otherwise, go to the mounting plate. OL-8371-05 Cisco Aironet 1240AG Series Access Point Hardware Installation Guide 2-9 Step 1 Use the mounting plate as a template to mark the locations of the following sized holes at the locations you marked: •...mount the plate with the security hasp slot on a horizontal or vertical surface. Step 5 Attach the access point to Step 4. Step 2 Step 3 Step 4 Drill one of the four mounting holes. Note For a more secure installation you are using the #8 fasteners. Note When mounting on a vertical surface, position the cable security bracket...
Otherwise, go to the mounting plate. OL-8371-05 Cisco Aironet 1240AG Series Access Point Hardware Installation Guide 2-9 Step 1 Use the mounting plate as a template to mark the locations of the following sized holes at the locations you marked: •...mount the plate with the security hasp slot on a horizontal or vertical surface. Step 5 Attach the access point to Step 4. Step 2 Step 3 Step 4 Drill one of the four mounting holes. Note For a more secure installation you are using the #8 fasteners. Note When mounting on a vertical surface, position the cable security bracket...

Hardware Installation Guide
Page 39
.... OL-8371-05 Cisco Aironet 1240AG Series Access Point Hardware Installation Guide 2-11 Use a standard screwdriver to tighten the T-rail clip studs in the mounting plate. Attach the mounting plate to the T-...bracket mounting clip (not supplied) such as the Erico 512A and BHC, you need to modify a thicker tile to allow room for additional information. Use a wrench or pliers to the suspended ceiling T-rail. Chapter 2 Installing the Access Point Mounting Above a Suspended Ceiling Follow these steps to mount your access point on page 2-16. To attach the access point to the mounting...
.... OL-8371-05 Cisco Aironet 1240AG Series Access Point Hardware Installation Guide 2-11 Use a standard screwdriver to tighten the T-rail clip studs in the mounting plate. Attach the mounting plate to the T-...bracket mounting clip (not supplied) such as the Erico 512A and BHC, you need to modify a thicker tile to allow room for additional information. Use a wrench or pliers to the suspended ceiling T-rail. Chapter 2 Installing the Access Point Mounting Above a Suspended Ceiling Follow these steps to mount your access point on page 2-16. To attach the access point to the mounting...

Hardware Installation Guide
Page 40
... Ceiling Parts 4 3 5 Chapter 2 Installing the Access Point 2.4 GHz RIGHT / PRIMARY 2.4 GHz LEFT 48VDC STATUS ETHERRANDIETO CONSOLE MODE ETHERNET 2 1 3 2 1 135583 1 Suspended ceiling T-rail 2 T-rail clip 3 Height adjustment screw 4 T-bar box hanger 5 Bracket mounting clip Caution Only the fiber-optic power injector (AIR... building's environmental air space, such as above suspended ceilings. 2-12 Cisco Aironet 1240AG Series Access Point Hardware Installation Guide OL-8371-05 Mounting Above a Suspended Ceiling It may be placed in a building's environmental air space;
... Ceiling Parts 4 3 5 Chapter 2 Installing the Access Point 2.4 GHz RIGHT / PRIMARY 2.4 GHz LEFT 48VDC STATUS ETHERRANDIETO CONSOLE MODE ETHERNET 2 1 3 2 1 135583 1 Suspended ceiling T-rail 2 T-rail clip 3 Height adjustment screw 4 T-bar box hanger 5 Bracket mounting clip Caution Only the fiber-optic power injector (AIR... building's environmental air space, such as above suspended ceilings. 2-12 Cisco Aironet 1240AG Series Access Point Hardware Installation Guide OL-8371-05 Mounting Above a Suspended Ceiling It may be placed in a building's environmental air space;

Hardware Installation Guide
Page 41
... 2-7 Access Point Mounting Plate 135498 OL-8371-05 Note The illustration shows the access point mounting plate mounted perpendicular to mount the access point above a suspended ceiling. Cisco Aironet 1240AG Series Access Point Hardware Installation Guide 2-13 Figure 2-6 Mounting Plate Holes 1 Bracket mounting clip holes Follow these steps to the T-bar box hanger. You can also mount the bracket parallel to the access point mounting plate (see Figure 2-6). Step 1 Step 2 Insert the bracket mounting...
... 2-7 Access Point Mounting Plate 135498 OL-8371-05 Note The illustration shows the access point mounting plate mounted perpendicular to mount the access point above a suspended ceiling. Cisco Aironet 1240AG Series Access Point Hardware Installation Guide 2-13 Figure 2-6 Mounting Plate Holes 1 Bracket mounting clip holes Follow these steps to the T-bar box hanger. You can also mount the bracket parallel to the access point mounting plate (see Figure 2-6). Step 1 Step 2 Insert the bracket mounting...

Hardware Installation Guide
Page 42
... access point mounting plate has an attached cable security bracket that covers the console port, Ethernet port, power port, and the mode button to comply with four rubber pads that they are securely attached to help prevent sliding or scratching the surface of the T-bar box hanger to a ceiling or wall. 2-14 Cisco Aironet 1240AG Series Access Point...
... access point mounting plate has an attached cable security bracket that covers the console port, Ethernet port, power port, and the mode button to comply with four rubber pads that they are securely attached to help prevent sliding or scratching the surface of the T-bar box hanger to a ceiling or wall. 2-14 Cisco Aironet 1240AG Series Access Point...

Hardware Installation Guide
Page 43
... help prevent someone from using the Mode button to reset the access point to default values or from using the serial console cable to access the access point's CLI interface or from removing the Ethernet cable. Figure 2-9 Cable Security Bracket Screws 1 Cable security bracket 2 Cable security bracket screws 3 Mounting plate OL-8371-05 Cisco Aironet 1240AG Series Access Point Hardware Installation Guide 2-15
... help prevent someone from using the Mode button to reset the access point to default values or from using the serial console cable to access the access point's CLI interface or from removing the Ethernet cable. Figure 2-9 Cable Security Bracket Screws 1 Cable security bracket 2 Cable security bracket screws 3 Mounting plate OL-8371-05 Cisco Aironet 1240AG Series Access Point Hardware Installation Guide 2-15

Hardware Installation Guide
Page 44
... and reconnect only a single power source. Attaching the Access Point to the Mounting Plate Chapter 2 Installing the Access Point To remove the cable security bracket from the mounting plate, follow these instructions: Step 1 Position the mounting plate with blue dots or labels to the access point's 5-GHz antenna connectors. 2-16 Cisco Aironet 1240AG Series Access Point Hardware Installation Guide OL-8371-05 Step 2 Remove...
... and reconnect only a single power source. Attaching the Access Point to the Mounting Plate Chapter 2 Installing the Access Point To remove the cable security bracket from the mounting plate, follow these instructions: Step 1 Position the mounting plate with blue dots or labels to the access point's 5-GHz antenna connectors. 2-16 Cisco Aironet 1240AG Series Access Point Hardware Installation Guide OL-8371-05 Step 2 Remove...

Hardware Installation Guide
Page 45
... the security cable lock. If your access point: • Using a security cable • Securing the access point to the mounting plate Using a Security Cable You can be used with any of the mounting methods described in -line power, do not connect the power module to the access point. OL-8371-05 Cisco Aironet 1240AG Series Access Point Hardware Installation Guide 2-17 b. Step...
... the security cable lock. If your access point: • Using a security cable • Securing the access point to the mounting plate Using a Security Cable You can be used with any of the mounting methods described in -line power, do not connect the power module to the access point. OL-8371-05 Cisco Aironet 1240AG Series Access Point Hardware Installation Guide 2-17 b. Step...

Hardware Installation Guide
Page 47
OL-8371-05 Cisco Aironet 1240AG Series Access Point Hardware Installation Guide 2-19 Chapter 2 Installing the Access Point Securing the Access Point Step 3 Place your padlock (user supplied) through the padlock hole in the security hasp's padlock flange (see Figure 2-11). Note When attaching the mounting plate to a vertical surface, place the security cable bracket end of the mounting plate on the...
OL-8371-05 Cisco Aironet 1240AG Series Access Point Hardware Installation Guide 2-19 Chapter 2 Installing the Access Point Securing the Access Point Step 3 Place your padlock (user supplied) through the padlock hole in the security hasp's padlock flange (see Figure 2-11). Note When attaching the mounting plate to a vertical surface, place the security cable bracket end of the mounting plate on the...

Hardware Installation Guide
Page 101
...36 Mbps) 64-QAM (48 and 54 Mbps) OL-8371-05 Cisco Aironet 1240AG Series Access Point Hardware Installation Guide C-1 power connector (for 10BASE-T or 100BASE-T Ethernet connections; Table C-1 Access Point Specifications 802.11G Radio Specifications Category 802.11b 802.11g 802.11A ...45oC) without mounting bracket installed -4 to 131oF (-20 to 55oC) with mounting bracket installed Storage Temperature 1240AG series power module: 32 to 104oF (0 to 40oC) -40 to 185oF (-40 to 85oC) Humidity 10 to right) Left RP-TNC antenna connector; C A P P E N D I X Access Point Specifications Table...
...36 Mbps) 64-QAM (48 and 54 Mbps) OL-8371-05 Cisco Aironet 1240AG Series Access Point Hardware Installation Guide C-1 power connector (for 10BASE-T or 100BASE-T Ethernet connections; Table C-1 Access Point Specifications 802.11G Radio Specifications Category 802.11b 802.11g 802.11A ...45oC) without mounting bracket installed -4 to 131oF (-20 to 55oC) with mounting bracket installed Storage Temperature 1240AG series power module: 32 to 104oF (0 to 40oC) -40 to 185oF (-40 to 85oC) Humidity 10 to right) Left RP-TNC antenna connector; C A P P E N D I X Access Point Specifications Table...


