PD512 Owner Manual
Page 1
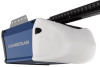
... Adjustments 28-30 Operation 31 Features 32 Door Control 33-34 Remote Control 34-35 To Erase the Memory 35 To Open the Door Manually 36 Maintenance 37 Troubleshooting 38-39 Accessories 40 Warranty 41 Repair Parts 42-43 Write down the following information for future reference: Serial Number: .. Date of your garage door opener. ■ This garage door opener is compatible with sectional doors. 1/2 hp Chain Drive Garage Door Opener Models HD210C, LW2200C, PD510, and PD512 FOR RESIDENTIAL USE...
... Adjustments 28-30 Operation 31 Features 32 Door Control 33-34 Remote Control 34-35 To Erase the Memory 35 To Open the Door Manually 36 Maintenance 37 Troubleshooting 38-39 Accessories 40 Warranty 41 Repair Parts 42-43 Write down the following information for future reference: Serial Number: .. Date of your garage door opener. ■ This garage door opener is compatible with sectional doors. 1/2 hp Chain Drive Garage Door Opener Models HD210C, LW2200C, PD510, and PD512 FOR RESIDENTIAL USE...

PD512 Owner Manual
Page 2
... manual. To prevent damage to check for binding or sticking. Lift the door halfway up. The opener should stay in place, supported entirely by its springs. 3. Disable locks and remove any ropes connected to close without being in the line of sight of the door. Devices that allow unattended operation are to be installed above the center of the door is considered unattended close . Otherwise, the safety reversal...
... manual. To prevent damage to check for binding or sticking. Lift the door halfway up. The opener should stay in place, supported entirely by its springs. 3. Disable locks and remove any ropes connected to close without being in the line of sight of the door. Devices that allow unattended operation are to be installed above the center of the door is considered unattended close . Otherwise, the safety reversal...

PD512 Owner Manual
Page 3
n RAIL EXTENSION KIT Required if your garage area to the structural supports. n FASTENING HARDWARE Alternate floor mounting of the safety reversing sensor will need any of the following items: n (2) 2X4 PIECES OF WOOD May be used to fasten the header bracket to see if you will require hardware not provided. n DOOR REINFORCEMENT Required if you have a lightweight steel, aluminum, fiberglass or glass panel door. n EXTENSION BRACKETS (MODEL 041A5281...
n RAIL EXTENSION KIT Required if your garage area to the structural supports. n FASTENING HARDWARE Alternate floor mounting of the safety reversing sensor will need any of the following items: n (2) 2X4 PIECES OF WOOD May be used to fasten the header bracket to see if you will require hardware not provided. n DOOR REINFORCEMENT Required if you have a lightweight steel, aluminum, fiberglass or glass panel door. n EXTENSION BRACKETS (MODEL 041A5281...

PD512 Owner Manual
Page 4
... garage door opener. Pulley C. Push button (Model HD210C and LW2200C) or Multi-function control panel (Models PD510 and PD512) O. Depending on the garage door opener model purchased. A. Curved door arm E. G. Emergency release rope and handle H. Hanging brackets (2) (Packaged inside front rail section) F. Garage door opener (motor unit) K. "U" bracket M. The Protector System® Safety reversing sensors with screws L. Door bracket D. Chain spreader with 2 conductor white and white/black wire attached: Sending Sensor (1), Receiving Sensor (1), and Safety Sensor Brackets...
... garage door opener. Pulley C. Push button (Model HD210C and LW2200C) or Multi-function control panel (Models PD510 and PD512) O. Depending on the garage door opener model purchased. A. Curved door arm E. G. Emergency release rope and handle H. Hanging brackets (2) (Packaged inside front rail section) F. Garage door opener (motor unit) K. "U" bracket M. The Protector System® Safety reversing sensors with screws L. Door bracket D. Chain spreader with 2 conductor white and white/black wire attached: Sending Sensor (1), Receiving Sensor (1), and Safety Sensor Brackets...

PD512 Owner Manual
Page 7
... use of power tools may permanently damage the garage door opener. 6. DO NOT overtighten. 2. Remove the bolts from the top of the rail. 4. Attach chain spreader to garage door opener, use ONLY those bolts/fasteners mounted in the garage door opener) Bolt "U" Bracket 1/4"-20x1-3/4" Cover Protection Bolt Hole Lock Nut 1/4"-20 Chain Spreader 6 Assembly STEP 2 Fasten the rail to the motor unit To avoid SERIOUS damage to the motor unit with two screws. The use any power tools. Tighten securely...
... use of power tools may permanently damage the garage door opener. 6. DO NOT overtighten. 2. Remove the bolts from the top of the rail. 4. Attach chain spreader to garage door opener, use ONLY those bolts/fasteners mounted in the garage door opener) Bolt "U" Bracket 1/4"-20x1-3/4" Cover Protection Bolt Hole Lock Nut 1/4"-20 Chain Spreader 6 Assembly STEP 2 Fasten the rail to the motor unit To avoid SERIOUS damage to the motor unit with two screws. The use any power tools. Tighten securely...

PD512 Owner Manual
Page 11
..., disconnect ALL electric power BEFORE performing ANY service or maintenance. 14. Installation IMPORTANT INSTALLATION INSTRUCTIONS To reduce the risk of the garage door. To avoid SERIOUS PERSONAL INJURY or DEATH from ALL moving parts of installation, test safety reversal system. Door MUST reverse on contact with sectional doors. 10 Disable ALL locks and remove ALL ropes connected to garage door BEFORE installing opener to be made by a trained door systems technician BEFORE installing opener. 4. Install wall-mounted garage door control: l within reach...
..., disconnect ALL electric power BEFORE performing ANY service or maintenance. 14. Installation IMPORTANT INSTALLATION INSTRUCTIONS To reduce the risk of the garage door. To avoid SERIOUS PERSONAL INJURY or DEATH from ALL moving parts of installation, test safety reversal system. Door MUST reverse on contact with sectional doors. 10 Disable ALL locks and remove ALL ropes connected to garage door BEFORE installing opener to be made by a trained door systems technician BEFORE installing opener. 4. Install wall-mounted garage door control: l within reach...

PD512 Owner Manual
Page 14
... the header bracket. Use packing material as shown. 4. Align the bracket holes and join with a clevis pin as a protective base. Insert a ring fastener to the header bracket 1. NOTE: A 2x4 is raised, pull the trolley release arm down to clear the spring. 2. The trolley can remain disconnected until instructed. Position the opener on it is ideal for setting the distance between the rail and the door.
... the header bracket. Use packing material as shown. 4. Align the bracket holes and join with a clevis pin as a protective base. Insert a ring fastener to the header bracket 1. NOTE: A 2x4 is raised, pull the trolley release arm down to clear the spring. 2. The trolley can remain disconnected until instructed. Position the opener on it is ideal for setting the distance between the rail and the door.

PD512 Owner Manual
Page 15
... instructions illustrate one of the garage. Measure the distance from a falling garage door opener, fasten it SECURELY to structural supports. Remove the 2x4 and manually close the door. Concrete anchors MUST be different. Finished Ceiling Unfinished Ceiling 1. Below are three example installations. Your installation may be used if installing ANY brackets into masonry. Cut both pieces of the garage door opener to the hanging brackets with the header bracket...
... instructions illustrate one of the garage. Measure the distance from a falling garage door opener, fasten it SECURELY to structural supports. Remove the 2x4 and manually close the door. Concrete anchors MUST be different. Finished Ceiling Unfinished Ceiling 1. Below are three example installations. Your installation may be used if installing ANY brackets into masonry. Cut both pieces of the garage door opener to the hanging brackets with the header bracket...

PD512 Owner Manual
Page 16
... Install a 100 watt maximum light bulb in the trolley release arm. Light bulb size should be A19, standard neck only. NOTE: Use only standard light bulb. If rope knot becomes untied, you could result in an open or closed. Insert the other end of the emergency release rope through the handle. Mount the emergency release within reach, but at least 1 inch (2.5 cm) from a falling garage door: l If possible, use emergency release handle unless garage...
... Install a 100 watt maximum light bulb in the trolley release arm. Light bulb size should be A19, standard neck only. NOTE: Use only standard light bulb. If rope knot becomes untied, you could result in an open or closed. Insert the other end of the emergency release rope through the handle. Mount the emergency release within reach, but at least 1 inch (2.5 cm) from a falling garage door: l If possible, use emergency release handle unless garage...

PD512 Owner Manual
Page 21
... when it is pre-wired for the top screw. 8. For gang box installations it can be connected to either screw. Mount the door control with door control push buttons or remote control transmitters. If your garage is not necessary to drill holes or install the drywall anchors. Mark the location of the door control. l Connect ONLY to each of the two screws on the back of the door control over the screw and slide down into...
... when it is pre-wired for the top screw. 8. For gang box installations it can be connected to either screw. Mount the door control with door control push buttons or remote control transmitters. If your garage is not necessary to drill holes or install the drywall anchors. Mark the location of the door control. l Connect ONLY to each of the two screws on the back of the door control over the screw and slide down into...

PD512 Owner Manual
Page 23
... 1/4"-20 Facing the door from closing , the door will stop and reverse to the door track, the wall, or the floor. IMPORTANT INFORMATION ABOUT THE SAFETY REVERSING SENSORS The safety reversing sensors must be disabled. If an obstruction breaks the light beam while the door is closing garage door: l Correctly connect and align the safety reversing sensor. NOTE: For energy efficiency the garage door opener will flash 10 times. The sensors should point toward each other with the garage door opener light bulb; Insert the...
... 1/4"-20 Facing the door from closing , the door will stop and reverse to the door track, the wall, or the floor. IMPORTANT INFORMATION ABOUT THE SAFETY REVERSING SENSORS The safety reversing sensors must be disabled. If an obstruction breaks the light beam while the door is closing garage door: l Correctly connect and align the safety reversing sensor. NOTE: For energy efficiency the garage door opener will flash 10 times. The sensors should point toward each other with the garage door opener light bulb; Insert the...

PD512 Owner Manual
Page 30
... down cycle using the remote control or the UP and DOWN buttons. Programming is in the desired UP position. 3. Press and release the DOWN Button. Once the door is complete. 6 * If the garage door opener lights are flashing 5 times during the steps for Program the Travel, the safety reversing sensors are unable to operate the door up and down , repeat the steps for Program the Travel, the programming has timed out. The garage door opener lights will flash twice and...
... down cycle using the remote control or the UP and DOWN buttons. Programming is in the desired UP position. 3. Press and release the DOWN Button. Once the door is complete. 6 * If the garage door opener lights are flashing 5 times during the steps for Program the Travel, the safety reversing sensors are unable to operate the door up and down , repeat the steps for Program the Travel, the programming has timed out. The garage door opener lights will flash twice and...

PD512 Owner Manual
Page 32
... SHOULD GO UNDER A STOPPED, PARTIALLY OPENED DOOR. 6. SAVE THESE INSTRUCTIONS. 31 Weak or broken springs or unbalanced door could result in sight and away from people and objects until completely closed . Operation IMPORTANT SAFETY INSTRUCTIONS To reduce the risk of SEVERE INJURY or DEATH. 11. NEVER use emergency release handle unless garage doorway is CLOSED. Garage door MUST reverse on a one-piece door if using this release with garage door control push buttons or remote controls. 3. NO ONE...
... SHOULD GO UNDER A STOPPED, PARTIALLY OPENED DOOR. 6. SAVE THESE INSTRUCTIONS. 31 Weak or broken springs or unbalanced door could result in sight and away from people and objects until completely closed . Operation IMPORTANT SAFETY INSTRUCTIONS To reduce the risk of SEVERE INJURY or DEATH. 11. NEVER use emergency release handle unless garage doorway is CLOSED. Garage door MUST reverse on a one-piece door if using this release with garage door control push buttons or remote controls. 3. NO ONE...

PD512 Owner Manual
Page 33
... light bulb turns off the sensor LEDs will turn on the sensor LEDs will not close the door if you with each use LED bulbs as these may reduce the range or performance of the infrared beam. Bulb power is A19. For added control over 100 billion new codes. Accessories Remote Controls MEMORY CAPACITY Up to 8 Door Controls Up to 2 door controls Keyless Entries Up to full open , and the safety reversing sensors are not installed, or are not compatible. The garage door opener will flash 10 times...
... light bulb turns off the sensor LEDs will turn on the sensor LEDs will not close the door if you with each use LED bulbs as these may reduce the range or performance of the infrared beam. Bulb power is A19. For added control over 100 billion new codes. Accessories Remote Controls MEMORY CAPACITY Up to 8 Door Controls Up to 2 door controls Keyless Entries Up to full open , and the safety reversing sensors are not installed, or are not compatible. The garage door opener will flash 10 times...

PD512 Owner Manual
Page 34
...wall-mounted door control, remote control, or wireless keyless entry. Test the door control by the number times the garage door opener flashes: l 1 flash is 1-1/2 minutes l 2 flashes is 2-1/2 minutes l 3 flashes is 3-1/2 minutes l 4 flashes is 4-1/2 minutes). When the door is continuously blinking, the LOCK feature needs to open . If the obstruction interrupts the sensor beam the garage door opener lights will move in motion. LIGHTS Light Button Press the LIGHT button to turn the garage door opener lights on the door control or keyless entry until the garage door opener lights turn...
...wall-mounted door control, remote control, or wireless keyless entry. Test the door control by the number times the garage door opener flashes: l 1 flash is 1-1/2 minutes l 2 flashes is 2-1/2 minutes l 3 flashes is 3-1/2 minutes l 4 flashes is 4-1/2 minutes). When the door is continuously blinking, the LOCK feature needs to open . If the obstruction interrupts the sensor beam the garage door opener lights will move in motion. LIGHTS Light Button Press the LIGHT button to turn the garage door opener lights on the door control or keyless entry until the garage door opener lights turn...

PD512 Owner Manual
Page 36
...;ash once. 2 The command LED will flash once. 3. Programming can be heard) when the code has been programmed. To program additional accessories refer to enter Programming Mode. 2. TO ADD, REPROGRAM, OR CHANGE A REMOTE CONTROL/KEYLESS ENTRY PIN USING THE MULTI-FUNCTION CONTROL PANEL 1. Press and immediately release the Learn button. 2. Remote Control: Press and hold the button on the keyless entry keypad. Keyless Entry: Enter a 4-digit personal identification number (PIN) of your choice on the garage door opener. Visit bridge.chamberlain.com to find out...
...;ash once. 2 The command LED will flash once. 3. Programming can be heard) when the code has been programmed. To program additional accessories refer to enter Programming Mode. 2. TO ADD, REPROGRAM, OR CHANGE A REMOTE CONTROL/KEYLESS ENTRY PIN USING THE MULTI-FUNCTION CONTROL PANEL 1. Press and immediately release the Learn button. 2. Remote Control: Press and hold the button on the keyless entry keypad. Keyless Entry: Enter a 4-digit personal identification number (PIN) of your choice on the garage door opener. Visit bridge.chamberlain.com to find out...

PD512 Owner Manual
Page 38
... the user'sauthorityto operate the equipment. Replace the batteries with Part 15 of the FCC rulesand IndustryCanada (IC)licence-exempt RSSstandard(s). Dispose of fire, explosion or chemical burn: l Replace ONLY with the visor clip. Maintenance Maintenance Schedule EVERY MONTH l Manually operate door. Adjust if necessary, see page 28. EVERY YEAR l Oil door rollers, bearings and hinges. If the battery is low, the remote control's LED will not flash...
... the user'sauthorityto operate the equipment. Replace the batteries with Part 15 of the FCC rulesand IndustryCanada (IC)licence-exempt RSSstandard(s). Dispose of fire, explosion or chemical burn: l Replace ONLY with the visor clip. Maintenance Maintenance Schedule EVERY MONTH l Manually operate door. Adjust if necessary, see page 28. EVERY YEAR l Oil door rollers, bearings and hinges. If the battery is low, the remote control's LED will not flash...

PD512 Owner Manual
Page 39
... arrows on the door that would interrupt the sensor's path while closing. 1 5 Door moves 6-8" stops or reverses. Inspect safety sensor wire at the logic board. Manually open and close and the light bulbs flash. Opener hums for proper assembly, replace if necessary. 38 The wires for binding or obstructions, such as a broken spring or door lock, correct as needed . 1 4 The garage door opener will not close the door. Make sure nothing is programmed with self-diagnostic capabilities. Replace motor if necessary. 1 6 Door coasts after...
... arrows on the door that would interrupt the sensor's path while closing. 1 5 Door moves 6-8" stops or reverses. Inspect safety sensor wire at the logic board. Manually open and close and the light bulbs flash. Opener hums for proper assembly, replace if necessary. 38 The wires for binding or obstructions, such as a broken spring or door lock, correct as needed . 1 4 The garage door opener will not close the door. Make sure nothing is programmed with self-diagnostic capabilities. Replace motor if necessary. 1 6 Door coasts after...

PD512 Owner Manual
Page 40
... disabled using the door control, see www.chamberlain.com for certain vehicles. My garage door opener is beeping: My garage door opener light(s) will not turn off when the door is not programming to reprogram travel module if necessary. l If the remote control will not close and the light bulbs blink on the door control. The safety reversing sensor must be necessary for more information. Troubleshooting DIAGNOSTIC CODE Up Arrow Down Arrow Flash(es) Flash(es) 4 1-4 SYMPTOM Door is working properly. My vehicle's Homelink® is open and close...
... disabled using the door control, see www.chamberlain.com for certain vehicles. My garage door opener is beeping: My garage door opener light(s) will not turn off when the door is not programming to reprogram travel module if necessary. l If the remote control will not close and the light bulbs blink on the door control. The safety reversing sensor must be necessary for more information. Troubleshooting DIAGNOSTIC CODE Up Arrow Down Arrow Flash(es) Flash(es) 4 1-4 SYMPTOM Door is working properly. My vehicle's Homelink® is open and close...

PD512 Owner Manual
Page 42
... ITEMS (E.G., BATTERIES IN REMOTE CONTROL TRANSMITTERS AND LIGHT BULBS), OR UNITS INSTALLED FOR NON-RESIDENTIAL USE. This limited warranty gives you specific legal rights, and you . Address repair parts orders to our service center for a specific period of -purchase receipt with those instructions will be repaired or replaced with the instructions regarding installation, operation, and maintenance and testing. The warranty period commences from the date of the garage door opener. Then...
... ITEMS (E.G., BATTERIES IN REMOTE CONTROL TRANSMITTERS AND LIGHT BULBS), OR UNITS INSTALLED FOR NON-RESIDENTIAL USE. This limited warranty gives you specific legal rights, and you . Address repair parts orders to our service center for a specific period of -purchase receipt with those instructions will be repaired or replaced with the instructions regarding installation, operation, and maintenance and testing. The warranty period commences from the date of the garage door opener. Then...


