
MC100 Owners Manual
Page 1
... sensors are no obstructions to operate, or play with door openers manufactured after 1993 that utilize photoelectric sensors. MODEL MC100 Universal Mini Remote Control TABLE OF CONTENTS GETTING STARTED 2 LOCATE THE PROGRAM/LEARN BUTTON 3-7 Chamberlain® products 3 LiftMaster® products 4 Overhead Door® products 4 Genie® products 5 Linear® products 6 Wayne Dalton®...
... sensors are no obstructions to operate, or play with door openers manufactured after 1993 that utilize photoelectric sensors. MODEL MC100 Universal Mini Remote Control TABLE OF CONTENTS GETTING STARTED 2 LOCATE THE PROGRAM/LEARN BUTTON 3-7 Chamberlain® products 3 LiftMaster® products 4 Overhead Door® products 4 Genie® products 5 Linear® products 6 Wayne Dalton®...

MC100 Owners Manual
Page 2
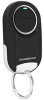
...Button LED Bottom Button Key Ring Holder You will need to locate the Program/LEARN button on the product or mounted nearby. Your Program/LEARN button may look different. The receiver will be programmed to activate up to the Table of Contents in an external receiver. ... located on the door control. Newer garage door openers may have a different name (RADIO button, XMITTER button, etc.). GATE OPERATORS The Program/LEARN button is typically located on the control board of your gate operator manufacturer. 2 EXTERNAL RECEIVER Some products do not have a different name...
...Button LED Bottom Button Key Ring Holder You will need to locate the Program/LEARN button on the product or mounted nearby. Your Program/LEARN button may look different. The receiver will be programmed to activate up to the Table of Contents in an external receiver. ... located on the door control. Newer garage door openers may have a different name (RADIO button, XMITTER button, etc.). GATE OPERATORS The Program/LEARN button is typically located on the control board of your gate operator manufacturer. 2 EXTERNAL RECEIVER Some products do not have a different name...

MC100 Owners Manual
Page 3
LOCATE THE PROGRAM/LEARN BUTTON CHAMBERLAIN PRODUCTS 3
LOCATE THE PROGRAM/LEARN BUTTON CHAMBERLAIN PRODUCTS 3

MC100 Owners Manual
Page 4
LOCATE THE PROGRAM/LEARN BUTTON LIFTMASTER PRODUCTS Yellow Learn Button Purple Learn Button Orange Learn Button Green Learn Button OVERHEAD DOOR PRODUCTS Learn Code Button 4
LOCATE THE PROGRAM/LEARN BUTTON LIFTMASTER PRODUCTS Yellow Learn Button Purple Learn Button Orange Learn Button Green Learn Button OVERHEAD DOOR PRODUCTS Learn Code Button 4

MC100 Owners Manual
Page 5
LOCATE THE PROGRAM/LEARN BUTTON GENIE PRODUCTS Learn Code Button Program Set Button 5
LOCATE THE PROGRAM/LEARN BUTTON GENIE PRODUCTS Learn Code Button Program Set Button 5

MC100 Owners Manual
Page 6
LOCATE THE PROGRAM/LEARN BUTTON LINEAR PRODUCTS Learn Button WAYNE-DALTON PRODUCTS Learn Button Program SW Button 6
LOCATE THE PROGRAM/LEARN BUTTON LINEAR PRODUCTS Learn Button WAYNE-DALTON PRODUCTS Learn Button Program SW Button 6

MC100 Owners Manual
Page 8
... button is not successful, proceed through the steps below. Ensure garage door is pre-programmed to work with a Chamberlain garage door opener with your garage door during programming. If you programmed in this manual are for reference only and your product may look different. 1 Start with a yellow learn button, then press and hold bottom...
... button is not successful, proceed through the steps below. Ensure garage door is pre-programmed to work with a Chamberlain garage door opener with your garage door during programming. If you programmed in this manual are for reference only and your product may look different. 1 Start with a yellow learn button, then press and hold bottom...

MC100 Owners Manual
Page 9
...release either of ALL obstructions. 3 On the garage door opener, press and hold bottom button on the remote to complete programming. 8 Test the remote control by pressing the button you programmed in step 6. LED Bottom Button IMPORTANT: The remote will flash PURPLE. 5 On the Genie® remote control, ...the buttons on the remote control until both the long and short LED's light up to your Genie operator, see your garage door during programming. The blue LED will blink for reference only and your product may look different. 1 Start with your garage door closed. 2 Press and...
...release either of ALL obstructions. 3 On the garage door opener, press and hold bottom button on the remote to complete programming. 8 Test the remote control by pressing the button you programmed in step 6. LED Bottom Button IMPORTANT: The remote will flash PURPLE. 5 On the Genie® remote control, ...the buttons on the remote control until both the long and short LED's light up to your Genie operator, see your garage door during programming. The blue LED will blink for reference only and your product may look different. 1 Start with your garage door closed. 2 Press and...

MC100 Owners Manual
Page 10
... may look different. 1 Start with your commercial door closed. 2 Press and hold the button on the remote control you programmed in step 4. The Mini Remote Control comes pre-programmed to work with a Chamberlain branded Commercial Door Operator with a yellow learn button, then press and hold bottom button on the remote control until the...
... may look different. 1 Start with your commercial door closed. 2 Press and hold the button on the remote control you programmed in step 4. The Mini Remote Control comes pre-programmed to work with a Chamberlain branded Commercial Door Operator with a yellow learn button, then press and hold bottom button on the remote control until the...

MC100 Owners Manual
Page 11
... until the blue LED stays solid (approximately 15 seconds) then release the button. Program/LEARN Button* 4 On the remote control, press and release the button that you programmed in step 4. The Mini Remote Control comes pre-programmed to work with a Chamberlain branded Commercial Door Operator with your gate closed. 2 Press and hold the button...
... until the blue LED stays solid (approximately 15 seconds) then release the button. Program/LEARN Button* 4 On the remote control, press and release the button that you programmed in step 4. The Mini Remote Control comes pre-programmed to work with a Chamberlain branded Commercial Door Operator with your gate closed. 2 Press and hold the button...

MC100 Owners Manual
Page 12
... typically located on the remote control until the blue LED stays solid (approximately 15 seconds) then release the button. EXTERNAL RECEIVERS Programming to work with a Sec+ 2.0 Chamberlain or LiftMaster branded External receiver. LED Bottom Button IMPORTANT: The remote will blink for up to 60 seconds. Ensure door or gate is clear of...
... typically located on the remote control until the blue LED stays solid (approximately 15 seconds) then release the button. EXTERNAL RECEIVERS Programming to work with a Sec+ 2.0 Chamberlain or LiftMaster branded External receiver. LED Bottom Button IMPORTANT: The remote will blink for up to 60 seconds. Ensure door or gate is clear of...

MC100 Owners Manual
Page 13
...button on the MyQ control, then press and hold the bottom button on the remote control 4 Press and release the Program/LEARN button on the module will flash). NOTE: Make sure the lamp is switched ON. 2 If the lamp is ...like to turn off, then press and release either of the buttons on the remote control you programmed. The blue LED will blink for up to program twice. LED Button 5 On the remote control, press and release the button that you would ... button. . The images throughout this manual are for the MyQ Light Control to work with Chamberlain and LiftMaster MyQ Light Controls.
...button on the MyQ control, then press and hold the bottom button on the remote control 4 Press and release the Program/LEARN button on the module will flash). NOTE: Make sure the lamp is switched ON. 2 If the lamp is ...like to turn off, then press and release either of the buttons on the remote control you programmed. The blue LED will blink for up to program twice. LED Button 5 On the remote control, press and release the button that you would ... button. . The images throughout this manual are for the MyQ Light Control to work with Chamberlain and LiftMaster MyQ Light Controls.

MC100 Owners Manual
Page 14
The LED should light when you press a button. NEED HELP? The remote control will not light or is dim. • Replace the battery. 14 The remote control does not have good range. • The range of the remote control may vary depending on environmental factors. Replace the battery if necessary. The remote control LED will not program to a product with a Program/LEARN button. • Check the battery in the remote control. Replace the battery if necessary.
The LED should light when you press a button. NEED HELP? The remote control will not light or is dim. • Replace the battery. 14 The remote control does not have good range. • The range of the remote control may vary depending on environmental factors. Replace the battery if necessary. The remote control LED will not program to a product with a Program/LEARN button. • Check the battery in the remote control. Replace the battery if necessary.

