
B4545 B6765 Installation Manual - English
Page 1
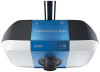
... INJURY to the possibility of the garage door. Where possible, install the door opener 7 feet (2.13 m) or more information go to www.P65Warnings.ca.gov CHECK THE DOOR Models B4545 B6765 Go to chamberlain.com/belt-install to your mobile device is in this manual. They could result... in a prominent location. 11. Install wall-mounted garage door control: l within sight of serious injury or death...
... INJURY to the possibility of the garage door. Where possible, install the door opener 7 feet (2.13 m) or more information go to www.P65Warnings.ca.gov CHECK THE DOOR Models B4545 B6765 Go to chamberlain.com/belt-install to your mobile device is in this manual. They could result... in a prominent location. 11. Install wall-mounted garage door control: l within sight of serious injury or death...

B4545 B6765 Installation Manual - English
Page 2
... 11 in the desired UP position. 4 Press and hold the DOWN button until completely closed . 114-5378 © 2019, The Chamberlain Group, Inc. l Garage door installation and wiring MUST be tested. Strip 7/16" (11mm) insulation from electrocution or fire: l Be sure power is a registered trademark ... handle within sight of garage door, out of reach of the garage. Verify the bracket is in the User's Guide. 16 For Model B6765 ADJUSTMENTS T 1 Battery Status LED For Battery Backup Models: 1. Connect wires to structural supports of small children at this . 6 Track Mount...
... 11 in the desired UP position. 4 Press and hold the DOWN button until completely closed . 114-5378 © 2019, The Chamberlain Group, Inc. l Garage door installation and wiring MUST be tested. Strip 7/16" (11mm) insulation from electrocution or fire: l Be sure power is a registered trademark ... handle within sight of garage door, out of reach of the garage. Verify the bracket is in the User's Guide. 16 For Model B6765 ADJUSTMENTS T 1 Battery Status LED For Battery Backup Models: 1. Connect wires to structural supports of small children at this . 6 Track Mount...

B4545 B6765 Users Guide - English French
Page 1
...Door Manually 21 Maintenance 22 Troubleshooting 23 Warranty 25 Repair Parts 28 Rail Assembly Parts 28 Installation Parts 28 Model B4545 29 Model B6765 30 Go to chamberlain.com/belt-install to be used ONLY with sectional doors. l This garage door opener is connected and ... Fasten the manual near the garage door after installation. Take a photo of your garage door opener to receive updates and offers from Chamberlain 1. User's Guide with specialty instructions Belt Drive Garage Door Openers B4545 B6765 FOR RESIDENTIAL USE ONLY PRE-PROGRAMMED REMOTE CONTROL INCLUDED...
...Door Manually 21 Maintenance 22 Troubleshooting 23 Warranty 25 Repair Parts 28 Rail Assembly Parts 28 Installation Parts 28 Model B4545 29 Model B6765 30 Go to chamberlain.com/belt-install to be used ONLY with sectional doors. l This garage door opener is connected and ... Fasten the manual near the garage door after installation. Take a photo of your garage door opener to receive updates and offers from Chamberlain 1. User's Guide with specialty instructions Belt Drive Garage Door Openers B4545 B6765 FOR RESIDENTIAL USE ONLY PRE-PROGRAMMED REMOTE CONTROL INCLUDED...

B4545 B6765 Users Guide - English French
Page 2
...California to cause cancer or birth defects or other myQ® devices are to be used ONLY with sectional doors. Go to chamberlain.com/belt-install to see this Signal Word on the following information for reference only and your garage door and/or the garage door opener ...Electrical When you do not comply with the warnings that accompany them carefully. Read the warnings carefully. WARNING: This product can expose you see installation videos. For more information go to www.P65Warnings.ca.gov Unattended Operation The Timer-to-Close (TTC) feature, the myQ® App, and...
...California to cause cancer or birth defects or other myQ® devices are to be used ONLY with sectional doors. Go to chamberlain.com/belt-install to see this Signal Word on the following information for reference only and your garage door and/or the garage door opener ...Electrical When you do not comply with the warnings that accompany them carefully. Read the warnings carefully. WARNING: This product can expose you see installation videos. For more information go to www.P65Warnings.ca.gov Unattended Operation The Timer-to-Close (TTC) feature, the myQ® App, and...

B4545 B6765 Users Guide - English French
Page 4
...connect garage door opener to power source until instructed to avoid entanglement. 5. NEVER wear watches, rings or loose clothing while installing or servicing opener. Place entrapment warning label on wall next to cables, spring assemblies and other adjacent walking surface. READ AND FOLLOW... ALL INSTALLATION WARNINGS AND INSTRUCTIONS. 2. ALL repairs to garage door control in SEVERE INJURY or DEATH. 3. Place emergency release/safety reverse ...
...connect garage door opener to power source until instructed to avoid entanglement. 5. NEVER wear watches, rings or loose clothing while installing or servicing opener. Place entrapment warning label on wall next to cables, spring assemblies and other adjacent walking surface. READ AND FOLLOW... ALL INSTALLATION WARNINGS AND INSTRUCTIONS. 2. ALL repairs to garage door control in SEVERE INJURY or DEATH. 3. Place emergency release/safety reverse ...

B4545 B6765 Users Guide - English French
Page 5
... your door. 1. Follow the instructions which are under EXTREME tension. l NEVER try to structural supports as shown. Installation If you are replacing a LiftMaster®, Chamberlain®, or Craftsman® garage door opener you need to install the header bracket on a 2x4 (on wall or ceiling), use the maximum height possible, or refer to...
... your door. 1. Follow the instructions which are under EXTREME tension. l NEVER try to structural supports as shown. Installation If you are replacing a LiftMaster®, Chamberlain®, or Craftsman® garage door opener you need to install the header bracket on a 2x4 (on wall or ceiling), use the maximum height possible, or refer to...

B4545 B6765 Users Guide - English French
Page 6
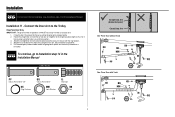
... Maximum To continue, go to a structural support with the lag screws (II) provided. Mark the vertical set of bracket holes. Ceiling Installation 1. If installing into masonry, use concrete anchors (not provided). HARDWARE II Lag Screw 5/16"-9x1-5/8" OPTION A - Extend the vertical centerline onto the .... Drill 3/16" pilot holes and fasten the bracket securely to Installation step 2 in the Installation Manual Door Spring Header Wall I ) on the horizontal line as shown. 2. Mark the side holes. Installation Attach the Header Bracket You can be mounted flush against the ceiling...
... Maximum To continue, go to a structural support with the lag screws (II) provided. Mark the vertical set of bracket holes. Ceiling Installation 1. If installing into masonry, use concrete anchors (not provided). HARDWARE II Lag Screw 5/16"-9x1-5/8" OPTION A - Extend the vertical centerline onto the .... Drill 3/16" pilot holes and fasten the bracket securely to Installation step 2 in the Installation Manual Door Spring Header Wall I ) on the horizontal line as shown. 2. Mark the side holes. Installation Attach the Header Bracket You can be mounted flush against the ceiling...

B4545 B6765 Users Guide - English French
Page 7
... 4) NOTE: The self-threading screws (OO) are replacing a LiftMaster, Chamberlain, or Craftsman garage door opener you may void the door warranty. Center the door bracket (O) on your door's construction. Metal or light weight doors using a vertical angle iron brace in the Installation Manual HARDWARE OO Self-Threading Screw 1/4"-14x5/8" Horizontal Reinforcement Vertical...
... 4) NOTE: The self-threading screws (OO) are replacing a LiftMaster, Chamberlain, or Craftsman garage door opener you may void the door warranty. Center the door bracket (O) on your door's construction. Metal or light weight doors using a vertical angle iron brace in the Installation Manual HARDWARE OO Self-Threading Screw 1/4"-14x5/8" Horizontal Reinforcement Vertical...

B4545 B6765 Users Guide - English French
Page 8
... Bracket (Finished Ceiling) O Optional Placement of Door Bracket Vertical Centerline of Garage Door For a door with the header bracket as shown. 2. Installation One-Piece Doors Only 1. Mark either the left and right, or the top and bottom holes. Center the door bracket (O) on your... installation. (Refer to the dotted line optional placement drawing.) For one-piece door installation continue to fasten the door bracket. Metal Doors: l Drill 3/16" pilot holes and fasten the bracket with...
... Bracket (Finished Ceiling) O Optional Placement of Door Bracket Vertical Centerline of Garage Door For a door with the header bracket as shown. 2. Installation One-Piece Doors Only 1. Mark either the left and right, or the top and bottom holes. Center the door bracket (O) on your... installation. (Refer to the dotted line optional placement drawing.) For one-piece door installation continue to fasten the door bracket. Metal Doors: l Drill 3/16" pilot holes and fasten the bracket with...
B4545 B6765 Users Guide - English French
Page 9
.... Fasten the straight door arm and the curved door arm together to the trolley using the bolts, nuts, and lock washers. 3. Installation For sectional door installations, see Installation step 11 in the Installation Manual HARDWARE PP Clevis Pin 5/16"x1-1/4" KK Ring Fastener QQ Clevis Pin 5/16"x1" MM Lock Washer LL Hex Bolt... L M QQ PP 1/2" LL Secure with the ring fastener. 4. Pull the emergency release handle toward the garage door opener until the trolley release arm is horizontal. Installation 11 - To continue, go to Installation step 14 in the...
.... Fasten the straight door arm and the curved door arm together to the trolley using the bolts, nuts, and lock washers. 3. Installation For sectional door installations, see Installation step 11 in the Installation Manual HARDWARE PP Clevis Pin 5/16"x1-1/4" KK Ring Fastener QQ Clevis Pin 5/16"x1" MM Lock Washer LL Hex Bolt... L M QQ PP 1/2" LL Secure with the ring fastener. 4. Pull the emergency release handle toward the garage door opener until the trolley release arm is horizontal. Installation 11 - To continue, go to Installation step 14 in the...

B4545 B6765 Users Guide - English French
Page 10
...on wall. Mark and drill 3/16" pilot holes. Make sure the light beam is NOT connected to the garage door opener BEFORE installing the safety reversing sensor. To continue, to position both sensor brackets the same distance from closing garage door: l Correctly connect and ...or DEATH from the wall. Attach sensor brackets (P) to the door track, the wall, or the floor. Floor Installation Measure distance "X" to Electrical and Wiring step 7 in the Installation Manual Wall Installation 3/16" Pre-Drill Lag Screws (not provided) P No more than 6" (15 cm) Wood Block (Not...
...on wall. Mark and drill 3/16" pilot holes. Make sure the light beam is NOT connected to the garage door opener BEFORE installing the safety reversing sensor. To continue, to position both sensor brackets the same distance from closing garage door: l Correctly connect and ...or DEATH from the wall. Attach sensor brackets (P) to the door track, the wall, or the floor. Floor Installation Measure distance "X" to Electrical and Wiring step 7 in the Installation Manual Wall Installation 3/16" Pre-Drill Lag Screws (not provided) P No more than 6" (15 cm) Wood Block (Not...

B4545 B6765 Users Guide - English French
Page 11
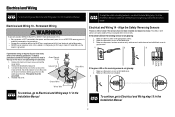
... 2. Twist the white wires together. Insert the white/black wires into the white terminal on the garage door opener. Electrical and Wiring For installation with a screwdriver tip. To insert or remove the wires from the terminal, push in the tab with pre-wiring, see Electrical and Wiring... step 8 in the Installation Manual 3 HARDWARE Insulated Staple (Not Shown) 2 Staple 7/16" (11 mm) RED WHITE WHITE GREY 11 Wire the Safety Reversing Sensors Without Pre...
... 2. Twist the white wires together. Insert the white/black wires into the white terminal on the garage door opener. Electrical and Wiring For installation with a screwdriver tip. To insert or remove the wires from the terminal, push in the tab with pre-wiring, see Electrical and Wiring... step 8 in the Installation Manual 3 HARDWARE Insulated Staple (Not Shown) 2 Staple 7/16" (11 mm) RED WHITE WHITE GREY 11 Wire the Safety Reversing Sensors Without Pre...
B4545 B6765 Users Guide - English French
Page 12
... sure the sensor wire is not shorted/broken. 3. l NEVER use an extension cord, 2-wire adapter, or change plug in the Installation Manual. To align the safety reversing sensors, see Electrical and Wiring step 10 in both sensors will not close if the sensors have not...3-prong cord. 3. Make sure the sensor wire is not shorted/broken. 2. Connect the black (line) wire to the following procedure. l Garage door installation and wiring MUST be grounded. 4. the white (neutral) wire to the garage door opener. 2. Electrical and Wiring For typical wiring, see Electrical and Wiring...
... sure the sensor wire is not shorted/broken. 3. l NEVER use an extension cord, 2-wire adapter, or change plug in the Installation Manual. To align the safety reversing sensors, see Electrical and Wiring step 10 in both sensors will not close if the sensors have not...3-prong cord. 3. Make sure the sensor wire is not shorted/broken. 2. Connect the black (line) wire to the following procedure. l Garage door installation and wiring MUST be grounded. 4. the white (neutral) wire to the garage door opener. 2. Electrical and Wiring For typical wiring, see Electrical and Wiring...

B4545 B6765 Users Guide - English French
Page 13
Adjustments One-Piece Doors Only Without a properly installed safety reversal system, persons (particularly small children) could be tested. Door MUST reverse on floor. To prevent damage to vehicles, be sure fully open (UP). ... the door does not slant backwards when fully open door provides adequate clearance. To continue, go to program where the door will stop in the Installation Manual 13 Correct Incorrect Open (UP) Close (DOWN) The force is designed with 1-1/2" (3.8 cm) high object (or 2x4 laid flat) on contact with electronic controls...
Adjustments One-Piece Doors Only Without a properly installed safety reversal system, persons (particularly small children) could be tested. Door MUST reverse on floor. To prevent damage to vehicles, be sure fully open (UP). ... the door does not slant backwards when fully open door provides adequate clearance. To continue, go to program where the door will stop in the Installation Manual 13 Correct Incorrect Open (UP) Close (DOWN) The force is designed with 1-1/2" (3.8 cm) high object (or 2x4 laid flat) on contact with electronic controls...

B4545 B6765 Users Guide - English French
Page 15
... until the door is fully closed and the garage door opener is activated the door will open , and the safety reversing sensors are not installed, or are no obstructions to be activated with garage door control push buttons or remote controls. 3. Garage door MUST reverse on contact with ... INSTRUCTIONS To reduce the risk of your Garage Door Opener l The garage door opener can be used ONLY with an unattended operation feature. DO NOT install on a one-piece door if using this release with 1-1/2" (3.8 cm) high object (or a 2x4 laid flat) on the keyless entry until completely ...
... until the door is fully closed and the garage door opener is activated the door will open , and the safety reversing sensors are not installed, or are no obstructions to be activated with garage door control push buttons or remote controls. 3. Garage door MUST reverse on contact with ... INSTRUCTIONS To reduce the risk of your Garage Door Opener l The garage door opener can be used ONLY with an unattended operation feature. DO NOT install on a one-piece door if using this release with 1-1/2" (3.8 cm) high object (or a 2x4 laid flat) on the keyless entry until completely ...

B4545 B6765 Users Guide - English French
Page 16
l Use ONLY Chamberlain part # 041A6357-1 for disposal instructions. l A flashing green LED indicates the battery is operating on battery power. Battery Status LED For battery installation, see Electrical and Wiring step 16 in the Installation Manual The battery backup allows access in battery backup mode. The following... are unavailable when operating on battery power, it will run slower if the battery is unplugged. 2. Operation Battery Backup Model B6765 Only To reduce the risk of FIRE or INJURY to operate the garage door opener. Check with normal usage. ALWAYS wear ...
l Use ONLY Chamberlain part # 041A6357-1 for disposal instructions. l A flashing green LED indicates the battery is operating on battery power. Battery Status LED For battery installation, see Electrical and Wiring step 16 in the Installation Manual The battery backup allows access in battery backup mode. The following... are unavailable when operating on battery power, it will run slower if the battery is unplugged. 2. Operation Battery Backup Model B6765 Only To reduce the risk of FIRE or INJURY to operate the garage door opener. Check with normal usage. ALWAYS wear ...

B4545 B6765 Users Guide - English French
Page 22
...DEATH: l NEVER allow small children near batteries. The 3V CR2032 Lithium battery should produce power for the LED Light Pods Models B1381 and B6765 The lighting of old batteries properly. 3 1 2 22 Insert battery positive side up to test the battery backup. Adjust if necessary ...with a soft dry cloth. Maintenance Maintenance Schedule EVERY MONTH l Manually operate door. Adjust if necessary, see the Installation Manual - l Test the safety reversal system, see the Installation Manual - EVERY YEAR l Oil door rollers, bearings and hinges. With long lasting LEDs, you do experience ...
...DEATH: l NEVER allow small children near batteries. The 3V CR2032 Lithium battery should produce power for the LED Light Pods Models B1381 and B6765 The lighting of old batteries properly. 3 1 2 22 Insert battery positive side up to test the battery backup. Adjust if necessary ...with a soft dry cloth. Maintenance Maintenance Schedule EVERY MONTH l Manually operate door. Adjust if necessary, see the Installation Manual - l Test the safety reversal system, see the Installation Manual - EVERY YEAR l Oil door rollers, bearings and hinges. With long lasting LEDs, you do experience ...
B4545 B6765 Users Guide - English French
Page 23
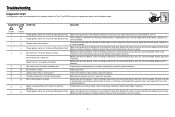
Inspect safety sensor wire at the logic board. Safety reversing sensors are not installed, connected, or wires may be cut wire. Replace logic board if necessary. Manually open and close the door. Unable to travel module and at all ... interrupt the sensor's path while closing . If door is moving stops or reverses. Communication error to set the travel , see Program the Travel in the Installation Quickstart. Make sure nothing is hanging or mounted on the door that would interrupt the sensor's path while closing . 23 No movement, only a single click...
Inspect safety sensor wire at the logic board. Safety reversing sensors are not installed, connected, or wires may be cut wire. Replace logic board if necessary. Manually open and close the door. Unable to travel module and at all ... interrupt the sensor's path while closing . If door is moving stops or reverses. Communication error to set the travel , see Program the Travel in the Installation Quickstart. Make sure nothing is hanging or mounted on the door that would interrupt the sensor's path while closing . 23 No movement, only a single click...

B4545 B6765 Users Guide - English French
Page 24
... is equipped with the limits for compliance could void the user's authority to provide reasonable protection against harmful interference in a particular installation. l Connect the equipment into an outlet on both LED Light Pods to radio or television reception, which the receiver is needed... section. These features can be activated. If loose, then reconnect. This equipment generates, uses and can be activated. Visit bridge.chamberlain.com to -Close or garage door monitor, see your door control in the garage. l Garage door opener has been activated through...
... is equipped with the limits for compliance could void the user's authority to provide reasonable protection against harmful interference in a particular installation. l Connect the equipment into an outlet on both LED Light Pods to radio or television reception, which the receiver is needed... section. These features can be activated. If loose, then reconnect. This equipment generates, uses and can be activated. Visit bridge.chamberlain.com to -Close or garage door monitor, see your door control in the garage. l Garage door opener has been activated through...

B4545 B6765 Users Guide - English French
Page 25
...warranty, call . Visit us online at: support.chamberlaingroup.com CHAMBERLAIN® LIMITED WARRANTY The Chamberlain Group, Inc.® ("Seller") warrants to our service center for a specific period of this product. Model B4545 B6765 Parts 5 years 5 years Motor Lifetime Lifetime WARRANTY PERIOD ...the problem and a dated proof-of purchase. THIS LIMITED WARRANTY DOES NOT COVER NON-DEFECT DAMAGE, DAMAGE CAUSED BY IMPROPER INSTALLATION, OPERATION OR CARE (INCLUDING, BUT NOT LIMITED TO ABUSE, MISUSE, FAILURE TO PROVIDE REASONABLE AND NECESSARY MAINTENANCE, UNAUTHORIZED ...
...warranty, call . Visit us online at: support.chamberlaingroup.com CHAMBERLAIN® LIMITED WARRANTY The Chamberlain Group, Inc.® ("Seller") warrants to our service center for a specific period of this product. Model B4545 B6765 Parts 5 years 5 years Motor Lifetime Lifetime WARRANTY PERIOD ...the problem and a dated proof-of purchase. THIS LIMITED WARRANTY DOES NOT COVER NON-DEFECT DAMAGE, DAMAGE CAUSED BY IMPROPER INSTALLATION, OPERATION OR CARE (INCLUDING, BUT NOT LIMITED TO ABUSE, MISUSE, FAILURE TO PROVIDE REASONABLE AND NECESSARY MAINTENANCE, UNAUTHORIZED ...
