

Owners Manual
Page 1
z Be sure to read the precautions in the separate User's Guide (Basic Operation). For details about setting up the projector and lamp replacement, see the User's Guide (Basic Operation). E DATA PROJECTOR XJ-S30/XJ-S35 User's Guide z Be sure to keep all user documentation handy for future reference.
z Be sure to read the precautions in the separate User's Guide (Basic Operation). For details about setting up the projector and lamp replacement, see the User's Guide (Basic Operation). E DATA PROJECTOR XJ-S30/XJ-S35 User's Guide z Be sure to keep all user documentation handy for future reference.
Owners Manual
Page 3
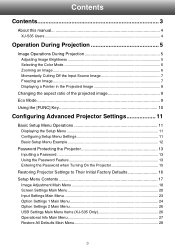
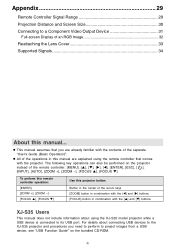
Contents Contents 3 About this manual 4 XJ-S35 Users ...4 Operation During Projection 5 Image Operations During Projection 5 Adjusting Image Brightness 5 Selecting the Color Mode 6 Zooming an Image ...6 Momentarily Cutting Off the Input Source Image 7 ... when Turning On the Projector 15 Restoring Projector Settings to Their Initial Factory Defaults 16 Setup Menu Contents 17 Image Adjustment Main Menu 18 Screen Settings Main Menu 20 Input Settings Main Menu 23 Option Settings 1 Main Menu 24 Option Settings 2 Main Menu 26 USB Settings Main Menu Items (XJ-S35 Only 26 Operational...
Contents Contents 3 About this manual 4 XJ-S35 Users ...4 Operation During Projection 5 Image Operations During Projection 5 Adjusting Image Brightness 5 Selecting the Color Mode 6 Zooming an Image ...6 Momentarily Cutting Off the Input Source Image 7 ... when Turning On the Projector 15 Restoring Projector Settings to Their Initial Factory Defaults 16 Setup Menu Contents 17 Image Adjustment Main Menu 18 Screen Settings Main Menu 20 Input Settings Main Menu 23 Option Settings 1 Main Menu 24 Option Settings 2 Main Menu 26 USB Settings Main Menu Items (XJ-S35 Only 26 Operational...
Owners Manual
Page 4
... This manual does not include information about connecting USB devices to the XJ-S35 projector and procedures you are explained using the XJ-S35 model projector while a USB device is connected to project images from a USB device, see "USB Function Guide" on the projector instead of the remote controller: [MENU], [S], [T], [X], [W], [ENTER], [ESC],... Output Device 31 Full-screen Display of an RGB Image 32 Reattaching the Lens Cover 33 Supported Signals 34 About this projector button: Button in the center of the cursor keys [ZOOM] button in combination with the [W] and [X] buttons [...
... This manual does not include information about connecting USB devices to the XJ-S35 projector and procedures you are explained using the XJ-S35 model projector while a USB device is connected to project images from a USB device, see "USB Function Guide" on the projector instead of the remote controller: [MENU], [S], [T], [X], [W], [ENTER], [ESC],... Output Device 31 Full-screen Display of an RGB Image 32 Reattaching the Lens Cover 33 Supported Signals 34 About this projector button: Button in the center of the cursor keys [ZOOM] button in combination with the [W] and [X] buttons [...
Owners Manual
Page 5
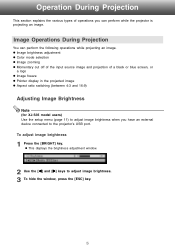
z This displays the brightness adjustment window. 2 Use the [W] and [X] keys to the projector's USB port. z Image brightness adjustment z Color mode selection z Image zooming z Momentary cut off of the input source image and projection of operations you have ... black or blue screen, or a logo z Image freeze z Pointer display in the projected image z Aspect ratio switching (between 4:3 and 16:9) Adjusting Image Brightness Note (for XJ-S35 model users) Use the setup menu (page 11) to adjust image brightness when you can perform the following operations while projecting an image. To adjust...
z This displays the brightness adjustment window. 2 Use the [W] and [X] keys to the projector's USB port. z Image brightness adjustment z Color mode selection z Image zooming z Momentary cut off of the input source image and projection of operations you have ... black or blue screen, or a logo z Image freeze z Pointer display in the projected image z Aspect ratio switching (between 4:3 and 16:9) Adjusting Image Brightness Note (for XJ-S35 model users) Use the setup menu (page 11) to adjust image brightness when you can perform the following operations while projecting an image. To adjust...
Owners Manual
Page 6
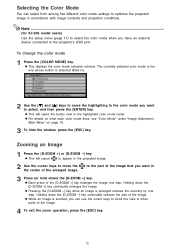
...or hold down the [D-ZOOM +] key continually enlarges the image. Holding down the [D-ZOOM -] key continually reduces the size of the enlarged image. Note (for XJ-S35 model users) Use the setup menu (page 11) to select the color mode when you want in the projected image. 2 Use the cursor keys to... move the highlighting to the color mode you have an external device connected to the projector's USB port. z While an image is enlarged reduces the zooming by one step. z This will select the button next to the highlighted color ...
...or hold down the [D-ZOOM +] key continually enlarges the image. Holding down the [D-ZOOM -] key continually reduces the size of the enlarged image. Note (for XJ-S35 model users) Use the setup menu (page 11) to select the color mode when you want in the projected image. 2 Use the cursor keys to... move the highlighting to the color mode you have an external device connected to the projector's USB port. z While an image is enlarged reduces the zooming by one step. z This will select the button next to the highlighted color ...
Owners Manual
Page 9
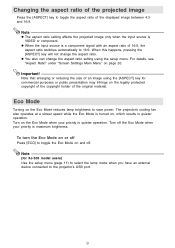
... Mode when your priority is turned on the Eco Mode reduces lamp brightness to the projector's USB port. 9 When this happens, pressing the [ASPECT] key will not change the aspect ratio setting using the [ASPECT] key for XJ-S35 model users) Use the setup menu (page 11) to select the lamp mode when... may infringe on page 20. z When the input source is VIDEO or component. Note that enlarging or reducing the size of the original material. The projector's cooling fan also operates at a slower speed while the Eco Mode is quieter operation.
... Mode when your priority is turned on the Eco Mode reduces lamp brightness to the projector's USB port. 9 When this happens, pressing the [ASPECT] key will not change the aspect ratio setting using the [ASPECT] key for XJ-S35 model users) Use the setup menu (page 11) to select the lamp mode when... may infringe on page 20. z When the input source is VIDEO or component. Note that enlarging or reducing the size of the original material. The projector's cooling fan also operates at a slower speed while the Eco Mode is quieter operation.

Owners Manual
Page 10
...; This performs the same operation as pressing the [BRIGHT] key ( key) described on the bundled CD-ROM. 10 Note (for XJ-S35 model users) When you have an external device connected to the projector's USB port, use this menu to control the connected device. For details, see the "USB Function Guide" on page...
...; This performs the same operation as pressing the [BRIGHT] key ( key) described on the bundled CD-ROM. 10 Note (for XJ-S35 model users) When you have an external device connected to the projector's USB port, use this menu to control the connected device. For details, see the "USB Function Guide" on page...
Owners Manual
Page 11
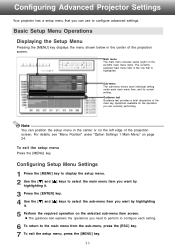
... below in the center or on the XJ-S35) main menu items. The currently selected main menu item is the one that you are currently performing. Main menu The main menu includes seven (eight on the left edge of the projection screen. Configuring Advanced Projector Settings Your projector has a setup menu that is highlighted...
... below in the center or on the XJ-S35) main menu items. The currently selected main menu item is the one that you are currently performing. Main menu The main menu includes seven (eight on the left edge of the projection screen. Configuring Advanced Projector Settings Your projector has a setup menu that is highlighted...
Owners Manual
Page 17
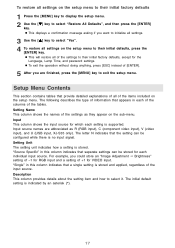
... their initial factory defaults, except for which each of the columns of the settings as R (RGB input), C (component video input), V (video input), and U (USB input, XJ-S35 only). Input source names are finished, press the [MENU] key to select "Restore All Defaults", and then press the [ENTER] key. Setting Unit The setting...
... their initial factory defaults, except for which each of the columns of the settings as R (RGB input), C (component video input), V (video input), and U (USB input, XJ-S35 only). Input source names are finished, press the [MENU] key to select "Restore All Defaults", and then press the [ENTER] key. Setting Unit The setting...
Owners Manual
Page 26
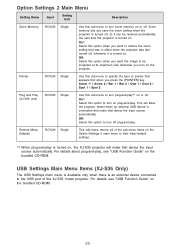
...on or off plug-and-play. On*: Select this option when you save the zoom setting when the projector is turned off, so it is turned on, the XJ-S35 projector will allow the projector detect when an external USB device is connected and make that appears first when you turn on . Off:...-ROM. Restore Menu Defaults RCVUN Single This sub-menu returns all of the XJ-S35 model projector. USB Settings Main Menu Items (XJ-S35 Only) The USB Settings main menu is available only when there is turned on the projector. On*: Select this sub-menu to restore the zoom setting that device the...
...on or off plug-and-play. On*: Select this option when you save the zoom setting when the projector is turned off, so it is turned on, the XJ-S35 projector will allow the projector detect when an external USB device is connected and make that appears first when you turn on . Off:...-ROM. Restore Menu Defaults RCVUN Single This sub-menu returns all of the XJ-S35 model projector. USB Settings Main Menu Items (XJ-S35 Only) The USB Settings main menu is available only when there is turned on the projector. On*: Select this sub-menu to restore the zoom setting that device the...


