Setup Guide
Page 1
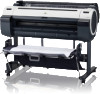
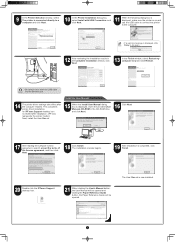
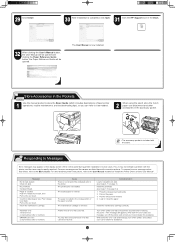
... the printer Detailed instructions The User Manual (electronic manual) includes the following information: ...iPF765 Printer and stand Installation space (W x D x H mm) 1704 × 1700 × 1362 Package Contents i g j c d e f a k h b a. Starter ink tanks: Bk, MBk (x 2), C, M, Y g. Sample paper h. Set of CD-ROMs k. Power cord • Some items are included with the printer. • Canon, the Canon logo, and imagePROGRAF... are trademarks or registered trademarks of CANON INC. • Microsoft and Windows are given in this manual...
... the printer Detailed instructions The User Manual (electronic manual) includes the following information: ...iPF765 Printer and stand Installation space (W x D x H mm) 1704 × 1700 × 1362 Package Contents i g j c d e f a k h b a. Starter ink tanks: Bk, MBk (x 2), C, M, Y g. Sample paper h. Set of CD-ROMs k. Power cord • Some items are included with the printer. • Canon, the Canon logo, and imagePROGRAF... are trademarks or registered trademarks of CANON INC. • Microsoft and Windows are given in this manual...
Setup Guide
Page 5
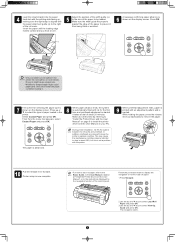
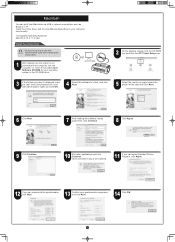
...For how to load roll paper, refer to the MEMO Basic Guide, to the User Manual installed at "Install the Printer Driver and the User Manual", or to the instructions displayed by referring to "Install the Printer Driver and the User Manual" on how to load roll paper. 1.Press Navigate. 2.Use the ▲ and...Doing so might cause a paper jam. • Wrinkled or warped paper might cause paper jams. Be sure to install the printer driver and the User Manual on the display screen. Guide and press OK. Insert the paper until the leading edge makes contact and you hear a tone. 5 Adjust the ...
...For how to load roll paper, refer to the MEMO Basic Guide, to the User Manual installed at "Install the Printer Driver and the User Manual", or to the instructions displayed by referring to "Install the Printer Driver and the User Manual" on how to load roll paper. 1.Press Navigate. 2.Use the ▲ and...Doing so might cause a paper jam. • Wrinkled or warped paper might cause paper jams. Be sure to install the printer driver and the User Manual on the display screen. Guide and press OK. Insert the paper until the leading edge makes contact and you hear a tone. 5 Adjust the ...
Setup Guide
Page 6
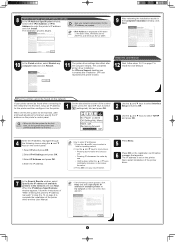
...the country or region of use the latest version of your questionnaire responses, and click Next. 6 Install the Printer Driver and the User Manual Windows You can respond to the questionnaire, click Next. 8 Confirm your computer. • Select Deactivate the block and click... printer with a USB cable, refer to the on-screen instructions during installation depending on page 6. Install the printer driver and the User Manual by following screen may not be displayed MEMO during installation of Administrator). For USB connections Install the printer driver • Use a USB...
...the country or region of use the latest version of your questionnaire responses, and click Next. 6 Install the Printer Driver and the User Manual Windows You can respond to the questionnaire, click Next. 8 Confirm your computer. • Select Deactivate the block and click... printer with a USB cable, refer to the on-screen instructions during installation depending on page 6. Install the printer driver and the User Manual by following screen may not be displayed MEMO during installation of Administrator). For USB connections Install the printer driver • Use a USB...
Setup Guide
Page 7
... completed, click Finish. 20 Double-click the iPFxxxx Support desktop icon. 21 When clicking the User's Manual button, the User Manual will be opened and clicking the Paper Reference Guide button, the Paper Reference Guide will be opened. 9 In the Printer ... The printer driver settings take effect after installation. (iPFxxxx represents the printer model.) Next, install the User Manual. 15 When the Install User Manual dialog box is displayed, insert the provided User Manuals CD-ROM in the Complete Installation window, click Next. 13 In the Finish window, select Restart my computer now...
... completed, click Finish. 20 Double-click the iPFxxxx Support desktop icon. 21 When clicking the User's Manual button, the User Manual will be opened and clicking the Paper Reference Guide button, the Paper Reference Guide will be opened. 9 In the Printer ... The printer driver settings take effect after installation. (iPFxxxx represents the printer model.) Next, install the User Manual. 15 When the Install User Manual dialog box is displayed, insert the provided User Manuals CD-ROM in the Complete Installation window, click Next. 13 In the Finish window, select Restart my computer now...

Setup Guide
Page 8
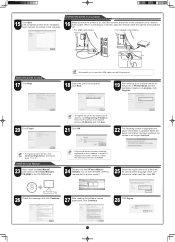
... the IP address of the printer to start the installation process. The installation process begins. When entering the printer's IP address manually After reading the precautions in the network and click Next. If the printer is already connected to the a network, proceed to...case. 7 When searching the available printer on page 9 to step 9 in RemoteUI. (→"Menu Settings", User Manual) (→"Configuring the Printer's TCP/IP Network Settings", User Manual) • Configure the setting for the printer. Proceed to setup and configure an IP address for assignment ...
... the IP address of the printer to start the installation process. The installation process begins. When entering the printer's IP address manually After reading the precautions in the network and click Next. If the printer is already connected to the a network, proceed to...case. 7 When searching the available printer on page 9 to step 9 in RemoteUI. (→"Menu Settings", User Manual) (→"Configuring the Printer's TCP/IP Network Settings", User Manual) • Configure the setting for the printer. Proceed to setup and configure an IP address for assignment ...
Setup Guide
Page 9
...9660; decreases the value by one. • Holding down either IPv4 Address or IPv6 Address to complete the installation of the printer driver and the User Manual. • If the following menus using the ▲ and ▼ keys on the printer. No Paper Loaded OK:Setting/Adj. When the... IP Address Specifications window appears, follow steps 15-21 on page 7 to Install the User Manual ▲ ▲ ▲ ▲ When the printer cannot be found when connecting to select (settings/adj. cart. and click Install. This ...
...9660; decreases the value by one. • Holding down either IPv4 Address or IPv6 Address to complete the installation of the printer driver and the User Manual. • If the following menus using the ▲ and ▼ keys on the printer. No Paper Loaded OK:Setting/Adj. When the... IP Address Specifications window appears, follow steps 15-21 on page 7 to Install the User Manual ▲ ▲ ▲ ▲ When the printer cannot be found when connecting to select (settings/adj. cart. and click Install. This ...
Setup Guide
Page 10
...computer, turn the computer on your questionnaire responses, and click Next. 14 Click OK. 10 Insert the provided User Software CD-ROM for your operating system in step 4 are installed. 11 If you can agree Extended Survey ...Program, click Agree. 12 If you can print from Macintosh via USB or network connections such as a user with administrative rights when installing the printer driver. Mac OS X 10.4.11 or later Install the printer driver &#... Click Continue. 10 Exit other applications and click Continue. Install the printer driver and the User Manual depending on .
...computer, turn the computer on your questionnaire responses, and click Next. 14 Click OK. 10 Insert the provided User Software CD-ROM for your operating system in step 4 are installed. 11 If you can agree Extended Survey ...Program, click Agree. 12 If you can print from Macintosh via USB or network connections such as a user with administrative rights when installing the printer driver. Mac OS X 10.4.11 or later Install the printer driver &#... Click Continue. 10 Exit other applications and click Continue. Install the printer driver and the User Manual depending on .
Setup Guide
Page 11
... the Ethernet port. When the paper information has been updated, the screen is on the computer, a screen is updated. Install the User Manual 23 Next, install the User Manual. Next, connect the printer to the computer. 16 Make sure that the printer is no longer displayed. • To register another ... the printer in Printer Name and the installation location in the CD-ROM drive. • If the same model of the user manual to 19. Insert the provided User Manuals CD-ROM in Location, click Register. 20 Click Finish. • To register the printer by entering its IP MEMO address,...
... the Ethernet port. When the paper information has been updated, the screen is on the computer, a screen is updated. Install the User Manual 23 Next, install the User Manual. Next, connect the printer to the computer. 16 Make sure that the printer is no longer displayed. • To register another ... the printer in Printer Name and the installation location in the CD-ROM drive. • If the same model of the user manual to 19. Insert the provided User Manuals CD-ROM in Location, click Register. 20 Click Finish. • To register the printer by entering its IP MEMO address,...
Setup Guide
Page 12
... When using the stand, store the 3-inch paper core attachment and other accessories in the Dock. 32 When clicking the User's Manual button, the User Manual will be opened and clicking the Paper Reference Guide button, the Paper Reference Guide will be opened. Paper is not installed...some cases. Install the maintenance cartridge correctly. Write down the error code and message, turn off the printer, and contact your Canon dealer for assistance. For other than these, refer to Messages Error messages may not indicate a problem with corrective actions. xxxxxxxx-xxxx...
... When using the stand, store the 3-inch paper core attachment and other accessories in the Dock. 32 When clicking the User's Manual button, the User Manual will be opened and clicking the Paper Reference Guide button, the Paper Reference Guide will be opened. Paper is not installed...some cases. Install the maintenance cartridge correctly. Write down the error code and message, turn off the printer, and contact your Canon dealer for assistance. For other than these, refer to Messages Error messages may not indicate a problem with corrective actions. xxxxxxxx-xxxx...


