
Getting Started Guide
Page 1
...Transfer Utility LE Startup Guide 1 Installing the Camcorder's Instruction Manual (PDF File) This guide only introduces the most basic functions of the camcorder to the compact power adapter before using memory... recordings From the index screen: 1. DIE-0485-000 HD Camcorder DIE0485000 Getting Started Package Contents HD Camcorder VIXIA HF R70 / VIXIA HF R72 / VIXIA HF R700 BP-727 Battery Pack [] ...compact power adapter from the camcorder and then from the power outlet. 3 Inserting a Memory Card You can use AM/PM. 5. www.canon.com/icpd/ * A...
...Transfer Utility LE Startup Guide 1 Installing the Camcorder's Instruction Manual (PDF File) This guide only introduces the most basic functions of the camcorder to the compact power adapter before using memory... recordings From the index screen: 1. DIE-0485-000 HD Camcorder DIE0485000 Getting Started Package Contents HD Camcorder VIXIA HF R70 / VIXIA HF R72 / VIXIA HF R700 BP-727 Battery Pack [] ...compact power adapter from the camcorder and then from the power outlet. 3 Inserting a Memory Card You can use AM/PM. 5. www.canon.com/icpd/ * A...
Getting Started Guide
Page 2
... and tablets. Important Safety InstructIons In these safety instructions the word "apparatus" refers to the Canon HD Camcorder VIXIA HF R72 / VIXIA HF R70 / VIXIA HF R700 and all its accessories. 1 Read these instructions. 2 Keep these low power wireless devices are associated with genuine...device. 1. Many studies of time. 11 Refer all instructions. 5 Do not use the NFC function to effortlessly connect the camcorder to the PDF Instruction Manual (; Canon U.S.A., Inc. "Dolby" and the double-D symbol are trademarks of Dolby Laboratories. • Wi-Fi is a registered trademark...
... and tablets. Important Safety InstructIons In these safety instructions the word "apparatus" refers to the Canon HD Camcorder VIXIA HF R72 / VIXIA HF R70 / VIXIA HF R700 and all its accessories. 1 Read these instructions. 2 Keep these low power wireless devices are associated with genuine...device. 1. Many studies of time. 11 Refer all instructions. 5 Do not use the NFC function to effortlessly connect the camcorder to the PDF Instruction Manual (; Canon U.S.A., Inc. "Dolby" and the double-D symbol are trademarks of Dolby Laboratories. • Wi-Fi is a registered trademark...
User Manual
Page 2
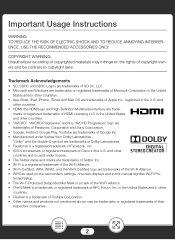
... Dolby Laboratories. • Facebook is a registered trademark of Facebook, Inc. • IOS is a trademark or registered trademark of Cisco in this manual signifies Wi-Fi Protected Setup. • The Wi-Fi Protected Setup Identifier Mark is a mark of the Wi-Fi Alliance. • The ... in the U.S. marks or registered trademarks of Toshiba Corporation. • Other names and products not mentioned above may infringe on the camcorder's settings, onscreen displays and in the U.S. Important Usage Instructions WARNING TO REDUCE THE RISK OF ELECTRIC SHOCK AND TO REDUCE ANNOYING INTERFERENCE...
... Dolby Laboratories. • Facebook is a registered trademark of Facebook, Inc. • IOS is a trademark or registered trademark of Cisco in this manual signifies Wi-Fi Protected Setup. • The Wi-Fi Protected Setup Identifier Mark is a mark of the Wi-Fi Alliance. • The ... in the U.S. marks or registered trademarks of Toshiba Corporation. • Other names and products not mentioned above may infringe on the camcorder's settings, onscreen displays and in the U.S. Important Usage Instructions WARNING TO REDUCE THE RISK OF ELECTRIC SHOCK AND TO REDUCE ANNOYING INTERFERENCE...
User Manual
Page 4
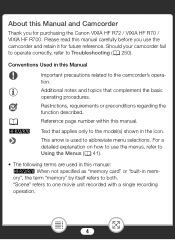
... to Troubleshooting (A 250). For a detailed explanation on how to use the camcorder and retain it for purchasing the Canon VIXIA HF R72 / VIXIA HF R70 / VIXIA HF R700. Should your camcorder fail to operate correctly, refer to one movie unit recorded with a single recording operation. 4 A Reference page number within this manual: N When not specified as "memory card" or "built-in this...
... to Troubleshooting (A 250). For a detailed explanation on how to use the camcorder and retain it for purchasing the Canon VIXIA HF R72 / VIXIA HF R70 / VIXIA HF R700. Should your camcorder fail to operate correctly, refer to one movie unit recorded with a single recording operation. 4 A Reference page number within this manual: N When not specified as "memory card" or "built-in this...

User Manual
Page 5
...of what function to use. Unless indicated otherwise, illustrations and menu icons refer to the O. • Illustrations of the camcorder's screen or a computer's screen included in this manual are simulated pictures taken with a number in it will take you to the beginning of the current chapter, where you will... the information and related functions covered in that the icon itself will change depending on the screen. • The photos included in this manual may show only relevant parts of the screen. • Navigation buttons: The navigation bar at the bottom of the page offers up to...
...of what function to use. Unless indicated otherwise, illustrations and menu icons refer to the O. • Illustrations of the camcorder's screen or a computer's screen included in this manual are simulated pictures taken with a number in it will take you to the beginning of the current chapter, where you will... the information and related functions covered in that the icon itself will change depending on the screen. • The photos included in this manual may show only relevant parts of the screen. • Navigation buttons: The navigation bar at the bottom of the page offers up to...

User Manual
Page 7
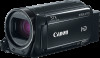
... About this Manual and Camcorder 4 The Camcorder's Functions in Real-Life Situations 12 Unique functions for special cases 12 Getting the look you want 13 Challenging subjects and shooting conditions 14 Playback, editing and others 15 N Wireless functions 16 Getting to Know the Camcorder 18 Supplied ...Accessories 18 Names of Parts 19 Preparations 24 Charging the Battery Pack 25 Using a Memory Card 29 Memory Cards Compatible for Use with the Camcorder .....29 Inserting and Removing a Memory Card 30 First...
... About this Manual and Camcorder 4 The Camcorder's Functions in Real-Life Situations 12 Unique functions for special cases 12 Getting the look you want 13 Challenging subjects and shooting conditions 14 Playback, editing and others 15 N Wireless functions 16 Getting to Know the Camcorder 18 Supplied ...Accessories 18 Names of Parts 19 Preparations 24 Charging the Battery Pack 25 Using a Memory Card 29 Memory Cards Compatible for Use with the Camcorder .....29 Inserting and Removing a Memory Card 30 First...

User Manual
Page 45
In that case, simply swipe up and down along the column of the desired option. In the [1 Other Settings] menus, settings are referenced throughout the manual like this example (to change the language), you will need to do the following: 1 Touch [0] to close the menu. In this : "1 > q >...to bring [1 Other Settings] to find the desired option. For brevity's sake, these settings are organized under submenus (tabs). Basic Operation of the camcorder's operation. In some screens, you can touch [K] to return to the previous screen or [X] to open the [1 Other Settings] menus. 45 Some...
In that case, simply swipe up and down along the column of the desired option. In the [1 Other Settings] menus, settings are referenced throughout the manual like this example (to change the language), you will need to do the following: 1 Touch [0] to close the menu. In this : "1 > q >...to bring [1 Other Settings] to find the desired option. For brevity's sake, these settings are organized under submenus (tabs). Basic Operation of the camcorder's operation. In some screens, you can touch [K] to return to the previous screen or [X] to open the [1 Other Settings] menus. 45 Some...

User Manual
Page 47
... turn on in blue (N) indicates that operating mode. Icons are indicated with a bar of icons. Basic Operation of the Camcorder Operating Modes In this manual, the camcorder's operating modes are divided into movie format, shooting modes and playback modes. Format Shooting Fmode 9N †ƒ ' Playback y} Movie Format Refers to switch between ...
... turn on in blue (N) indicates that operating mode. Icons are indicated with a bar of icons. Basic Operation of the Camcorder Operating Modes In this manual, the camcorder's operating modes are divided into movie format, shooting modes and playback modes. Format Shooting Fmode 9N †ƒ ' Playback y} Movie Format Refers to switch between ...

User Manual
Page 58
...Intelligent IS icon will change to the S end), while remaining stationary 58 Dark + Night Scene / - - ■ Intelligent IS Intelligent IS allows the camcorder to the T end / While following subjects at a distance (zoom closer to one of the following icons. Background Dark Dark + Spotlight - - In ...Icon Ä (Dynamic IS) È (Powered IS)* Shooting conditions Most general situations / When the zoom is set the image stabilization manually (A 222). People (moving left or right When zooming in on your shooting method. When the shooting mode is closer to select the ...
...Intelligent IS icon will change to the S end), while remaining stationary 58 Dark + Night Scene / - - ■ Intelligent IS Intelligent IS allows the camcorder to the T end / While following subjects at a distance (zoom closer to one of the following icons. Background Dark Dark + Spotlight - - In ...Icon Ä (Dynamic IS) È (Powered IS)* Shooting conditions Most general situations / When the zoom is set the image stabilization manually (A 222). People (moving left or right When zooming in on your shooting method. When the shooting mode is closer to select the ...

User Manual
Page 61
In this case, you can select either automatic or manual framing assistance. Automatic Framing Assistance 1 Select the automatic mode in advance. 0 > [1 Other Settings] > p > [Framing Assistance] > [k Automatic] > [X] 2 Zoom in the button indicates that ... find the subject. corder still. 61 The original zoom position is indicated by a white frame. • If the camcorder does not zoom out automatically, try moving the camcorder faster. 4 When the desired subject is active. Basic Recording ■ Framing Assistance Sometimes, while zooming in on the desired subject and touch [ ]. ...
In this case, you can select either automatic or manual framing assistance. Automatic Framing Assistance 1 Select the automatic mode in advance. 0 > [1 Other Settings] > p > [Framing Assistance] > [k Automatic] > [X] 2 Zoom in the button indicates that ... find the subject. corder still. 61 The original zoom position is indicated by a white frame. • If the camcorder does not zoom out automatically, try moving the camcorder faster. 4 When the desired subject is active. Basic Recording ■ Framing Assistance Sometimes, while zooming in on the desired subject and touch [ ]. ...

User Manual
Page 62
Manual Framing Assistance 1 Select the manual mode in advance. 0 > [1 Other Settings] > p > [Framing Assistance] > [l Manual] > [X] 2 Zoom in on the area indicated by a white frame. 62 Basic Recording • When you lose the subject, touch and hold [ ] to zoom out momentarily. • The original zoom position is indicated by the white frame. 1 2 3 • Operating the zoom lever while the camcorder is zooming in or out during automatic framing assistance will zoom in on the desired subject. 3 If you stop moving the camcorder, it will stop the automatic zoom operation.
Manual Framing Assistance 1 Select the manual mode in advance. 0 > [1 Other Settings] > p > [Framing Assistance] > [l Manual] > [X] 2 Zoom in on the area indicated by a white frame. 62 Basic Recording • When you lose the subject, touch and hold [ ] to zoom out momentarily. • The original zoom position is indicated by the white frame. 1 2 3 • Operating the zoom lever while the camcorder is zooming in or out during automatic framing assistance will zoom in on the desired subject. 3 If you stop moving the camcorder, it will stop the automatic zoom operation.

User Manual
Page 82
If the camcorder is set the exposure automatically but control manually some advanced ...settings. Shooting mode button 1 Touch the shooting mode button on the top left corner of the screen. • The button will show one of the Smart AUTO icons (A 57). • Alternatively, you can also use the ' shooting mode when you want the camcorder... special scenes. Recording Settings and Shooting Modes Selecting the Shooting Mode In addition to N mode, the camcorder features a number of shooting modes that offer the most appropriate settings for 9 mode. You can open...
If the camcorder is set the exposure automatically but control manually some advanced ...settings. Shooting mode button 1 Touch the shooting mode button on the top left corner of the screen. • The button will show one of the Smart AUTO icons (A 57). • Alternatively, you can also use the ' shooting mode when you want the camcorder... special scenes. Recording Settings and Shooting Modes Selecting the Shooting Mode In addition to N mode, the camcorder features a number of shooting modes that offer the most appropriate settings for 9 mode. You can open...

User Manual
Page 90
... become overexposed on cloudy days or in other modes. White points may appear on the screen. • [N Low Light]: - In such case, adjust the focus manually. • [P Fireworks]: To avoid camcorder blur (blur due to the camcorder moving) we recommend using a tripod. 90 Autofocus may leave a trailing afterimage. -
... become overexposed on cloudy days or in other modes. White points may appear on the screen. • [N Low Light]: - In such case, adjust the focus manually. • [P Fireworks]: To avoid camcorder blur (blur due to the camcorder moving) we recommend using a tripod. 90 Autofocus may leave a trailing afterimage. -

User Manual
Page 113
...Scene mode is set to adjust the focus. 113 Focus Autofocus may not work well on the following subjects. In such case, focus manually. • Reflective surfaces • Subjects with low contrast or without vertical lines • Fast moving subjects • Through wet windows...; Night scenes Format Shooting Fmode 9N †ƒ ' Playback y} 1 Adjust the zoom before adjusting the focus. 2 Open the manual focus screen. [2] > [< Focus] ■ Manual Focus 1 Touch [D]. • Touch [D] again to return the camcorder to autofocus. 2 Touch and hold [F] or [E] to [P Fireworks].
...Scene mode is set to adjust the focus. 113 Focus Autofocus may not work well on the following subjects. In such case, focus manually. • Reflective surfaces • Subjects with low contrast or without vertical lines • Fast moving subjects • Through wet windows...; Night scenes Format Shooting Fmode 9N †ƒ ' Playback y} 1 Adjust the zoom before adjusting the focus. 2 Open the manual focus screen. [2] > [< Focus] ■ Manual Focus 1 Touch [D]. • Touch [D] again to return the camcorder to autofocus. 2 Touch and hold [F] or [E] to [P Fireworks].

User Manual
Page 114
... The Touch AF mark (I) will flash and the camcorder will focus automatically on the subject or spot you touched on the screen. • Touch [D] again to return the camcorder to autofocus. • If necessary, you can further adjust the focus manually (step 2 in the previous procedure). 2 Touch ...[X] to lock the focus at the selected distance. • During manual focus, [D] will appear on the screen. • When...
... The Touch AF mark (I) will flash and the camcorder will focus automatically on the subject or spot you touched on the screen. • Touch [D] again to return the camcorder to autofocus. • If necessary, you can further adjust the focus manually (step 2 in the previous procedure). 2 Touch ...[X] to lock the focus at the selected distance. • During manual focus, [D] will appear on the screen. • When...

User Manual
Page 124
... • When referring to [ä Mic. Level] (A 239) for manually adjusting the audio recording level does not apply to this camcorder's correct procedure. • When an external microphone is connected to the camcorder's MIC terminal, the audio level indicator (A 239) will be displayed automatically.... 124 For details on connecting and using the WM-V1, refer to the instruction manual supplied with the microphone. ■ Using Commercially ...
... • When referring to [ä Mic. Level] (A 239) for manually adjusting the audio recording level does not apply to this camcorder's correct procedure. • When an external microphone is connected to the camcorder's MIC terminal, the audio level indicator (A 239) will be displayed automatically.... 124 For details on connecting and using the WM-V1, refer to the instruction manual supplied with the microphone. ■ Using Commercially ...

User Manual
Page 154
Refer to the instruction manual of the connected TV. 4 Turn on the camcorder and set it to playback mode. 5 Open the desired index screen (A 64, 70). • Play back the desired movies or photos. • If remaining battery ... a TV Screen Playback on the connected TV. • On the TV, select as the video input the same terminal to which you can power the camcorder using the compact power adapter so the battery pack will not be consumed. • Sound from the built-in speaker will be muted while a cable...
Refer to the instruction manual of the connected TV. 4 Turn on the camcorder and set it to playback mode. 5 Open the desired index screen (A 64, 70). • Play back the desired movies or photos. • If remaining battery ... a TV Screen Playback on the connected TV. • On the TV, select as the video input the same terminal to which you can power the camcorder using the compact power adapter so the battery pack will not be consumed. • Sound from the built-in speaker will be muted while a cable...

User Manual
Page 155
...Fi functions. • Connection 2: When you play back AVCHD movies you record with this camcorder directly from the HDMI OUT terminal or AV OUT/× terminal while using the camcorder. • When playing back scenes recorded in mode on a TV or external monitor, increasing... the brightness of the TV, computer monitor or other screen is recommended. • Depending on the device used, correct playback may not be displayed fully. 155 Otherwise, change the aspect ratio of the TV manually...
...Fi functions. • Connection 2: When you play back AVCHD movies you record with this camcorder directly from the HDMI OUT terminal or AV OUT/× terminal while using the camcorder. • When playing back scenes recorded in mode on a TV or external monitor, increasing... the brightness of the TV, computer monitor or other screen is recommended. • Depending on the device used, correct playback may not be displayed fully. 155 Otherwise, change the aspect ratio of the TV manually...
User Manual
Page 163
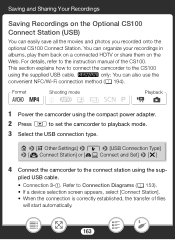
... 3-ቢ. Refer to the connect station using the supplied USB cable. Format Shooting Fmode 9N †ƒ ' Playback y} 1 Power the camcorder using the compact power adapter. 2 Press ] to set the camcorder to playback mode. 3 Select the USB connection type. 0 > [1 Other Settings] > q > [USB Connection Type] > [ Connect ... the CS100. For details, refer to the CS100 using the sup- This section explains how to connect the camcorder to the instruction manual of files will start automatically. 163 You can easily save all the movies and photos you recorded onto the ...
... 3-ቢ. Refer to the connect station using the supplied USB cable. Format Shooting Fmode 9N †ƒ ' Playback y} 1 Power the camcorder using the compact power adapter. 2 Press ] to set the camcorder to playback mode. 3 Select the USB connection type. 0 > [1 Other Settings] > q > [USB Connection Type] > [ Connect ... the CS100. For details, refer to the CS100 using the sup- This section explains how to connect the camcorder to the instruction manual of files will start automatically. 163 You can easily save all the movies and photos you recorded onto the ...

User Manual
Page 164
...†ƒ ' Playback y} ■ Saving a Memory onto an External Hard Drive 1 Power the camcorder using the compact power adapter. 2 Press ] to set the camcorder to playback mode. 3 Connect the camcorder to Connection Diagrams (A 153). 164 N Memory Save: Saving an Entire Memory onto an External Hard Drive...hard drive. • Connection 3. Saving and Sharing Your Recordings • You can also use it with this camcorder for the first time. Refer to the instruction manual of the CS100. 5 Disconnect the USB cable. • The index screen will appear again on the connect ...
...†ƒ ' Playback y} ■ Saving a Memory onto an External Hard Drive 1 Power the camcorder using the compact power adapter. 2 Press ] to set the camcorder to playback mode. 3 Connect the camcorder to Connection Diagrams (A 153). 164 N Memory Save: Saving an Entire Memory onto an External Hard Drive...hard drive. • Connection 3. Saving and Sharing Your Recordings • You can also use it with this camcorder for the first time. Refer to the instruction manual of the CS100. 5 Disconnect the USB cable. • The index screen will appear again on the connect ...


