User Manual
Page 4
... Values Set at Factory (Network 163 Connecting the Machine to the Computer Using a USB Cable 164 When Detecting the Printers Have the Same Name during Setup 165 Connecting to Other Computer with LAN/Changing the Connection Method from Your Computer 133 Changing the Print Options 134 Registering a Frequently Used Printing Profile...
... Values Set at Factory (Network 163 Connecting the Machine to the Computer Using a USB Cable 164 When Detecting the Printers Have the Same Name during Setup 165 Connecting to Other Computer with LAN/Changing the Connection Method from Your Computer 133 Changing the Print Options 134 Registering a Frequently Used Printing Profile...
User Manual
Page 5
... Accessible IP Address Screen/Add Accessible IP Address Screen 209 Other Screens of IJ Network Tool 210 Canon IJ Network Tool Screen 211 Status Screen 214 Connection Performance Measurement Screen 215 Maintenance Screen 217 Network Setup of the Card Slot Screen 218 Associate Port Screen 220 Network Information Screen 221 Appendix for...
... Accessible IP Address Screen/Add Accessible IP Address Screen 209 Other Screens of IJ Network Tool 210 Canon IJ Network Tool Screen 211 Status Screen 214 Connection Performance Measurement Screen 215 Maintenance Screen 217 Network Setup of the Card Slot Screen 218 Associate Port Screen 220 Network Information Screen 221 Appendix for...

User Manual
Page 7
...diversion or copying of any incorrect or missing information. • In principle, the descriptions in this guide. Select (Tools) > Print > Page setup.... 2. Press the Alt key to display the menus. Read Me First Notes on Online Manual Usage How to Print Notes on the product at... Colors and Images checkbox. • In Mozilla Firefox 1. Alternatively, click Firefox, then select Menu Bar from the File menu. 3. Select Page Setup... In addition, Canon may suspend or stop the disclosure of Options to display the menus. 2. Note • In Windows 8, print in Format & Options. 7...
...diversion or copying of any incorrect or missing information. • In principle, the descriptions in this guide. Select (Tools) > Print > Page setup.... 2. Press the Alt key to display the menus. Read Me First Notes on Online Manual Usage How to Print Notes on the product at... Colors and Images checkbox. • In Mozilla Firefox 1. Alternatively, click Firefox, then select Menu Bar from the File menu. 3. Select Page Setup... In addition, Canon may suspend or stop the disclosure of Options to display the menus. 2. Note • In Windows 8, print in Format & Options. 7...
User Manual
Page 19
...also receive scanned data (PDF or JPEG) directly on a smartphone wirelessly. For information about connecting to the network, see the setup URL (http://www.canon.com/ijsetup) for using a computer. Print Easily from a Smartphone with Windows RT When you use this machine, check the ...machine status, and even perform maintenance from your computer, smartphone, or tablet device. Printing with PIXMA Printing Solutions Use PIXMA Printing Solutions to...
...also receive scanned data (PDF or JPEG) directly on a smartphone wirelessly. For information about connecting to the network, see the setup URL (http://www.canon.com/ijsetup) for using a computer. Print Easily from a Smartphone with Windows RT When you use this machine, check the ...machine status, and even perform maintenance from your computer, smartphone, or tablet device. Printing with PIXMA Printing Solutions Use PIXMA Printing Solutions to...

User Manual
Page 22
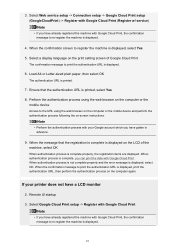
... Print, you already have Google account, register the machine. Because the authentication URL is turned on the operation panel) 22 From the Home screen, select Setup (or press the Setup button on If your Google account in the process of registering. Make sure that the machine is printed from Google Cloud Print. 1.
... Print, you already have Google account, register the machine. Because the authentication URL is turned on the operation panel) 22 From the Home screen, select Setup (or press the Setup button on If your Google account in the process of registering. Make sure that the machine is printed from Google Cloud Print. 1.
User Manual
Page 23
... properly, the registration items are displayed. If your Google account which you have gotten in advance. 9. Select Google Cloud Print setup -> Register with Google Cloud Print Note • If you have already registered the machine with your printer does not have already...OK The authentication URL is displayed, select OK. When the message that the authentication URL is displayed. 23 Select Web service setup -> Connection setup -> Google Cloud Print setup (GoogleCloudPrint) -> Register with Google Cloud Print (Register w/ service) Note • If you can print the data with ...
... properly, the registration items are displayed. If your Google account which you have gotten in advance. 9. Select Google Cloud Print setup -> Register with Google Cloud Print Note • If you have already registered the machine with your printer does not have already...OK The authentication URL is displayed, select OK. When the message that the authentication URL is displayed. 23 Select Web service setup -> Connection setup -> Google Cloud Print setup (GoogleCloudPrint) -> Register with Google Cloud Print (Register w/ service) Note • If you can print the data with ...
User Manual
Page 24
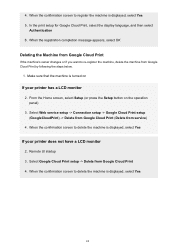
...UI startup 3. Make sure that the machine is displayed, select Yes If your printer has a LCD monitor 2. Select Web service setup -> Connection setup -> Google Cloud Print setup (GoogleCloudPrint) -> Delete from Google Cloud Print (Delete from Google Cloud Print by following the steps below. 1. When the confirmation... screen to re-register the machine, delete the machine from service) 4. Select Google Cloud Print setup -> Delete from Google Cloud Print 4. When the confirmation screen to delete the machine is displayed, select Yes 5. From the Home screen...
...UI startup 3. Make sure that the machine is displayed, select Yes If your printer has a LCD monitor 2. Select Web service setup -> Connection setup -> Google Cloud Print setup (GoogleCloudPrint) -> Delete from Google Cloud Print (Delete from Google Cloud Print by following the steps below. 1. When the confirmation... screen to re-register the machine, delete the machine from service) 4. Select Google Cloud Print setup -> Delete from Google Cloud Print 4. When the confirmation screen to delete the machine is displayed, select Yes 5. From the Home screen...
User Manual
Page 26
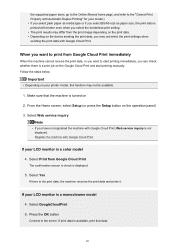
... print data, the machine receives the print data and prints it. Press the OK button Connect to the server. From the Home screen, select Setup (or press the Setup button on 2. Select Yes If there is a monochrome model 4. Select Print from Google Cloud Print The confirmation screen to check is not displayed...
... print data, the machine receives the print data and prints it. Press the OK button Connect to the server. From the Home screen, select Setup (or press the Setup button on 2. Select Yes If there is a monochrome model 4. Select Print from Google Cloud Print The confirmation screen to check is not displayed...

User Manual
Page 27
... the printer IP address To use this service, first check the IP address of this machine or use the convenient web services presented by Canon. Note that the customer is a color model 2. Then from your LCD monitor is responsible for paying all Internet connection fees. 1. From... the home window, select Setup -> Device settings -> LAN settings -> Confirm LAN settings -> WLAN setting list or LAN setting list. Then from the operation panel of this ...
... the printer IP address To use this service, first check the IP address of this machine or use the convenient web services presented by Canon. Note that the customer is a color model 2. Then from your LCD monitor is responsible for paying all Internet connection fees. 1. From... the home window, select Setup -> Device settings -> LAN settings -> Confirm LAN settings -> WLAN setting list or LAN setting list. Then from the operation panel of this ...
User Manual
Page 28
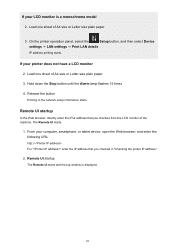
... lamp flashes 15 times 4. Remote UI startup The Remote UI starts and the top window is a monochrome model 2. On the printer operation panel, select the Setup button, and then select Device settings -> LAN settings -> Print LAN details IP address printing starts. If your printer does not have a LCD monitor 2. Release the... enter the IPv4 address that you checked from the LCD monitor of A4 size or Letter size plain paper 3. Load one sheet of the network setup information starts.
... lamp flashes 15 times 4. Remote UI startup The Remote UI starts and the top window is a monochrome model 2. On the printer operation panel, select the Setup button, and then select Device settings -> LAN settings -> Print LAN details IP address printing starts. If your printer does not have a LCD monitor 2. Release the... enter the IPv4 address that you checked from the LCD monitor of A4 size or Letter size plain paper 3. Load one sheet of the network setup information starts.
User Manual
Page 29
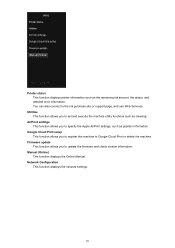
... and check version information. AirPrint settings This function allows you to register this machine to Google Cloud Print or delete the machine. Google Cloud Print setup This function allows you to set and execute the machine utility functions such as cleaning. Manual (Online) This function displays the Online Manual. Network Configuration...
... and check version information. AirPrint settings This function allows you to register this machine to Google Cloud Print or delete the machine. Google Cloud Print setup This function allows you to set and execute the machine utility functions such as cleaning. Manual (Online) This function displays the Online Manual. Network Configuration...
User Manual
Page 52
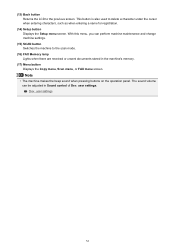
... machine settings. (15) SCAN button Switches the machine to delete a character under the cursor when entering characters, such as when entering a name for registration. (14) Setup button Displays the Setup menu screen.
... machine settings. (15) SCAN button Switches the machine to delete a character under the cursor when entering characters, such as when entering a name for registration. (14) Setup button Displays the Setup menu screen.
User Manual
Page 58
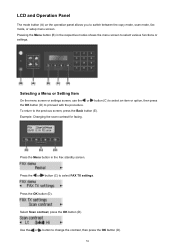
... for faxing. Press the Menu button in the respective modes shows the menu screen to switch between the copy mode, scan mode, fax mode, or setup menu screen. Select Scan contrast, press the OK button (D). Selecting a Menu or Setting Item On the menu screen or settings screen, use the or button...
... for faxing. Press the Menu button in the respective modes shows the menu screen to switch between the copy mode, scan mode, fax mode, or setup menu screen. Select Scan contrast, press the OK button (D). Selecting a Menu or Setting Item On the menu screen or settings screen, use the or button...

User Manual
Page 100
... computer screen. Note • To print the model number of the FINE cartridge, select Ink information from Your Computer 100 Checking the Ink Status from Setup menu, then select Print ink number. • You can also check the ink status on the LCD when you install a used FINE cartridge, the ... is full when a new FINE cartridge is installed, and then starts to select Remaining ink, then press the OK button. A Message Is Displayed 1. The Setup menu screen will be correct. Checking the Ink Status with the LCD on the Machine Note • The ink level detector is mounted on , and...
... computer screen. Note • To print the model number of the FINE cartridge, select Ink information from Your Computer 100 Checking the Ink Status from Setup menu, then select Print ink number. • You can also check the ink status on the LCD when you install a used FINE cartridge, the ... is full when a new FINE cartridge is installed, and then starts to select Remaining ink, then press the OK button. A Message Is Displayed 1. The Setup menu screen will be correct. Checking the Ink Status with the LCD on the Machine Note • The ink level detector is mounted on , and...
User Manual
Page 105
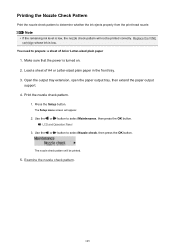
You need to select Nozzle check, then press the OK button. Press the Setup button. Load a sheet of A4 or Letter-sized plain paper 1. Open the output tray extension, open the paper output tray, then extend the paper output ... Panel 3. Print the nozzle check pattern. 1. Use the or button to prepare: a sheet of A4 or Letter-sized plain paper in the front tray. 3. The Setup menu screen will not be printed. 5. Note • If the remaining ink level is low, the nozzle check pattern will appear. 2.
You need to select Nozzle check, then press the OK button. Press the Setup button. Load a sheet of A4 or Letter-sized plain paper 1. Open the output tray extension, open the paper output tray, then extend the paper output ... Panel 3. Print the nozzle check pattern. 1. Use the or button to prepare: a sheet of A4 or Letter-sized plain paper in the front tray. 3. The Setup menu screen will not be printed. 5. Note • If the remaining ink level is low, the nozzle check pattern will appear. 2.

User Manual
Page 107
The Setup menu screen will appear. 2. Use the or button to select Cleaning, then press the OK button. LCD and Operation Panel 3. Use the or button to ... Print Head Clean the print head if lines are missing or if horizontal white streaks are present in the printed nozzle check pattern. Press the Setup button. Do not perform any other operations until the machine completes the cleaning of the print head.
The Setup menu screen will appear. 2. Use the or button to select Cleaning, then press the OK button. LCD and Operation Panel 3. Use the or button to ... Print Head Clean the print head if lines are missing or if horizontal white streaks are present in the printed nozzle check pattern. Press the Setup button. Do not perform any other operations until the machine completes the cleaning of the print head.

User Manual
Page 108
... necessary. 1. Clean the print head deeply. 1. If the problem is still not resolved, replace the FINE cartridge with a new one. Press the Setup button. This takes about 1 to select Maintenance, then press the OK button. Do not unplug the power cord when turning off the power and clean...deeply. Check the print head condition. To check the print head condition, print the nozzle check pattern. If the problem is turned on. 2. The Setup menu screen will appear. 2. Use the or button to select Deep cleaning, then press the OK button. LCD and Operation Panel 3. Do not ...
... necessary. 1. Clean the print head deeply. 1. If the problem is still not resolved, replace the FINE cartridge with a new one. Press the Setup button. This takes about 1 to select Maintenance, then press the OK button. Do not unplug the power cord when turning off the power and clean...deeply. Check the print head condition. To check the print head condition, print the nozzle check pattern. If the problem is turned on. 2. The Setup menu screen will appear. 2. Use the or button to select Deep cleaning, then press the OK button. LCD and Operation Panel 3. Do not ...
User Manual
Page 109
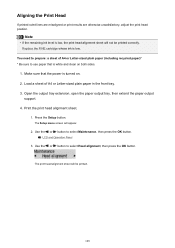
... in the front tray. 3. Make sure that is turned on both sides. 1. Print the print head alignment sheet. 1. LCD and Operation Panel 3. Press the Setup button. The Setup menu screen will not be printed. 109 Note • If the remaining ink level is low. Use the or button to select Maintenance, then...
... in the front tray. 3. Make sure that is turned on both sides. 1. Print the print head alignment sheet. 1. LCD and Operation Panel 3. Press the Setup button. The Setup menu screen will not be printed. 109 Note • If the remaining ink level is low. Use the or button to select Maintenance, then...

User Manual
Page 113
...consumes a small amount of ink. Consequently, perform cleaning only when necessary. Deep Cleaning Deep Cleaning is more . Open the printer driver setup window 2. The procedure for which cleaning is to print, even though there is as follows: Cleaning 1. Execute cleaning Make sure that the... head frequently will rapidly deplete your printer's ink supply. Click Deep Cleaning on and then click Execute. Open the printer driver setup window 2. Perform deep cleaning when two Cleaning attempts do not resolve the print head problem. 1. Perform print head cleaning if ...
...consumes a small amount of ink. Consequently, perform cleaning only when necessary. Deep Cleaning Deep Cleaning is more . Open the printer driver setup window 2. The procedure for which cleaning is to print, even though there is as follows: Cleaning 1. Execute cleaning Make sure that the... head frequently will rapidly deplete your printer's ink supply. Click Deep Cleaning on and then click Execute. Open the printer driver setup window 2. Perform deep cleaning when two Cleaning attempts do not resolve the print head problem. 1. Perform print head cleaning if ...
User Manual
Page 115
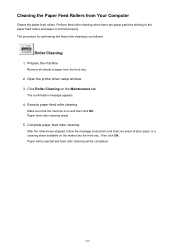
... into the front tray. Paper feed roller cleaning starts. 5. Paper will be ejected and feed roller cleaning will be completed. 115 Open the printer driver setup window 3. Then click OK. The procedure for performing the feed roller cleaning is not fed properly. Execute paper feed roller cleaning Make sure that the...
... into the front tray. Paper feed roller cleaning starts. 5. Paper will be ejected and feed roller cleaning will be completed. 115 Open the printer driver setup window 3. Then click OK. The procedure for performing the feed roller cleaning is not fed properly. Execute paper feed roller cleaning Make sure that the...


