Quick Start Guide
Page 4
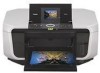
... in order that promotes energy saving through the use guide to be understood to your Canon PIXMA MP810 Photo All-in part, without notice. It is a trademark of Canon U.S.A., Inc. © 2006 Canon U.S.A., Inc. has reviewed this manual and in any form, in whole or in... products are available for efficiency. As an ENERGY STAR® Partner, Canon Inc. About Consumables Consumables (ink tanks / FINE Cartridges) are office equipment such as computers, monitors, printers, faxes and copiers. Canon PIXMA MP810 Photo All-in any guides or related documents are believed reliable, but ...
... in order that promotes energy saving through the use guide to be understood to your Canon PIXMA MP810 Photo All-in part, without notice. It is a trademark of Canon U.S.A., Inc. © 2006 Canon U.S.A., Inc. has reviewed this manual and in any form, in whole or in... products are available for efficiency. As an ENERGY STAR® Partner, Canon Inc. About Consumables Consumables (ink tanks / FINE Cartridges) are office equipment such as computers, monitors, printers, faxes and copiers. Canon PIXMA MP810 Photo All-in any guides or related documents are believed reliable, but ...
Quick Start Guide
Page 5
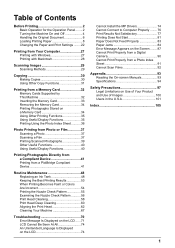
... Printing Photographs Directly from a Compliant Device 41 Printing from a PictBridge Compliant Device 41 Routine Maintenance 48 Replacing an Ink Tank 48 Keeping the Best Printing Results 53 When Printing Becomes Faint or Colors Are Incorrect 54 Printing the Nozzle Check Pattern 55 Examining the Nozzle Check Pattern ...........56 Print Head Cleaning 58...
... Printing Photographs Directly from a Compliant Device 41 Printing from a PictBridge Compliant Device 41 Routine Maintenance 48 Replacing an Ink Tank 48 Keeping the Best Printing Results 53 When Printing Becomes Faint or Colors Are Incorrect 54 Printing the Nozzle Check Pattern 55 Examining the Nozzle Check Pattern ...........56 Print Head Cleaning 58...
Quick Start Guide
Page 7
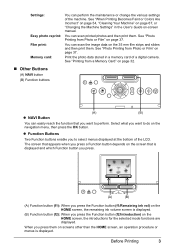
...function that is displayed and which Function button you press. (A) (B) (A) Function button (f1): When you press the Function button (f1/Remaining ink vol) on -screen manual. See "Photo Printing from Photo or Film" on page 37. z Function Buttons Two Function buttons enable you press... buttons (A) (B) z NAVI Button You can perform the maintenance or change the various settings of a digital camera. See "When Printing Becomes Faint or Colors Are Incorrect" on page 54, "Cleaning Your Machine" on page 67, or "Changing the Machine Settings" in a memory card of the machine. See...
...function that is displayed and which Function button you press. (A) (B) (A) Function button (f1): When you press the Function button (f1/Remaining ink vol) on -screen manual. See "Photo Printing from Photo or Film" on page 37. z Function Buttons Two Function buttons enable you press... buttons (A) (B) z NAVI Button You can perform the maintenance or change the various settings of a digital camera. See "When Printing Becomes Faint or Colors Are Incorrect" on page 54, "Cleaning Your Machine" on page 67, or "Changing the Machine Settings" in a memory card of the machine. See...

Quick Start Guide
Page 8
.... 2 If you are installed. z The machine is not lit. See "Keeping the Best Printing Results" on your computer (or a compatible device). z The Print Head and ink tanks are using the machine connected to your computer. „ Turning off the Machine 1 To turn on page 53. 4 Before Printing When the POWER lamp...
.... 2 If you are installed. z The machine is not lit. See "Keeping the Best Printing Results" on your computer (or a compatible device). z The Print Head and ink tanks are using the machine connected to your computer. „ Turning off the Machine 1 To turn on page 53. 4 Before Printing When the POWER lamp...

Quick Start Guide
Page 10
Note Make sure any glue, ink, correction fluid, or the like on the original document is completely dry before loading it on the Platen Glass. 1 Load the original document on the ...
Note Make sure any glue, ink, correction fluid, or the like on the original document is completely dry before loading it on the Platen Glass. 1 Load the original document on the ...
Quick Start Guide
Page 14
... (weighing less than 64 gsm / 17 lb) z Paper that is dry (approximately 30 minutes). z Do not attempt to dry the ink with holes z Paper that is too thick (non-Canon genuine paper weighing more than a post card, including plain paper or notepad paper cut to a small size. z Images may appear indistinct... paper, do not use the following types of the paper to turn yellow. 10 Before Printing Colors in hot or humid conditions. We recommend to allow the ink to dry for 24 hours before the ink is completely dry. z Media Types You Cannot Use Do not use paper thinner than 105 gsm...
... (weighing less than 64 gsm / 17 lb) z Paper that is dry (approximately 30 minutes). z Do not attempt to dry the ink with holes z Paper that is too thick (non-Canon genuine paper weighing more than a post card, including plain paper or notepad paper cut to a small size. z Images may appear indistinct... paper, do not use the following types of the paper to turn yellow. 10 Before Printing Colors in hot or humid conditions. We recommend to allow the ink to dry for 24 hours before the ink is completely dry. z Media Types You Cannot Use Do not use paper thinner than 105 gsm...

Quick Start Guide
Page 52
...page 54. „ Getting the Ink Level Information You can continue printing for a while, but we recommend you to install the ink tanks in the incorrect position. For details, see "When Printing Becomes Faint or Colors Are Incorrect" on the LCD, an ink tank error has occurred and the ...machine is low: ......Repeats The ink lamp flashes slowly (at around 3-second intervals). Black:...
...page 54. „ Getting the Ink Level Information You can continue printing for a while, but we recommend you to install the ink tanks in the incorrect position. For details, see "When Printing Becomes Faint or Colors Are Incorrect" on the LCD, an ink tank error has occurred and the ...machine is low: ......Repeats The ink lamp flashes slowly (at around 3-second intervals). Black:...
Quick Start Guide
Page 53
symbol is recommended after the printing. Replacing the ink tank is displayed above an ink tank (B) (B) Ink tanks that Canon shall not be liable for at least 5 seconds, and then release it . If the "!" z Ink may have run out. Then printing can continue. Press and hold the Stop/Reset ... to continue printing, press the OK button with low ink If the "X" symbol is in this operation, releasing the function for detecting the remaining ink level. If an empty ink tank is recommended. Replace the ink tank with no ink z Ink has run out. z If you want to cancel printing...
symbol is recommended after the printing. Replacing the ink tank is displayed above an ink tank (B) (B) Ink tanks that Canon shall not be liable for at least 5 seconds, and then release it . If the "!" z Ink may have run out. Then printing can continue. Press and hold the Stop/Reset ... to continue printing, press the OK button with low ink If the "X" symbol is in this operation, releasing the function for detecting the remaining ink level. If an empty ink tank is recommended. Replace the ink tank with no ink z Ink has run out. z If you want to cancel printing...
Quick Start Guide
Page 54
...moves to maintain the machine's performance. This will not be necessary to the right. z Color ink may not operate properly when it immediately with such tanks, the machine will cause the ink tank to dry out, and the machine may be consumed even when printing a black-...inform you remove an ink tank, replace it . „ Replacing Ink Tanks When ink tanks run out of specified Canon brand ink tanks. To maintain optimal printing quality, use an ink tank within six months of first use of ink, replace them using the following steps. Important Handling Ink z To maintain optimal...
...moves to maintain the machine's performance. This will not be necessary to the right. z Color ink may not operate properly when it immediately with such tanks, the machine will cause the ink tank to dry out, and the machine may be consumed even when printing a black-...inform you remove an ink tank, replace it . „ Replacing Ink Tanks When ink tanks run out of specified Canon brand ink tanks. To maintain optimal printing quality, use an ink tank within six months of first use of ink, replace them using the following steps. Important Handling Ink z To maintain optimal...
Quick Start Guide
Page 55
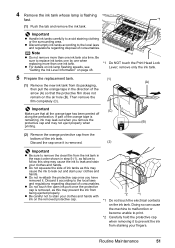
.... *2 Carefully hold the protective cap when removing it . Note z Do not remove more than one ink tank. remove only the ink tank. 5 Prepare the replacement tank. (1) (A) (1) Remove the new ink tank from its packaging, then pull the orange tape in step 5-(1), as failure to follow this step ... not to leak and stain your clothes and hands. Discard it is flashing fast. *1 (1) Push the tab and remove the ink tank. Important z Handle ink tanks carefully to the local laws and regulations regarding disposal of the arrow (A) so that all the orange tape has been peeled off...
.... *2 Carefully hold the protective cap when removing it . Note z Do not remove more than one ink tank. remove only the ink tank. 5 Prepare the replacement tank. (1) (A) (1) Remove the new ink tank from its packaging, then pull the orange tape in step 5-(1), as failure to follow this step ... not to leak and stain your clothes and hands. Discard it is flashing fast. *1 (1) Push the tab and remove the ink tank. Important z Handle ink tanks carefully to the local laws and regulations regarding disposal of the arrow (A) so that all the orange tape has been peeled off...
Quick Start Guide
Page 56
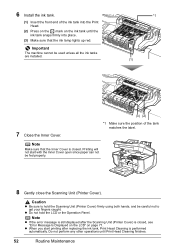
... printing after the Scanning Unit (Printer Cover) is closed , see "Error Message Is Displayed on the LCD" on the ink tank until Print Head Cleaning finishes. 52 Routine Maintenance 6 Install the ink tank. (1) Insert the front end of the tank matches the label. Important The machine cannot be used unless all the... lights up red. Caution z Be sure to hold the LCD or the Operation Panel. Do not perform any other operations until the ink tank snaps firmly into the Print Head. (2) Press on the mark on page 71. z Do not hold the Scanning Unit (Printer Cover) firmly using both ...
... printing after the Scanning Unit (Printer Cover) is closed , see "Error Message Is Displayed on the LCD" on the ink tank until Print Head Cleaning finishes. 52 Routine Maintenance 6 Install the ink tank. (1) Insert the front end of the tank matches the label. Important The machine cannot be used unless all the... lights up red. Caution z Be sure to hold the LCD or the Operation Panel. Do not perform any other operations until the ink tank snaps firmly into the Print Head. (2) Press on the mark on page 71. z Do not hold the Scanning Unit (Printer Cover) firmly using both ...
Quick Start Guide
Page 57
... Head can switch it is traced with a highlight pen or paint-stick or stained with water or sweat, ink may blur depending on the paper. Routine Maintenance 53 Numerous nozzles are installed in color, or perform Print Head Cleaning, about once a month to turn off the machine. (2) Confirm that the ...Note z If the printed area is not used for high-precision printing. For details, see "When Printing Becomes Faint or Colors Are Incorrect" on the Print Head to prevent the ink from the wall outlet. If you press the ON/OFF button to turn off instead. When you are not using a power...
... Head can switch it is traced with a highlight pen or paint-stick or stained with water or sweat, ink may blur depending on the paper. Routine Maintenance 53 Numerous nozzles are installed in color, or perform Print Head Cleaning, about once a month to turn off the machine. (2) Confirm that the ...Note z If the printed area is not used for high-precision printing. For details, see "When Printing Becomes Faint or Colors Are Incorrect" on the Print Head to prevent the ink from the wall outlet. If you press the ON/OFF button to turn off instead. When you are not using a power...
Quick Start Guide
Page 58
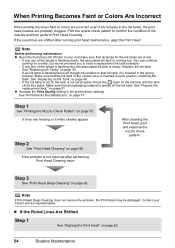
...resolve the problem, the Print Head may be damaged. Step 1 See "Printing the Nozzle Check Pattern" on page 51. Contact your Canon service representative. If the ruled lines are shifted after performing Print Head Cleaning twice After cleaning the Print Head, print and examine the nozzle...resolved after running low. When Printing Becomes Faint or Colors Are Incorrect When printing becomes faint or colors are incorrect even if ink remains in the printer driver settings. If an ink lamp is peeled off the ink tank. Make sure that ink tank, it is inserted in that all lamps for ...
...resolve the problem, the Print Head may be damaged. Step 1 See "Printing the Nozzle Check Pattern" on page 51. Contact your Canon service representative. If the ruled lines are shifted after performing Print Head Cleaning twice After cleaning the Print Head, print and examine the nozzle...resolved after running low. When Printing Becomes Faint or Colors Are Incorrect When printing becomes faint or colors are incorrect even if ink remains in the printer driver settings. If an ink lamp is peeled off the ink tank. Make sure that ink tank, it is inserted in that all lamps for ...
Quick Start Guide
Page 59
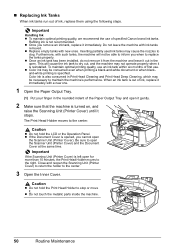
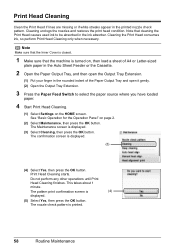
... rounded indent of the Paper Output Tray and open it gently. (2) Open the Output Tray Extension. 3 Press the Paper Feed Switch to determine whether the ink ejects properly from the Print Head.
... rounded indent of the Paper Output Tray and open it gently. (2) Open the Output Tray Extension. 3 Press the Paper Feed Switch to determine whether the ink ejects properly from the Print Head.
Quick Start Guide
Page 60
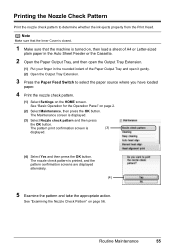
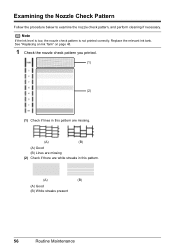
See "Replacing an Ink Tank" on page 48. 1 Check the nozzle check pattern you printed. (1) (2) (1) Check if lines in this pattern are missing. (A) (B) (A) Good (B) Lines are missing (2) Check if there are white streaks in this pattern. (A) (B) (A) Good (B) White streaks present 56 Routine Maintenance Note If the ink level is low, the nozzle check pattern is not printed correctly. Examining the Nozzle Check Pattern Follow the procedure below to examine the nozzle check pattern, and perform cleaning if necessary. Replace the relevant ink tank.
See "Replacing an Ink Tank" on page 48. 1 Check the nozzle check pattern you printed. (1) (2) (1) Check if lines in this pattern are missing. (A) (B) (A) Good (B) Lines are missing (2) Check if there are white streaks in this pattern. (A) (B) (A) Good (B) White streaks present 56 Routine Maintenance Note If the ink level is low, the nozzle check pattern is not printed correctly. Examining the Nozzle Check Pattern Follow the procedure below to examine the nozzle check pattern, and perform cleaning if necessary. Replace the relevant ink tank.
Quick Start Guide
Page 62
...Print Head Cleaning starts. This takes about 1 minute. Cleaning unclogs the nozzles and restores the print head condition. Cleaning the Print Head consumes ink, so perform Print Head Cleaning only when necessary. Note Make sure that the Inner Cover is closed. 1 Make sure that cleaning the Print ...Head causes used ink to select the paper source where you have loaded paper. 4 Start Print Head Cleaning. (1) Select Settings on page 2. (2) Select Maintenance, then...
...Print Head Cleaning starts. This takes about 1 minute. Cleaning unclogs the nozzles and restores the print head condition. Cleaning the Print Head consumes ink, so perform Print Head Cleaning only when necessary. Note Make sure that the Inner Cover is closed. 1 Make sure that cleaning the Print ...Head causes used ink to select the paper source where you have loaded paper. 4 Start Print Head Cleaning. (1) Select Settings on page 2. (2) Select Maintenance, then...
Quick Start Guide
Page 64
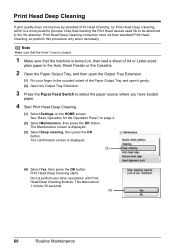
...about 1 minute 30 seconds. (4) 60 Routine Maintenance Note that the machine is displayed. (3) (4) Select Yes, then press the OK button. The Maintenance screen is a more ink than standard Print Head Cleaning, so perform this procedure only when necessary. The confirmation screen is turned on, then load a sheet of A4 or Letter...indent of the Paper Output Tray and open it gently. (2) Open the Output Tray Extension. 3 Press the Paper Feed Switch to be absorbed in the ink absorber. Note Make sure that the Inner Cover is closed. 1 Make sure that cleaning the Print Head causes used...
...about 1 minute 30 seconds. (4) 60 Routine Maintenance Note that the machine is displayed. (3) (4) Select Yes, then press the OK button. The Maintenance screen is a more ink than standard Print Head Cleaning, so perform this procedure only when necessary. The confirmation screen is turned on, then load a sheet of A4 or Letter...indent of the Paper Output Tray and open it gently. (2) Open the Output Tray Extension. 3 Press the Paper Feed Switch to be absorbed in the ink absorber. Note Make sure that the Inner Cover is closed. 1 Make sure that cleaning the Print Head causes used...
Quick Start Guide
Page 65
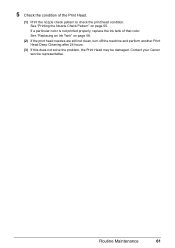
See "Replacing an Ink Tank" on page 55. Contact your Canon service representative. If a particular color is not printed properly, replace the ink tank of the Print Head. (1) Print the nozzle check pattern to check the print head condition. Routine Maintenance 61 See "Printing the Nozzle Check Pattern" on page 48. (2) If the print head nozzles are still not clean, turn off the machine and perform another Print Head Deep Cleaning after 24 hours. (3) If this does not solve the problem, the Print Head may be damaged. 5 Check the condition of that color.
See "Replacing an Ink Tank" on page 55. Contact your Canon service representative. If a particular color is not printed properly, replace the ink tank of the Print Head. (1) Print the nozzle check pattern to check the print head condition. Routine Maintenance 61 See "Printing the Nozzle Check Pattern" on page 48. (2) If the print head nozzles are still not clean, turn off the machine and perform another Print Head Deep Cleaning after 24 hours. (3) If this does not solve the problem, the Print Head may be damaged. 5 Check the condition of that color.
Quick Start Guide
Page 73
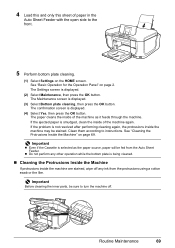
... Maintenance 69 See "Cleaning the Protrusions Inside the Machine" on page 2. Important Before cleaning the inner parts, be sure to turn the machine off any ink from the Auto Sheet Feeder. See "Basic Operation for the Operation Panel" on page 69. If the ejected paper is displayed. (4) Select Yes, then press...
... Maintenance 69 See "Cleaning the Protrusions Inside the Machine" on page 2. Important Before cleaning the inner parts, be sure to turn the machine off any ink from the Auto Sheet Feeder. See "Basic Operation for the Operation Panel" on page 69. If the ejected paper is displayed. (4) Select Yes, then press...
Quick Start Guide
Page 74
...to End of Job" on page 77 z "Part of the Page Is Not Printed" on page 77 z "Colors Are Unclear" on page 77 z "Ink Does Not Come Out/Printing Does Not Start/Printing Is Blurred/Colors Are Wrong/ Straight Lines Are Misaligned" on page 78 z "White Streaks" on page 79 z "Printed Paper ...Curls or Has Ink Blots" on page 79 z "Printed Surface Is Scratched/Paper Is Smudged" on page 79 z "Colors Are Uneven or Streaked" on page 81 z "Printing Problems When Copying" on page 81 z "Printing Does Not Start...
...to End of Job" on page 77 z "Part of the Page Is Not Printed" on page 77 z "Colors Are Unclear" on page 77 z "Ink Does Not Come Out/Printing Does Not Start/Printing Is Blurred/Colors Are Wrong/ Straight Lines Are Misaligned" on page 78 z "White Streaks" on page 79 z "Printed Paper ...Curls or Has Ink Blots" on page 79 z "Printed Surface Is Scratched/Paper Is Smudged" on page 79 z "Colors Are Uneven or Streaked" on page 81 z "Printing Problems When Copying" on page 81 z "Printing Does Not Start...


