Advanced User Guide VIDEO edition
Page 2
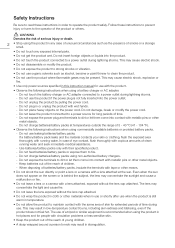
... does not appear on the power cord. This may concentrate the sunlight and cause a malfunction or fire. • Do not leave a lens or a camera with a lens attached, exposed without the lens cap attached. • Do not wrap the product in cloth or other means. • Do not shoot... the sun directly or point a lens or a camera with running water and seek immediate medical assistance. - Safety Instructions Be sure to read these instructions to prevent injury or harm to fire. - WARNING Denotes...
... does not appear on the power cord. This may concentrate the sunlight and cause a malfunction or fire. • Do not leave a lens or a camera with a lens attached, exposed without the lens cap attached. • Do not wrap the product in cloth or other means. • Do not shoot... the sun directly or point a lens or a camera with running water and seek immediate medical assistance. - Safety Instructions Be sure to read these instructions to prevent injury or harm to fire. - WARNING Denotes...

Advanced User Guide VIDEO edition
Page 3
...• Before installing, be sure the surface is capable of supporting the total weight of this product, refrain from further use of the camera and connected 3 devices, and sufficiently reinforce the surface if necessary. The accessory shoe cover is sufficiently sturdy. • Do not fire ..., any indications to hit it is intended for a while before resuming use is dangerous if swallowed. This may cause other part of cameras or accessories are dangerous if swallowed. The battery is forbidden. This may cause injury or damage to extremely high or low temperatures. This...
...• Before installing, be sure the surface is capable of supporting the total weight of this product, refrain from further use of the camera and connected 3 devices, and sufficiently reinforce the surface if necessary. The accessory shoe cover is sufficiently sturdy. • Do not fire ..., any indications to hit it is intended for a while before resuming use is dangerous if swallowed. This may cause other part of cameras or accessories are dangerous if swallowed. The battery is forbidden. This may cause injury or damage to extremely high or low temperatures. This...

Advanced User Guide VIDEO edition
Page 5
... 78 Momentary Automatic Aperture - Recording 47 Recording Video 47 Recording 47 Onscreen Displays 49 LCD Panel 54 Reviewing a Recording 55 Adjusting Camera and Recording Settings 56 Performing Basic Settings with the Multi- Preparations 15 Preparing the Power Supply 15 Using a Battery 15 Using a...Supplied Accessories 11 About the Instruction Manual 11 Names of Power Source (Power Source Navigation) 29 Using the Viewfinder 30 Checking the Camera's Inclination 32 Attaching an Accessory Compatible with Direct Touch Control 56 Direct Setting Mode (FUNC Button) 57 Video Recording Configuration: ...
... 78 Momentary Automatic Aperture - Recording 47 Recording Video 47 Recording 47 Onscreen Displays 49 LCD Panel 54 Reviewing a Recording 55 Adjusting Camera and Recording Settings 56 Performing Basic Settings with the Multi- Preparations 15 Preparing the Power Supply 15 Using a Battery 15 Using a...Supplied Accessories 11 About the Instruction Manual 11 Names of Power Source (Power Source Navigation) 29 Using the Viewfinder 30 Checking the Camera's Inclination 32 Attaching an Accessory Compatible with Direct Touch Control 56 Direct Setting Mode (FUNC Button) 57 Video Recording Configuration: ...

Advanced User Guide VIDEO edition
Page 6
... Recording 109 Adding an $ Mark or % Mark to the Last Clip Recorded 109 Using Metadata 110 Setting a User Memo Created with Canon XF Utility 110 Using News Metadata 111 Entering Slate Information About the Recording 112 Special Recording Modes 113 Slow & Fast Motion Recording 113... Pre-recording 115 Frame Recording Mode 116 Interval Recording Mode 117 Continuous Recording 118 Using Anamorphic Lenses 119 Web Camera Function 120 4. Customization 121 Assignable Buttons 121 Changing the Assigned Function 121 Custom Picture Settings 125 Selecting Custom Picture Files 125 ...
... Recording 109 Adding an $ Mark or % Mark to the Last Clip Recorded 109 Using Metadata 110 Setting a User Memo Created with Canon XF Utility 110 Using News Metadata 111 Entering Slate Information About the Recording 112 Special Recording Modes 113 Slow & Fast Motion Recording 113... Pre-recording 115 Frame Recording Mode 116 Interval Recording Mode 117 Continuous Recording 118 Using Anamorphic Lenses 119 Web Camera Function 120 4. Customization 121 Assignable Buttons 121 Changing the Assigned Function 121 Custom Picture Settings 125 Selecting Custom Picture Files 125 ...

Advanced User Guide VIDEO edition
Page 7
... 234 Reference Tables 236 Approximate Recording Time on a Card 236 Approximate Continuous Video Recording Times 238 Charging Times 239 Appendix: Camera Dimensions 240 Index 241 External Connections 145 Video Output Configuration 145 Video Output Configuration (Recording/ Playback) 145 Connecting to an ... Network's Status 173 FTP File Transfer 174 Transferring a Single Clip 174 Transferring All Clips 174 IP Streaming 175 Browser Remote: Controlling the Camera from a Clip 143 6. File Operations 140 File Menu Operations 140 Displaying Clip Information 141 Adding $ Marks or % Marks 142 Deleting ...
... 234 Reference Tables 236 Approximate Recording Time on a Card 236 Approximate Continuous Video Recording Times 238 Charging Times 239 Appendix: Camera Dimensions 240 Index 241 External Connections 145 Video Output Configuration 145 Video Output Configuration (Recording/ Playback) 145 Connecting to an ... Network's Status 173 FTP File Transfer 174 Transferring a Single Clip 174 Transferring All Clips 174 IP Streaming 175 Browser Remote: Controlling the Camera from a Clip 143 6. File Operations 140 File Menu Operations 140 Displaying Clip Information 141 Adding $ Marks or % Marks 142 Deleting ...

Advanced User Guide VIDEO edition
Page 9
... other power source. - Failing to specification. 1 Introduction 9 About this manual carefully before you for purchasing the Canon EOS R5 C. Please read this Manual Thank you use the camera and retain it for future reference. Before Using the Camera • Before making important recordings for recording may infringe on privacy and publicity rights regarding the use...
... other power source. - Failing to specification. 1 Introduction 9 About this manual carefully before you for purchasing the Canon EOS R5 C. Please read this Manual Thank you use the camera and retain it for future reference. Before Using the Camera • Before making important recordings for recording may infringe on privacy and publicity rights regarding the use...

Advanced User Guide VIDEO edition
Page 10
"Battery" refers to read. Unless indicated otherwise, shooting functions are utilized in CAMERA mode. • Unless indicated otherwise, illustrations in the manual show the Canon EOS R5 C camera with a Canon RF24-105mm F4 L IS USM lens attached. • Photographs in the manual are from ... mode": operating mode for making recordings (shooting mode). About this Manual Conventions Used in this manual. - "SD card" refers to the camera's operation. • NOTES: Additional topics that complement the basic operating procedures. 10 • A: Reference page number. • The following...
"Battery" refers to read. Unless indicated otherwise, shooting functions are utilized in CAMERA mode. • Unless indicated otherwise, illustrations in the manual show the Canon EOS R5 C camera with a Canon RF24-105mm F4 L IS USM lens attached. • Photographs in the manual are from ... mode": operating mode for making recordings (shooting mode). About this Manual Conventions Used in this manual. - "SD card" refers to the camera's operation. • NOTES: Additional topics that complement the basic operating procedures. 10 • A: Reference page number. • The following...

Advanced User Guide VIDEO edition
Page 11
...Shoe Cover2 Body Cap2 1 LC-E6 or LC-E6E Battery Charger is the Advanced User Guide for the camera in this manual are the ones supplied with the camera. Instruction Manual About the Instruction Manual The Instruction Manual included with a power cord.) 2 Comes pre-attached ... Supplied Accessories Supplied Accessories The following website: https://cam.start.canon/ Set the power switch to VIDEO to set the camera to the following accessories are provided in PHOTO mode. Complete instructions are supplied with the camera. 11 LC-E6/LC-E6E Battery Charger1 LP-E6NH Battery ...
...Shoe Cover2 Body Cap2 1 LC-E6 or LC-E6E Battery Charger is the Advanced User Guide for the camera in this manual are the ones supplied with the camera. Instruction Manual About the Instruction Manual The Instruction Manual included with a power cord.) 2 Comes pre-attached ... Supplied Accessories Supplied Accessories The following website: https://cam.start.canon/ Set the power switch to VIDEO to set the camera to the following accessories are provided in PHOTO mode. Complete instructions are supplied with the camera. 11 LC-E6/LC-E6E Battery Charger1 LP-E6NH Battery ...

Advanced User Guide VIDEO edition
Page 12
... Lens lock pin 25 Remote control terminal 26 Body cap * Names and functions differ in PHOTO mode. PHOTO: Turns on the camera in PHOTO mode. OFF: Turns off the camera. 19 Strap mounts Pass one end of the SS-1200 Shoulder Strap through the strap mount and adjust the length of Parts...) 8 Self-timer lamp/AF-assist beam (exclusive to PHOTO mode) 9 Remote control sensor 10 Grip (Battery compartment) 11 DC coupler cord hole 12 Assignable button Camera 12* (A 121) 13 Lens contacts (A 26) 14 Lens mount 15 LCD panel 16 RF lens mount index (A 26) 17 Tally lamp (A 47) 18 Power switch...
... Lens lock pin 25 Remote control terminal 26 Body cap * Names and functions differ in PHOTO mode. PHOTO: Turns on the camera in PHOTO mode. OFF: Turns off the camera. 19 Strap mounts Pass one end of the SS-1200 Shoulder Strap through the strap mount and adjust the length of Parts...) 8 Self-timer lamp/AF-assist beam (exclusive to PHOTO mode) 9 Remote control sensor 10 Grip (Battery compartment) 11 DC coupler cord hole 12 Assignable button Camera 12* (A 121) 13 Lens contacts (A 26) 14 Lens mount 15 LCD panel 16 RF lens mount index (A 26) 17 Tally lamp (A 47) 18 Power switch...

Advanced User Guide VIDEO edition
Page 13
...139) 4 Terminal cover 5 Eyecup 6 Top control dial* (A 75, 79) 7 AUTO IRIS (momentary automatic aperture) button (A 80)/Assignable button Camera 5* (A 121) 8 AF LOCK button (A 90)/ Assignable button Camera 6* (A 121) 9 Viewfinder eyepiece 10 Eye sensor* 11 LCD monitor (A 19) 12 MENU button (A 22) 13 Å (white balance ...adjustment) button (A 82)/ Assignable button Camera 13 (A 121) • Can be assigned as a REC button (A 121) 14 Exhaust ventilation outlet (A 43) 15 TIME CODE terminal (A 100)...
...139) 4 Terminal cover 5 Eyecup 6 Top control dial* (A 75, 79) 7 AUTO IRIS (momentary automatic aperture) button (A 80)/Assignable button Camera 5* (A 121) 8 AF LOCK button (A 90)/ Assignable button Camera 6* (A 121) 9 Viewfinder eyepiece 10 Eye sensor* 11 LCD monitor (A 19) 12 MENU button (A 22) 13 Å (white balance ...adjustment) button (A 82)/ Assignable button Camera 13 (A 121) • Can be assigned as a REC button (A 121) 14 Exhaust ventilation outlet (A 43) 15 TIME CODE terminal (A 100)...

Advanced User Guide VIDEO edition
Page 14
...intake vent (A 43) 5 Voice memo microphone (exclusive to PHOTO mode) 6 Serial number 7 MEDIA button* (A 135) When the camera is on, press to toggle the camera between CAMERA mode (shooting) and MEDIA mode (playback). 8 Joystick* (A 22) You can push the joystick in 8 directions (up/ down...9 MAGN. (magnification) button* (A 87)/ Assignable button Camera 2 (A 121) 10 AF-ON button (A 88)/ Assignable button Camera 1* (A 121) 11 Strap mounts 12 DISP (display) button (A 49)/ Assignable button Camera 3* (A 121) 13 MENU button (A 22)/ Assignable button Camera 4* (A 121) 14 Card slot cover 15 SELECT dial...
...intake vent (A 43) 5 Voice memo microphone (exclusive to PHOTO mode) 6 Serial number 7 MEDIA button* (A 135) When the camera is on, press to toggle the camera between CAMERA mode (shooting) and MEDIA mode (playback). 8 Joystick* (A 22) You can push the joystick in 8 directions (up/ down...9 MAGN. (magnification) button* (A 87)/ Assignable button Camera 2 (A 121) 10 AF-ON button (A 88)/ Assignable button Camera 1* (A 121) 11 Strap mounts 12 DISP (display) button (A 49)/ Assignable button Camera 3* (A 121) 13 MENU button (A 22)/ Assignable button Camera 4* (A 121) 14 Card slot cover 15 SELECT dial...

Advanced User Guide VIDEO edition
Page 15
Using a Battery You can power the camera using the LC-E6/LC-E6E Battery Charger. For LC-E6 • As shown by the arrow, flip out the battery charger's prongs and insert ... insert the battery into a power outlet. • Recharging starts automatically and the charge lamp blinks in use the camera until the battery is completely depleted. 2 Preparations 15 Preparing the Power Supply You can power the camera using a battery for the camera's configuration (attached lens/accessories and recording settings in orange. ቢ ባ ባ
Using a Battery You can power the camera using the LC-E6/LC-E6E Battery Charger. For LC-E6 • As shown by the arrow, flip out the battery charger's prongs and insert ... insert the battery into a power outlet. • Recharging starts automatically and the charge lamp blinks in use the camera until the battery is completely depleted. 2 Preparations 15 Preparing the Power Supply You can power the camera using a battery for the camera's configuration (attached lens/accessories and recording settings in orange. ቢ ባ ባ

Advanced User Guide VIDEO edition
Page 16
...the day of use, or the day before use. A small amount of electrical current flows when the battery pack is left attached to the camera for approximately ten seconds. • Battery packs other than the LP-E6NH/LP-E6N/LP-E6 cannot be longer (up to approximately 4 hours... Storing a fully charged battery pack may shorten its lifespan. • A fully charged battery pack that is not expressly recommended for use with this camera. • To prevent equipment breakdowns and excessive heating, do not connect the battery charger to voltage converters for a fully depleted battery pack is not...
...the day of use, or the day before use. A small amount of electrical current flows when the battery pack is left attached to the camera for approximately ten seconds. • Battery packs other than the LP-E6NH/LP-E6N/LP-E6 cannot be longer (up to approximately 4 hours... Storing a fully charged battery pack may shorten its lifespan. • A fully charged battery pack that is not expressly recommended for use with this camera. • To prevent equipment breakdowns and excessive heating, do not connect the battery charger to voltage converters for a fully depleted battery pack is not...

Advanced User Guide VIDEO edition
Page 17
...8226; Insert the battery until it locks in VIDEO and PHOTO mode. IMPORTANT • Using a genuine Canon Battery Pack LP-E6NH is recommended. Additionally, it snaps shut. Attaching the Battery 1 Turn off the camera. 2 Open the cover and remove the battery. ባ • Press the battery lock lever ... • To prevent short-circuits, always attach the included protective cover to the battery. If you use batteries that are not genuine Canon products, the camera's full performance may not be attained or malfunction may not match the charge indicator on the supplied charger.
...8226; Insert the battery until it locks in VIDEO and PHOTO mode. IMPORTANT • Using a genuine Canon Battery Pack LP-E6NH is recommended. Additionally, it snaps shut. Attaching the Battery 1 Turn off the camera. 2 Open the cover and remove the battery. ባ • Press the battery lock lever ... • To prevent short-circuits, always attach the included protective cover to the battery. If you use batteries that are not genuine Canon products, the camera's full performance may not be attained or malfunction may not match the charge indicator on the supplied charger.

Advanced User Guide VIDEO edition
Page 18
Preparing the Power Supply • Depending on how to connect said accessories, refer to their respective instruction manuals. For details on the camera and battery conditions, the remaining recording/playback time (in minutes) and battery charge (in percentage) may decrease suddenly. • The remaining recording/playback time (in minutes) and battery charge are approximate. 18 Using a Power Outlet You can also power the camera directly from a power outlet using the optional DR-E6C DC Coupler and CA-946 AC Adapter.
Preparing the Power Supply • Depending on how to connect said accessories, refer to their respective instruction manuals. For details on the camera and battery conditions, the remaining recording/playback time (in minutes) and battery charge (in percentage) may decrease suddenly. • The remaining recording/playback time (in minutes) and battery charge are approximate. 18 Using a Power Outlet You can also power the camera directly from a power outlet using the optional DR-E6C DC Coupler and CA-946 AC Adapter.

Advanced User Guide VIDEO edition
Page 19
... the brightness, contrast, color saturation, sharpness and luminance of the LCD screen with the respective settings in the > [¢ Monitoring Setup] menu (A 190). • In CAMERA mode, you can set > [¢ Monitoring Setup] > [LCD Mirror Image] to [On] to flip the image horizontally so it shows a mirror image of the subject...
... the brightness, contrast, color saturation, sharpness and luminance of the LCD screen with the respective settings in the > [¢ Monitoring Setup] menu (A 190). • In CAMERA mode, you can set > [¢ Monitoring Setup] > [LCD Mirror Image] to [On] to flip the image horizontally so it shows a mirror image of the subject...

Advanced User Guide VIDEO edition
Page 20
... Zone], [Date/Time] and [Date Format] • Settings adjusted in VIDEO mode will also be lost. The [Date/Time] screen will appear automatically when the camera's clock is [UTC-05:00] (New York) or [UTC+01:00] (Central Europe), depending on the country/region of the fields in the same way..., recharge the built-in backup battery may be depleted completely and the date and time setting may be applied to PHOTO mode. • Resetting the camera's settings in VIDEO mode by pressing the SET button or the joystick itself. • The cursor will move between the fields, or touch the desired...
... Zone], [Date/Time] and [Date Format] • Settings adjusted in VIDEO mode will also be lost. The [Date/Time] screen will appear automatically when the camera's clock is [UTC-05:00] (New York) or [UTC+01:00] (Central Europe), depending on the country/region of the fields in the same way..., recharge the built-in backup battery may be depleted completely and the date and time setting may be applied to PHOTO mode. • Resetting the camera's settings in VIDEO mode by pressing the SET button or the joystick itself. • The cursor will move between the fields, or touch the desired...

Advanced User Guide VIDEO edition
Page 21
Refer to Selecting an Option from the Menu (A 22) for details on how to navigate the menu to complete this 21 procedure. 1 Select > [B System Setup] > [Language H]. 2 Select the desired language and press the MENU button to German, Spanish, French, Italian, Polish, Portuguese, Russian, Ukrainian, Simplified Chinese, Korean or Japanese. Please note that some settings and screens will be displayed in English, regardless of the language setting. You can change it to close the menu. Date, Time and Language Settings Changing the Language The camera's default language is English.
Refer to Selecting an Option from the Menu (A 22) for details on how to navigate the menu to complete this 21 procedure. 1 Select > [B System Setup] > [Language H]. 2 Select the desired language and press the MENU button to German, Spanish, French, Italian, Polish, Portuguese, Russian, Ukrainian, Simplified Chinese, Korean or Japanese. Please note that some settings and screens will be displayed in English, regardless of the language setting. You can change it to close the menu. Date, Time and Language Settings Changing the Language The camera's default language is English.

Advanced User Guide VIDEO edition
Page 22
...> [B System Setup] > [Language H] > Desired option 1 Press the MENU button. • The menu opens. Using the Menus Using the Menus Many of the camera's functions can be explained in the respective section of the manual. Joystick When making a menu selection, push the joystick to stop some operations that was... selected the last time the menu was closed (unless the camera was turned off). • When a menu icon is open, turn the dial to move to select the icon of the desired setup menu....
...> [B System Setup] > [Language H] > Desired option 1 Press the MENU button. • The menu opens. Using the Menus Using the Menus Many of the camera's functions can be explained in the respective section of the manual. Joystick When making a menu selection, push the joystick to stop some operations that was... selected the last time the menu was closed (unless the camera was turned off). • When a menu icon is open, turn the dial to move to select the icon of the desired setup menu....

Advanced User Guide VIDEO edition
Page 24
Using the Menus Using the Customized Menus (My Menu) In CAMERA mode, you want to remove and then select [OK]. Renaming My Menu Sets You can give each of My Menu settings each with 6 options for ...
Using the Menus Using the Customized Menus (My Menu) In CAMERA mode, you want to remove and then select [OK]. Renaming My Menu Sets You can give each of My Menu settings each with 6 options for ...
