Instruction Manual
Page 3
... resolution/quality settings are at least 30 feet away from your photo subject. Press and release the MODE button. QUICK GUIDE: BUSHNELL IMAGEVIEW 11-1210 ADJUST THE BINOCULAR FOR COMFORTABLE VIEWING Adjust the center focus knob until you are fine for high resolution/quality. Move the sides of...circular image. TURN ON THE CAMERA 1. If left inactive, camera will show a live preview. See "Changing Operational Modes" for distant subjects. 11-1210 1LIM.indd 3 11/17/04 9:31:18 AM The camera focus is preset and is set for email or PC only viewing. Insert 2 AAA alkaline batteries....
... resolution/quality settings are at least 30 feet away from your photo subject. Press and release the MODE button. QUICK GUIDE: BUSHNELL IMAGEVIEW 11-1210 ADJUST THE BINOCULAR FOR COMFORTABLE VIEWING Adjust the center focus knob until you are fine for high resolution/quality. Move the sides of...circular image. TURN ON THE CAMERA 1. If left inactive, camera will show a live preview. See "Changing Operational Modes" for distant subjects. 11-1210 1LIM.indd 3 11/17/04 9:31:18 AM The camera focus is preset and is set for email or PC only viewing. Insert 2 AAA alkaline batteries....
Instruction Manual
Page 4
... "Software Installation". To quickly erase an image while it is displayed, press SNAP. Then connect the ImageView to delete the photo. Images cannot be deleted during this alert to computer using PhotoSuite. 11-1210 1LIM.indd 4 11/17/04 9:31:19 AM REVIEWING AND DELETING STORED IMAGES You can review all images by pressing...
... "Software Installation". To quickly erase an image while it is displayed, press SNAP. Then connect the ImageView to delete the photo. Images cannot be deleted during this alert to computer using PhotoSuite. 11-1210 1LIM.indd 4 11/17/04 9:31:19 AM REVIEWING AND DELETING STORED IMAGES You can review all images by pressing...
Instruction Manual
Page 5
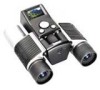
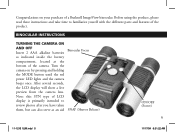
BINOCULAR INSTRUCTIONS TURNING THE CAMERA ON AND OFF Insert 2 AAA alkaline batteries as an aid Binocular Focus SNAP (Shutter Release) ON/OFF (Power) 1 11-1210 1LIM.indd 5 11/17/04 9:31:22 AM After several seconds, the LCD display will show a live preview from the camera lens. Note: this STN type of LCD ... take time to review photos after you have taken them, but can also serve as indicated inside the battery compartment, located at the bottom of a Bushnell ImageView binocular.
BINOCULAR INSTRUCTIONS TURNING THE CAMERA ON AND OFF Insert 2 AAA alkaline batteries as an aid Binocular Focus SNAP (Shutter Release) ON/OFF (Power) 1 11-1210 1LIM.indd 5 11/17/04 9:31:22 AM After several seconds, the LCD display will show a live preview from the camera lens. Note: this STN type of LCD ... take time to review photos after you have taken them, but can also serve as indicated inside the battery compartment, located at the bottom of a Bushnell ImageView binocular.
Instruction Manual
Page 6
Turning the display off , press and hold the ImageView steady using the flat end of your finger, then release it is left inactive for downloading photos, the camera draws power from the USB port. ... MODE button until the display goes out and the camera beeps 3 times. To turn the unit off when it . The camera will hear a rapid 2 11-1210 1LIM.indd 6 11/17/04 9:31:22 AM When connected to check the camera aim and focus before taking a new photo. Lightly press down the SNAP button...
Turning the display off , press and hold the ImageView steady using the flat end of your finger, then release it is left inactive for downloading photos, the camera draws power from the USB port. ... MODE button until the display goes out and the camera beeps 3 times. To turn the unit off when it . The camera will hear a rapid 2 11-1210 1LIM.indd 6 11/17/04 9:31:22 AM When connected to check the camera aim and focus before taking a new photo. Lightly press down the SNAP button...
Instruction Manual
Page 11
...need to recognize your camera. USING THE IMAGEVIEW WITH YOUR COMPUTER SYSTEM REQUIREMENTS: Pentium II 266 or equivalent minimum (Recommended Pentium III 500 MHz) Windows 98/ME/Windows 2000/XP Minimum 64MB of hard drive space, with additional 65MB for the camera. 7 11-1210 1LIM.indd 11 11/17/04 9:31:28 AM If ...your CD-ROM drive and it will self-start. Even if you have an auto play function and does not automatically launch the CD install screen, open the CD (open "My Computer" and double click the "ImageView" pencil icon) and...
...need to recognize your camera. USING THE IMAGEVIEW WITH YOUR COMPUTER SYSTEM REQUIREMENTS: Pentium II 266 or equivalent minimum (Recommended Pentium III 500 MHz) Windows 98/ME/Windows 2000/XP Minimum 64MB of hard drive space, with additional 65MB for the camera. 7 11-1210 1LIM.indd 11 11/17/04 9:31:28 AM If ...your CD-ROM drive and it will self-start. Even if you have an auto play function and does not automatically launch the CD install screen, open the CD (open "My Computer" and double click the "ImageView" pencil icon) and...
Instruction Manual
Page 12
...11-1210 1LIM.indd 12 11/17/04 9:31:28 AM Under (#1) "Select a device from new device" 6. DOWNLOADING PHOTOS TO YOUR COMPUTER: 1. You may have questions about using your PhotoSuite version and search the online knowledge base. Select "Transfer from the list", click "DigiCam", then click "Next" at : imageview@bushnell....com. Follow the on "Roxio PhotoSuite 5" to the Roxio website at: www.roxio.com and click "Support", then select your ImageView, including the downloading process, help is available at (800) ...
...11-1210 1LIM.indd 12 11/17/04 9:31:28 AM Under (#1) "Select a device from new device" 6. DOWNLOADING PHOTOS TO YOUR COMPUTER: 1. You may have questions about using your PhotoSuite version and search the online knowledge base. Select "Transfer from the list", click "DigiCam", then click "Next" at : imageview@bushnell....com. Follow the on "Roxio PhotoSuite 5" to the Roxio website at: www.roxio.com and click "Support", then select your ImageView, including the downloading process, help is available at (800) ...
Instruction Manual
Page 13
...the camera's memory (see "Delete All Images" under "Changing Operational Modes"), and begin taking new photos. 9 11-1210 1LIM.indd 13 11/17/04 9:31:29 AM After several seconds, the driver screen will also be added to "Roxio PhotoSuite Help",...click Edit & Create, then Edit), or print (click Print & Share, then Print) your photos in the driver window. 11. When the download is finished, you want to work with 00000). 12. After your photos have finished transferring and working ...computer. 10. 7. Or, click on bottom left) to start the download from the ImageView to your PC.
...the camera's memory (see "Delete All Images" under "Changing Operational Modes"), and begin taking new photos. 9 11-1210 1LIM.indd 13 11/17/04 9:31:29 AM After several seconds, the driver screen will also be added to "Roxio PhotoSuite Help",...click Edit & Create, then Edit), or print (click Print & Share, then Print) your photos in the driver window. 11. When the download is finished, you want to work with 00000). 12. After your photos have finished transferring and working ...computer. 10. 7. Or, click on bottom left) to start the download from the ImageView to your PC.
Instruction Manual
Page 16
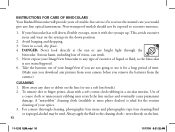
... of time. (Make sure you download any type of excessive of liquid or fluid, as the binocular is ideal for the routine cleaning of your ImageView binocular to any pictures from the camera.) CLEANING 1. Never expose your optics. 3. A "microfiber" cleaning cloth (available at the sun or any bright ... Your Bushnell binocular will provide years of trouble-free service if it receives the normal care you would give any dust or debris on the lens (or use it with a soft cotton cloth rubbing in the down position. 2. This avoids excessive stress and wear on the lens. 12 11-1210 1LIM...
... of time. (Make sure you download any type of excessive of liquid or fluid, as the binocular is ideal for the routine cleaning of your ImageView binocular to any pictures from the camera.) CLEANING 1. Never expose your optics. 3. A "microfiber" cleaning cloth (available at the sun or any bright ... Your Bushnell binocular will provide years of trouble-free service if it receives the normal care you would give any dust or debris on the lens (or use it with a soft cotton cloth rubbing in the down position. 2. This avoids excessive stress and wear on the lens. 12 11-1210 1LIM...


