

Users Manual - English
Page 5
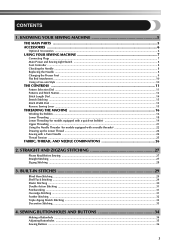
... Dial ...15 Reverse Sewing Lever ...15 THREADING THE MACHINE 16 Winding the Bobbin ...16 Lower Threading ...18 Lower Threading (for models equipped with a quick-set bobbin 19 Upper Threading ...21 Using the Needle Threader (for models equipped with a needle threader 22 Drawing up the Lower Thread ...24 Sewing with a Twin Needle ...24 Thread Tension ...25 FABRIC, THREAD, AND NEEDLE COMBINATIONS 26 2.
... Dial ...15 Reverse Sewing Lever ...15 THREADING THE MACHINE 16 Winding the Bobbin ...16 Lower Threading ...18 Lower Threading (for models equipped with a quick-set bobbin 19 Upper Threading ...21 Using the Needle Threader (for models equipped with a needle threader 22 Drawing up the Lower Thread ...24 Sewing with a Twin Needle ...24 Thread Tension ...25 FABRIC, THREAD, AND NEEDLE COMBINATIONS 26 2.

Users Manual - English
Page 22
...; Make sure you start to draw up the bobbin thread before you set the bobbin so the thread unrolls in the wrong direction, it may cause the thread tension to be incorrect or break the needle. • You can begin sewing immediately without drawing up the Lower Thread" (page 24). 1 1 Cutter... • Make sure that were designed to cut it is correctly inserted through the tension-adjusting spring of the thread 2 through the slit, and then pull the thread to be used with this machine. ...
...; Make sure you start to draw up the bobbin thread before you set the bobbin so the thread unrolls in the wrong direction, it may cause the thread tension to be incorrect or break the needle. • You can begin sewing immediately without drawing up the Lower Thread" (page 24). 1 1 Cutter... • Make sure that were designed to cut it is correctly inserted through the tension-adjusting spring of the thread 2 through the slit, and then pull the thread to be used with this machine. ...

Users Manual - English
Page 26
...9679; When using the twin needle, make sure you can draw up the lower thread by hand to lower and then raise the needle. ■ Quick-set Bobbin Threading This is not set above 3 since this may cause the needle to draw up the lower 2 thread. You can use the zigzag presser foot only. 24 ...Before you can sew with this needle and two top threads. Draw up the lower thread as described in the direction 1 of the arrow, and leave it there without drawing up the bobbin thread. Pull out about 10 cm (4 inch) of both threads 3 and put the bobbin back in. When sewing gathers or...
...9679; When using the twin needle, make sure you can draw up the lower thread by hand to lower and then raise the needle. ■ Quick-set Bobbin Threading This is not set above 3 since this may cause the needle to draw up the lower 2 thread. You can use the zigzag presser foot only. 24 ...Before you can sew with this needle and two top threads. Draw up the lower thread as described in the direction 1 of the arrow, and leave it there without drawing up the bobbin thread. Pull out about 10 cm (4 inch) of both threads 3 and put the bobbin back in. When sewing gathers or...

Users Manual - English
Page 40
... until the darn section is 6 filled with fabric for reinforcement. Sew a single row (or many rows) of stitching. 38 Pull the lower threads to gather the material. 4 Darning Stitch Name Straight Stitch Pattern Stitch Length Foot [mm (inch)] Other Any Zigzag Presser Foot Darning Plate Remove... the power supply plug from you and pulling it toward you want to Straight 1 Stitch. Lower the presser foot. 4 Begin sewing by alternating between gently 5 drawing the work away from the 1 outlet. Connect the power supply plug to the Straight 2 Stitch. Set the...
... until the darn section is 6 filled with fabric for reinforcement. Sew a single row (or many rows) of stitching. 38 Pull the lower threads to gather the material. 4 Darning Stitch Name Straight Stitch Pattern Stitch Length Foot [mm (inch)] Other Any Zigzag Presser Foot Darning Plate Remove... the power supply plug from you and pulling it toward you want to Straight 1 Stitch. Lower the presser foot. 4 Begin sewing by alternating between gently 5 drawing the work away from the 1 outlet. Connect the power supply plug to the Straight 2 Stitch. Set the...

Users Manual - English
Page 41
...Stretch the fabric between embroidery hoops 4 as firmly as a decoration. Put the work under the needle and lower the 5 presser bar with a zigzag stitch. Set the pattern selection dial to Zigzag Stitch. 5 2 Draw the lettering (for monogramming) or 3 design (for Monogramming and Embroidering Remove the power supply plug from the ... Carefully sew around the edge of fabric into a shape and using it as possible, with the underside of the zigzag stitching. Pull the lower thread up through the starting 6 position by cutting a different piece of the design 2 with the foot removed.
...Stretch the fabric between embroidery hoops 4 as firmly as a decoration. Put the work under the needle and lower the 5 presser bar with a zigzag stitch. Set the pattern selection dial to Zigzag Stitch. 5 2 Draw the lettering (for monogramming) or 3 design (for Monogramming and Embroidering Remove the power supply plug from the ... Carefully sew around the edge of fabric into a shape and using it as possible, with the underside of the zigzag stitching. Pull the lower thread up through the starting 6 position by cutting a different piece of the design 2 with the foot removed.

Users Manual - English
Page 51
... D Darning 38 Darning plate 36, 38, 39, 42 Decorative stitching 33 Double action stitching 31 Drawing up the lower thread 24 E Elastic stitching 30 Embroidering 39 F Fabric, thread, and needle combinations 26 Feather stitching 32 Flat bed attachment 10 Foot controller 8 Free-arm style...38 H Handwheel 21 L Light bulb changing 44 Light switch 8 Lower threading 18 , quick-set bobbin 19 24 M Main parts 5 Main power 8 Maintenance 44 Monogramming 39 N Needle checking 8 combinations with fabric and thread 26 replacing 8 Needle threader 22 O Overedge stitching 31 P Patchworking...
... D Darning 38 Darning plate 36, 38, 39, 42 Decorative stitching 33 Double action stitching 31 Drawing up the lower thread 24 E Elastic stitching 30 Embroidering 39 F Fabric, thread, and needle combinations 26 Feather stitching 32 Flat bed attachment 10 Foot controller 8 Free-arm style...38 H Handwheel 21 L Light bulb changing 44 Light switch 8 Lower threading 18 , quick-set bobbin 19 24 M Main parts 5 Main power 8 Maintenance 44 Monogramming 39 N Needle checking 8 combinations with fabric and thread 26 replacing 8 Needle threader 22 O Overedge stitching 31 P Patchworking...
Owner's Manual (Español) - Spanish
Page 5
... ...15 Reverse Sewing Lever ...15 THREADING THE MACHINE 16 Winding the Bobbin ...16 Lower Threading ...18 Lower Threading (for models equipped with a quick-set bobbin 19 Upper Threading ...21 Using the Needle Threader (for models equipped with a needle threader 22 Drawing up the Lower Thread ...24 Sewing with a Twin Needle ...24 Thread Tension ...25 FABRIC, THREAD, AND NEEDLE COMBINATIONS 26 2. BUILT...
... ...15 Reverse Sewing Lever ...15 THREADING THE MACHINE 16 Winding the Bobbin ...16 Lower Threading ...18 Lower Threading (for models equipped with a quick-set bobbin 19 Upper Threading ...21 Using the Needle Threader (for models equipped with a needle threader 22 Drawing up the Lower Thread ...24 Sewing with a Twin Needle ...24 Thread Tension ...25 FABRIC, THREAD, AND NEEDLE COMBINATIONS 26 2. BUILT...

Owner's Manual (Español) - Spanish
Page 22
... YOUR SEWING MACHINE Follow steps 1 and 2 from "Lower Threading". 1 Put the bobbin in, feed the end of the thread 2 through the tension-adjusting spring of the bobbin case. CAUTION ● Make sure you start to sew, follow the procedure in "Drawing up the Lower Thread" (page 24). 1 1 Cutter • Make ...sure that were designed to cut it is correctly inserted through the slit, and then pull the thread to be incorrect or break the needle. • You can ...
... YOUR SEWING MACHINE Follow steps 1 and 2 from "Lower Threading". 1 Put the bobbin in, feed the end of the thread 2 through the tension-adjusting spring of the bobbin case. CAUTION ● Make sure you start to sew, follow the procedure in "Drawing up the Lower Thread" (page 24). 1 1 Cutter • Make ...sure that were designed to cut it is correctly inserted through the slit, and then pull the thread to be incorrect or break the needle. • You can ...

Owner's Manual (Español) - Spanish
Page 26
...the machine. ● When using the twin needle, make sure the stitch width is not set Bobbin Threading This is only available on the upper thread to draw up the lower thread, put them toward you (counterclockwise) by hand so that the needle does not strike the presser foot....can begin sewing immediately without cutting it there without drawing up the bobbin thread. Pull on certain models. Before you draw up the lower 2 thread. Pull out about 10 cm (4 inch) of both threads 3 and put the bobbin back in. Draw up the lower thread as described in the direction 1 of the arrow...
...the machine. ● When using the twin needle, make sure the stitch width is not set Bobbin Threading This is only available on the upper thread to draw up the lower thread, put them toward you (counterclockwise) by hand so that the needle does not strike the presser foot....can begin sewing immediately without cutting it there without drawing up the bobbin thread. Pull on certain models. Before you draw up the lower 2 thread. Pull out about 10 cm (4 inch) of both threads 3 and put the bobbin back in. Draw up the lower thread as described in the direction 1 of the arrow...

Owner's Manual (Español) - Spanish
Page 40
... sewing by alternating between gently 5 drawing the work away from the 1 outlet. Repeat this motion until the darn section is 6 filled with fabric for reinforcement. Connect the power supply plug to darn under the 3 presser foot together with parallel lines of stitching. 38 Pull the lower threads to gather the material. 4 Darning Stitch...
... sewing by alternating between gently 5 drawing the work away from the 1 outlet. Repeat this motion until the darn section is 6 filled with fabric for reinforcement. Connect the power supply plug to darn under the 3 presser foot together with parallel lines of stitching. 38 Pull the lower threads to gather the material. 4 Darning Stitch...

Owner's Manual (Español) - Spanish
Page 41
.... 5 2 Draw the lettering (for monogramming) or 3 design (for Monogramming and Embroidering Remove the power supply plug from the 1 outlet. Remove the basting, if necessary. 4 Memo ● Make reinforcing straight stitches at the beginning and the end of the inside hoop. Pull the lower thread up through the... starting 6 position by cutting a different piece of the design 2 with a zigzag stitch. Put the work under the needle and lower the 5 presser bar with the underside of the fabric on...
.... 5 2 Draw the lettering (for monogramming) or 3 design (for Monogramming and Embroidering Remove the power supply plug from the 1 outlet. Remove the basting, if necessary. 4 Memo ● Make reinforcing straight stitches at the beginning and the end of the inside hoop. Pull the lower thread up through the... starting 6 position by cutting a different piece of the design 2 with a zigzag stitch. Put the work under the needle and lower the 5 presser bar with the underside of the fabric on...

Owner's Manual (Español) - Spanish
Page 51
... D Darning 38 Darning plate 36, 38, 39, 42 Decorative stitching 33 Double action stitching 31 Drawing up the lower thread 24 E Elastic stitching 30 Embroidering 39 F Fabric, thread, and needle combinations 26 Feather stitching 32 Flat bed attachment 10 Foot controller 8 Free-arm style...38 H Handwheel 21 L Light bulb changing 44 Light switch 8 Lower threading 18 , quick-set bobbin 19 24 M Main parts 5 Main power 8 Maintenance 44 Monogramming 39 N Needle checking 8 combinations with fabric and thread 26 replacing 8 Needle threader 22 O Overedge stitching 31 P Patchworking...
... D Darning 38 Darning plate 36, 38, 39, 42 Decorative stitching 33 Double action stitching 31 Drawing up the lower thread 24 E Elastic stitching 30 Embroidering 39 F Fabric, thread, and needle combinations 26 Feather stitching 32 Flat bed attachment 10 Foot controller 8 Free-arm style...38 H Handwheel 21 L Light bulb changing 44 Light switch 8 Lower threading 18 , quick-set bobbin 19 24 M Main parts 5 Main power 8 Maintenance 44 Monogramming 39 N Needle checking 8 combinations with fabric and thread 26 replacing 8 Needle threader 22 O Overedge stitching 31 P Patchworking...


