
Users Manual - English
Page 2
... mentioned in this sewing machine if it has a damaged cord or plug, if it is intended for use ." To disconnect, turn the main switch to break. 12. Switch the sewing machine to ensure that they do not play with same type rated 15 watts. The wrong plate can cause the needle to...
... mentioned in this sewing machine if it has a damaged cord or plug, if it is intended for use ." To disconnect, turn the main switch to break. 12. Switch the sewing machine to ensure that they do not play with same type rated 15 watts. The wrong plate can cause the needle to...

Users Manual - English
Page 6
...must be connected to the terminal which is fitted with the letter 'N' or coloured black or blue. Connecting Plugs and Main Power / Sewing Light Switch 1 2 1. Turn on or off - With alternative plugs an approved fuse must be fitted in your sewing machine is marked with the fuse ...markings identifying the terminals in the plug. Connect the electrical supply plug into the machine. 2. In the event of the machine must be switched off and an appropriate three pin plug fitted. When servicing the sewing machine, or when removing covers or changing lamps, the machine or ...
...must be connected to the terminal which is fitted with the letter 'N' or coloured black or blue. Connecting Plugs and Main Power / Sewing Light Switch 1 2 1. Turn on or off - With alternative plugs an approved fuse must be fitted in your sewing machine is marked with the fuse ...markings identifying the terminals in the plug. Connect the electrical supply plug into the machine. 2. In the event of the machine must be switched off and an appropriate three pin plug fitted. When servicing the sewing machine, or when removing covers or changing lamps, the machine or ...

Users Manual - English
Page 7
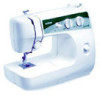
CONTENTS KNOWING YOUR SEWING MACHINE PRINCIPAL PARTS 2 ACCESSORIES 3 OPERATING YOUR SEWING MACHINE 4 Connecting Plugs 4 Main Power and Sewing Light Switches 5 Foot Controller 5 Inserting the Needle 6 Checking the Needle 6 Changing the Presser Foot 7 Converting to Free-Arm Style 8 Steadying the Machine 8 VARIOUS CONTROLS 9 Stitch Length Knob 9 ...
CONTENTS KNOWING YOUR SEWING MACHINE PRINCIPAL PARTS 2 ACCESSORIES 3 OPERATING YOUR SEWING MACHINE 4 Connecting Plugs 4 Main Power and Sewing Light Switches 5 Foot Controller 5 Inserting the Needle 6 Checking the Needle 6 Changing the Presser Foot 7 Converting to Free-Arm Style 8 Steadying the Machine 8 VARIOUS CONTROLS 9 Stitch Length Knob 9 ...

Users Manual - English
Page 68
... the needle plate. M Page 23 No M Damaged or worn needle is incorrect. M Page 14 No Feed dogs are lowered. Needle is turned off. Main power switch is not correctly inserted. M Page 5 No M The bobbin winding shaft is pulled excessively. M Page 23 No M Fabric is slid toward the bobbin presser. Power supply...
... the needle plate. M Page 23 No M Damaged or worn needle is incorrect. M Page 14 No Feed dogs are lowered. Needle is turned off. Main power switch is not correctly inserted. M Page 5 No M The bobbin winding shaft is pulled excessively. M Page 23 No M Fabric is slid toward the bobbin presser. Power supply...

Users Manual - English
Page 76
... Operating 5 Free-Arm Sewing 8 G Gathering 44 Guiding the Fabric 30 L Light Bulb Replacement 53 Lower (bobbin) Threading 15 M Main Power Switch 5 Monogramming 51 N Needle Inspection 6 Position selector 12 Replacement 6 Threading 16 Page O Oiling 54 Over Edge Stitch 49 P Performance Checklist 57-...Presser Foot Replacement 7 Principal Parts 2 R Repacking 65 S Sewing Direction 26 Sewing Fabric Edges 27 Sewing Light Bulb Replacement 53 Switch 5 Sewing on Very Thin Fabric 29 Shuttle Hook Removal 55 Shuttle Race Cleaning 55 Spool Installing 16 Steadying the Machine 8 Stitch...
... Operating 5 Free-Arm Sewing 8 G Gathering 44 Guiding the Fabric 30 L Light Bulb Replacement 53 Lower (bobbin) Threading 15 M Main Power Switch 5 Monogramming 51 N Needle Inspection 6 Position selector 12 Replacement 6 Threading 16 Page O Oiling 54 Over Edge Stitch 49 P Performance Checklist 57-...Presser Foot Replacement 7 Principal Parts 2 R Repacking 65 S Sewing Direction 26 Sewing Fabric Edges 27 Sewing Light Bulb Replacement 53 Switch 5 Sewing on Very Thin Fabric 29 Shuttle Hook Removal 55 Shuttle Race Cleaning 55 Spool Installing 16 Steadying the Machine 8 Stitch...


