

Basic Instruction Manual - English
Page 4
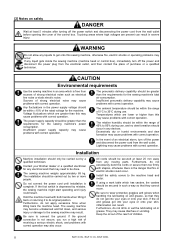
...Furthermore, do not get into your eyes or onto your Brother dealer or a qualified electrician for the sewing machine's total air consumption. Furthermore, do not apply excessive force when tilting back the machine head. ii BAS-300G, BAS-311G, BAS-326G Voltage fluctuations which are greater than the requirements for... which are lower or higher than the requirements for any electrical work table which is free from the wall outlet. If the oil and grease get onto this may cause problems with correct operation may occur. They may result. If any liquid gets inside the...
...Furthermore, do not get into your eyes or onto your Brother dealer or a qualified electrician for the sewing machine's total air consumption. Furthermore, do not apply excessive force when tilting back the machine head. ii BAS-300G, BAS-311G, BAS-326G Voltage fluctuations which are greater than the requirements for... which are lower or higher than the requirements for any electrical work table which is free from the wall outlet. If the oil and grease get onto this may cause problems with correct operation may occur. They may result. If any liquid gets inside the...

Basic Instruction Manual - English
Page 5
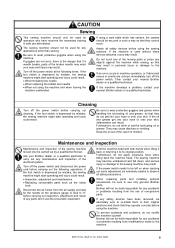
... the air hoses from the air supply and wait for any applications other than sewing. Furthermore, do not modify the machine yourself. BAS-300G, BAS-311G, BAS-326G iii Do not touch any of any parts which has casters, the casters should be held responsible for the needle on when ...out some adjustment, be extremely careful to observe all safety devices before carrying out the following times. If the oil and grease get into your eyes or onto your nearest Brother dealer or a qualified technician. If the power switch needs to be left on the pressure gauge to drop to...
... the air hoses from the air supply and wait for any applications other than sewing. Furthermore, do not modify the machine yourself. BAS-300G, BAS-311G, BAS-326G iii Do not touch any of any parts which has casters, the casters should be held responsible for the needle on when ...out some adjustment, be extremely careful to observe all safety devices before carrying out the following times. If the oil and grease get into your eyes or onto your nearest Brother dealer or a qualified technician. If the power switch needs to be left on the pressure gauge to drop to...
Basic Instruction Manual - English
Page 8
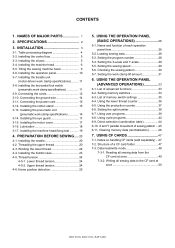
...Setting the X-scale and Y-scale 28 5-5. Setting the sewing speed 28 5-6. Using the thread wiper switch 34 Document CD 36 BAS-300G, BAS-311G, BAS-326G Tilting the sewing machine head 9 3-6. Installing the treadle unit (motor-driven work clamp specifications 16 3-14. Installing the...25 5-2. Notes on handling CF cards (sold separately) ...32 6. Using the STOP switch 34 6-3. Table processing diagram 4 3-2. Installing the oil pan 5 3-4. Installing the operation panel 10 3-7. Installing the eye guard 17 3-15. Upper thread tension 23 4-6. Checking the sewing pattern...
...Setting the X-scale and Y-scale 28 5-5. Setting the sewing speed 28 5-6. Using the thread wiper switch 34 Document CD 36 BAS-300G, BAS-311G, BAS-326G Tilting the sewing machine head 9 3-6. Installing the treadle unit (motor-driven work clamp specifications 16 3-14. Installing the...25 5-2. Notes on handling CF cards (sold separately) ...32 6. Using the STOP switch 34 6-3. Table processing diagram 4 3-2. Installing the oil pan 5 3-4. Installing the operation panel 10 3-7. Installing the eye guard 17 3-15. Upper thread tension 23 4-6. Checking the sewing pattern...

Basic Instruction Manual - English
Page 13
... the treadle unit (motor-driven work clamp specifications, install the treadle unit mounting bolt (A) before installing the oil pan. (Refer to "3-7. 3-2. INSTALLATION Remove the eight screws (1), and then remove the control box cover ... pcs.] (7) Nuts [8 pcs.] Operator 3-3. Installing the control box 3. Installing the oil pan 1840B (8) Power switch (9) Wood screws [2 pcs.] (10) Staples [4 pcs.] 1841B For motor-driven work clamp specifications)".) (1) Oil pan (2) Nails [7 pcs.] (3) Rubber cushions [4 pcs.] (4) Waste oil tank 4911Q BAS-300G, BAS-311G, BAS-326G 5
... the treadle unit (motor-driven work clamp specifications, install the treadle unit mounting bolt (A) before installing the oil pan. (Refer to "3-7. 3-2. INSTALLATION Remove the eight screws (1), and then remove the control box cover ... pcs.] (7) Nuts [8 pcs.] Operator 3-3. Installing the control box 3. Installing the oil pan 1840B (8) Power switch (9) Wood screws [2 pcs.] (10) Staples [4 pcs.] 1841B For motor-driven work clamp specifications)".) (1) Oil pan (2) Nails [7 pcs.] (3) Rubber cushions [4 pcs.] (4) Waste oil tank 4911Q BAS-300G, BAS-311G, BAS-326G 5

Basic Instruction Manual - English
Page 14
.... • When holding the machine head, do not hold it by the pulse motor. This may cause problems with operation of the oil pan and the rubber cushions. INSTALLATION 3-4. Installing the machine head Pulse motor Approx. 20 mm Approx. 20 mm (1) Pins [2 pcs.] (2) Set screws [2 pcs.] (3) Hinge rubber ... gently on top of the pulse motor. 2966B (4) Hinge holders [2 pcs.] (5) Bolts [4 pcs.] (6) Plain washers [4 pcs.] (7) Nuts [4 pcs.] (8) Head rest (9) Bolts with washer [4 pcs.] 4913Q 6 BAS-300G, BAS-311G, BAS-326G 3.
.... • When holding the machine head, do not hold it by the pulse motor. This may cause problems with operation of the oil pan and the rubber cushions. INSTALLATION 3-4. Installing the machine head Pulse motor Approx. 20 mm Approx. 20 mm (1) Pins [2 pcs.] (2) Set screws [2 pcs.] (3) Hinge rubber ... gently on top of the pulse motor. 2966B (4) Hinge holders [2 pcs.] (5) Bolts [4 pcs.] (6) Plain washers [4 pcs.] (7) Nuts [4 pcs.] (8) Head rest (9) Bolts with washer [4 pcs.] 4913Q 6 BAS-300G, BAS-311G, BAS-326G 3.

Basic Instruction Manual - English
Page 17
...the accessory M3x16 screw (33). • Check that the machine head switch (32) is not turned on as it may damage the outer cover L (2). BAS-300G, BAS-311G, BAS-326G 9 Move the machine head switch (32) to the position shown in figure 1. Stand at the left side, it will be sure to move the... , errors "E050", "E051" and "E055" will go in the direction of the sewing machine). 2. Tilting the sewing machine head CAUTION 2970B 4919Q 1. INSTALLATION Figure 1 Oil pan 2365B • Gently return the machine head to the right before tilting back the machine head. 3. If you .
...the accessory M3x16 screw (33). • Check that the machine head switch (32) is not turned on as it may damage the outer cover L (2). BAS-300G, BAS-311G, BAS-326G 9 Move the machine head switch (32) to the position shown in figure 1. Stand at the left side, it will be sure to move the... , errors "E050", "E051" and "E055" will go in the direction of the sewing machine). 2. Tilting the sewing machine head CAUTION 2970B 4919Q 1. INSTALLATION Figure 1 Oil pan 2365B • Gently return the machine head to the right before tilting back the machine head. 3. If you .

Basic Instruction Manual - English
Page 19
... washer and nut. (Refer to the 2nd step, the sewing machine starts sewing. 1st step 2nd step 4441Q 4921Q 3-8. Installing the oil pan.") • Mounting hole B is depressed to "3-4. When the foot switch is depressed to the 1st step, the work clamp specifications... NOTE: • Install the bolt for mounting hole A before installing the oil pan. (Refer to "3-9. List of memory switch settings" in the instruction manual CD.) 2972B Work clamp switch (2-step) Start switch 4923Q BAS-300G, BAS-311G, BAS-326G 11 Installing the machine head".) * Use a commercially-available foot switch...
... washer and nut. (Refer to the 2nd step, the sewing machine starts sewing. 1st step 2nd step 4441Q 4921Q 3-8. Installing the oil pan.") • Mounting hole B is depressed to "3-4. When the foot switch is depressed to the 1st step, the work clamp specifications... NOTE: • Install the bolt for mounting hole A before installing the oil pan. (Refer to "3-9. List of memory switch settings" in the instruction manual CD.) 2972B Work clamp switch (2-step) Start switch 4923Q BAS-300G, BAS-311G, BAS-326G 11 Installing the machine head".) * Use a commercially-available foot switch...
Basic Instruction Manual - English
Page 26
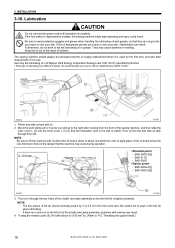
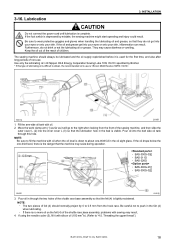
... the hook race. Keep the oil out of the reach of non-use is the danger that they do not drink or eat the lubricating oil or grease. Threading the upper thread".) 18 BAS-300G, BAS-311G, BAS-326G Use only the lubricating oil specified by Brother. * If this hole. If... the foot switch is visible. Pour oil into your eyes or onto your skin, inflammation can result...
... the hook race. Keep the oil out of the reach of non-use is the danger that they do not drink or eat the lubricating oil or grease. Threading the upper thread".) 18 BAS-300G, BAS-311G, BAS-326G Use only the lubricating oil specified by Brother. * If this hole. If... the foot switch is visible. Pour oil into your eyes or onto your skin, inflammation can result...

Basic Instruction Manual - English
Page 40
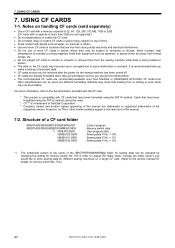
... or other manufacturers can be subject to vibrations or shocks, direct sunlight, high temperature or humidity or strong magnetic fields from equipment such as water, oil, solvents or drinks. • Use and store CF cards in locations that are not supported.) • Do not disassemble or modify the CF card. •... shocks or impacts or remove them from strong static electricity and electrical interference. • Do not use or store CF cards in this manual. 32 BAS-300G, BAS-311G, BAS-326G CF cards from SanDisk or HAGIWARA SYS-COM.
... or other manufacturers can be subject to vibrations or shocks, direct sunlight, high temperature or humidity or strong magnetic fields from equipment such as water, oil, solvents or drinks. • Use and store CF cards in locations that are not supported.) • Do not disassemble or modify the CF card. •... shocks or impacts or remove them from strong static electricity and electrical interference. • Do not use or store CF cards in this manual. 32 BAS-300G, BAS-311G, BAS-326G CF cards from SanDisk or HAGIWARA SYS-COM.
Instruction Manual - English
Page 4
... The sewing machine may cause problems with correct operation. Furthermore, do not get into your eyes or onto your skin. ii BAS-300G, BAS-311G, BAS-326G Touching areas where high voltages are present can result. Any fluctuations in the power supply voltage should be within the range ... to the sewing machine may occur. If the ground connection is free from the wall outlet. If the oil and grease get into your eyes or onto your Brother dealer or a qualified electrician for the sewing machine's total air consumption. WARNING Do not allow any devices....
... The sewing machine may cause problems with correct operation. Furthermore, do not get into your eyes or onto your skin. ii BAS-300G, BAS-311G, BAS-326G Touching areas where high voltages are present can result. Any fluctuations in the power supply voltage should be within the range ... to the sewing machine may occur. If the ground connection is free from the wall outlet. If the oil and grease get into your eyes or onto your Brother dealer or a qualified electrician for the sewing machine's total air consumption. WARNING Do not allow any devices....
Instruction Manual - English
Page 5
...sewing machine. Brother will not be held responsible for the needle on when carrying out some adjustment, be extremely careful to observe all safety devices before carrying out inspection, adjustment and repair of any accidents or problems resulting from the use beforehand. BAS-300G, BAS-311G, BAS-326G iii If...the machine. Furthermore, do not apply excessive force when tilting back the machine head. Furthermore, do not drink or eat the lubricating oil or grease. To prevent accidents and problems, do not get into your eyes or onto your skin. CAUTION Sewing This sewing machine ...
...sewing machine. Brother will not be held responsible for the needle on when carrying out some adjustment, be extremely careful to observe all safety devices before carrying out inspection, adjustment and repair of any accidents or problems resulting from the use beforehand. BAS-300G, BAS-311G, BAS-326G iii If...the machine. Furthermore, do not apply excessive force when tilting back the machine head. Furthermore, do not drink or eat the lubricating oil or grease. To prevent accidents and problems, do not get into your eyes or onto your skin. CAUTION Sewing This sewing machine ...
Instruction Manual - English
Page 8
INSTALLATION 3 3-1. Installing the oil pan 5 3-4. Installing the two-pedal foot switch (pneumatic work clamp lift amount 31 6. Installing the machine head fixing bolt 19 4. Installing the bobbin case 23 4-5.... a CF card folder 47 7-3. Using cycle programs 42 6-9. Structure of memory switch settings 35 6-4. Writing all sewing data from the CF card at once 50 BAS-300G, BAS-311G, BAS-326G SPECIFICATIONS 2 3. Connecting the ground wire 14 3-11. Setting the work clamp specifications 11 3-9. Using the lower thread counter 36 6-5. USING CF CARDS 47...
INSTALLATION 3 3-1. Installing the oil pan 5 3-4. Installing the two-pedal foot switch (pneumatic work clamp lift amount 31 6. Installing the machine head fixing bolt 19 4. Installing the bobbin case 23 4-5.... a CF card folder 47 7-3. Using cycle programs 42 6-9. Structure of memory switch settings 35 6-4. Writing all sewing data from the CF card at once 50 BAS-300G, BAS-311G, BAS-326G SPECIFICATIONS 2 3. Connecting the ground wire 14 3-11. Setting the work clamp specifications 11 3-9. Using the lower thread counter 36 6-5. USING CF CARDS 47...

Instruction Manual - English
Page 9
... hook 53 9-2. Draining the oil 54 9-4. Thread take-up spring 56 10-3. Adjusting the position of the driver 57 10-7. Presser foot installation position 63 10-14. Adjusting the air pressure (pneumatic work clamp lift amount 66 10-16. TROUBLESHOOTING 71 13. 7-SEGMENT DISPLAY 74 BAS-300G, BAS-311G, BAS-326G Cleaning the control box...
... hook 53 9-2. Draining the oil 54 9-4. Thread take-up spring 56 10-3. Adjusting the position of the driver 57 10-7. Presser foot installation position 63 10-14. Adjusting the air pressure (pneumatic work clamp lift amount 66 10-16. TROUBLESHOOTING 71 13. 7-SEGMENT DISPLAY 74 BAS-300G, BAS-311G, BAS-326G Cleaning the control box...

Instruction Manual - English
Page 14
....] (10) Staples [4 pcs.] 1841B For motor-driven work clamp specifications)".) (1) Oil pan (2) Nails [7 pcs.] (3) Rubber cushions [4 pcs.] (4) Waste oil tank 4911Q 5 BAS-300G, BAS-311G, BAS-326G Installing the treadle unit (motor-driven work clamp specifications, install the treadle unit mounting bolt (A) before installing the oil pan. (Refer to "3-7. Installing the control box Remove the eight screws...
....] (10) Staples [4 pcs.] 1841B For motor-driven work clamp specifications)".) (1) Oil pan (2) Nails [7 pcs.] (3) Rubber cushions [4 pcs.] (4) Waste oil tank 4911Q 5 BAS-300G, BAS-311G, BAS-326G Installing the treadle unit (motor-driven work clamp specifications, install the treadle unit mounting bolt (A) before installing the oil pan. (Refer to "3-7. Installing the control box Remove the eight screws...

Instruction Manual - English
Page 15
... and the rubber cushions. NOTE: • Be careful not to get the cords clamped between the machine head and the oil pan. • When holding the machine head, do not hold it by the pulse motor. Installing the machine head Pulse motor Approx. 20 mm 3. 3-4. INSTALLATION ... gently on top of the pulse motor. 2966B (4) Hinge holders [2 pcs.] (5) Bolts [4 pcs.] (6) Plain washers [4 pcs.] (7) Nuts [4 pcs.] (8) Head rest (9) Bolts with washer [4 pcs.] 4913Q BAS-300G, BAS-311G, BAS-326G 6
... and the rubber cushions. NOTE: • Be careful not to get the cords clamped between the machine head and the oil pan. • When holding the machine head, do not hold it by the pulse motor. Installing the machine head Pulse motor Approx. 20 mm 3. 3-4. INSTALLATION ... gently on top of the pulse motor. 2966B (4) Hinge holders [2 pcs.] (5) Bolts [4 pcs.] (6) Plain washers [4 pcs.] (7) Nuts [4 pcs.] (8) Head rest (9) Bolts with washer [4 pcs.] 4913Q BAS-300G, BAS-311G, BAS-326G 6

Instruction Manual - English
Page 18
INSTALLATION Figure 1 Oil pan 2365B • Gently return the machine head to the right when looking from the front of the sewing machine). 2. Stand at the left side, ... the accessory M3x16 screw (33). • Check that the machine head switch (32) is not turned on as it may damage the outer cover L (2). 9 BAS-300G, BAS-311G, BAS-326G NOTE: Always be generated. 3-5. Tilting the sewing machine head CAUTION 2970B 4919Q 1. Move the machine head switch (32) to the position shown in the...
INSTALLATION Figure 1 Oil pan 2365B • Gently return the machine head to the right when looking from the front of the sewing machine). 2. Stand at the left side, ... the accessory M3x16 screw (33). • Check that the machine head switch (32) is not turned on as it may damage the outer cover L (2). 9 BAS-300G, BAS-311G, BAS-326G NOTE: Always be generated. 3-5. Tilting the sewing machine head CAUTION 2970B 4919Q 1. Move the machine head switch (32) to the position shown in the...

Instruction Manual - English
Page 20
.... (Refer to "3-9. List of memory switch settings.") 2972B Work clamp switch (2-step) Start switch 4923Q 11 BAS-300G, BAS-311G, BAS-326G When the foot switch is depressed to "6-3. INSTALLATION 3-7. Installing the oil pan.") • Mounting hole B is depressed, the sewing machine starts sewing. * The work clamp specifications) (1) Treadle unit (2) Bolts [3 pcs.] (3) Plain washers [3 pcs...
.... (Refer to "3-9. List of memory switch settings.") 2972B Work clamp switch (2-step) Start switch 4923Q 11 BAS-300G, BAS-311G, BAS-326G When the foot switch is depressed to "6-3. INSTALLATION 3-7. Installing the oil pan.") • Mounting hole B is depressed, the sewing machine starts sewing. * The work clamp specifications) (1) Treadle unit (2) Bolts [3 pcs.] (3) Plain washers [3 pcs...
Instruction Manual - English
Page 27
... get into the inner cover L (3) so that the machine may seize during operation. ・ BAS-300G-03[] ・ BAS-311G ・ BAS-326G ・ BAS-300G-01[] ・ BAS-300G-02[] 1845B 4940Q 3. Use only the lubricating oil specified by Brother. * If this hole. INSTALLATION 3-16. Keep the oil out of the reach of felt (4) should always be lubricated and the...
... get into the inner cover L (3) so that the machine may seize during operation. ・ BAS-300G-03[] ・ BAS-311G ・ BAS-326G ・ BAS-300G-01[] ・ BAS-300G-02[] 1845B 4940Q 3. Use only the lubricating oil specified by Brother. * If this hole. INSTALLATION 3-16. Keep the oil out of the reach of felt (4) should always be lubricated and the...
Instruction Manual - English
Page 56
...not be subject to vibrations or shocks, direct sunlight, high temperature or humidity or strong magnetic fields from equipment such as water, oil, solvents or drinks. • Use and store CF cards in locations that are free from SanDisk or HAGIWARA SYS-COM. Change.... CF cards from other similar symbols appear in this manual. 7-2. Notes on memory switch No. 752.) 47 BAS-300G, BAS-311G, BAS-326G Structure of a CF card folder \BROTHER\ISM\ISMSYS\ISM02MN.MOT \BROTHER\ISM\ISMDB00\ISMMSW.SEW *1 \ISMUPG.SEW \ISMS0100.SEW \ISMS0101.SEW \ISMS0102.SEW : Control program : Memory ...
...not be subject to vibrations or shocks, direct sunlight, high temperature or humidity or strong magnetic fields from equipment such as water, oil, solvents or drinks. • Use and store CF cards in locations that are free from SanDisk or HAGIWARA SYS-COM. Change.... CF cards from other similar symbols appear in this manual. 7-2. Notes on memory switch No. 752.) 47 BAS-300G, BAS-311G, BAS-326G Structure of a CF card folder \BROTHER\ISM\ISMSYS\ISM02MN.MOT \BROTHER\ISM\ISMDB00\ISMMSW.SEW *1 \ISMUPG.SEW \ISMS0100.SEW \ISMS0101.SEW \ISMS0102.SEW : Control program : Memory ...

Instruction Manual - English
Page 62
... of the reach of the rotary hook thread guide and the shuttle race. 4986Q 53 BAS-300G, BAS-311G, BAS-326G Clean all the dust and thread ends from around the driver (4), the top of children. 9-1. If the oil and grease get into your eyes or onto your skin. 9. They may cause diarrhea or ... injury could result. Pull the shuttle race cover downward to wear protective goggles and gloves when handling the lubricating oil and grease, so that they do not drink or eat the lubricating oil or grease. If the foot switch is depressed by the arrow, and then remove the shuttle race base (2) ...
... of the reach of the rotary hook thread guide and the shuttle race. 4986Q 53 BAS-300G, BAS-311G, BAS-326G Clean all the dust and thread ends from around the driver (4), the top of children. 9-1. If the oil and grease get into your eyes or onto your skin. 9. They may cause diarrhea or ... injury could result. Pull the shuttle race cover downward to wear protective goggles and gloves when handling the lubricating oil and grease, so that they do not drink or eat the lubricating oil or grease. If the foot switch is depressed by the arrow, and then remove the shuttle race base (2) ...

