

Operating Guide
Page 8
... risk of igniting flammable vapors and be located or protected so it cannot be damaged by a moving vehicle Dryer Dimensions J Useful Tools The following tools are at temperatures above the floor to the left (see page 9). 6. The size of the installation area depends... 3. Remove all the way in . (25mm) 5. Install exhaust ductwork if necessary. Have the gas supply connected by the appropriate ductwork parts manufacturers (see page 17) Position the dryer near flammable materials, in rooms which may prolong the drying times. The installation room must be installed ...
... risk of igniting flammable vapors and be located or protected so it cannot be damaged by a moving vehicle Dryer Dimensions J Useful Tools The following tools are at temperatures above the floor to the left (see page 9). 6. The size of the installation area depends... 3. Remove all the way in . (25mm) 5. Install exhaust ductwork if necessary. Have the gas supply connected by the appropriate ductwork parts manufacturers (see page 17) Position the dryer near flammable materials, in rooms which may prolong the drying times. The installation room must be installed ...

Operating Guide
Page 9
... into the wall receptacle (see page 20). 15. Read the operating instructions to understand how your dryer operates. (see page 14). 13. If the dryer does not work, switch the dryer to "OFF". Tools Needed T20 star head screwdriver Hinge Reversal Parts Hinge (with the four screws for Installation" (see page...If pressing down on the right hand side of the dryer feels warm, the dryer has been connected properly. Open the shut off the gas supply if the dryer must not wobble. Conduct an appliance test: Check that corner until the dryer does not rock and is level, both front-to-back...
... into the wall receptacle (see page 20). 15. Read the operating instructions to understand how your dryer operates. (see page 14). 13. If the dryer does not work, switch the dryer to "OFF". Tools Needed T20 star head screwdriver Hinge Reversal Parts Hinge (with the four screws for Installation" (see page...If pressing down on the right hand side of the dryer feels warm, the dryer has been connected properly. Open the shut off the gas supply if the dryer must not wobble. Conduct an appliance test: Check that corner until the dryer does not rock and is level, both front-to-back...
Operating Guide
Page 29
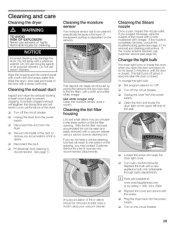
... duct Inspect and clean the exhaust ducting at least once a year to "Off". This deposit can be removed by calling 1 800 944-2904. If you open the dryer light cover. The light turns off about 5 minutes or until the door is deposited on for for a list of the nozzle.... Do not spray with a new appliance bulb only (obtainable through parts department). % Parts are available at least once a month using a narrow crevice cleaning tool. Do not use steam cleaners. Disconnect the duct from the power supply. See page 17. Replace the cover and secure with vinegar. Turn off the...
... duct Inspect and clean the exhaust ducting at least once a year to "Off". This deposit can be removed by calling 1 800 944-2904. If you open the dryer light cover. The light turns off about 5 minutes or until the door is deposited on for for a list of the nozzle.... Do not spray with a new appliance bulb only (obtainable through parts department). % Parts are available at least once a month using a narrow crevice cleaning tool. Do not use steam cleaners. Disconnect the duct from the power supply. See page 17. Replace the cover and secure with vinegar. Turn off the...