
Installation Instructions
Page 5
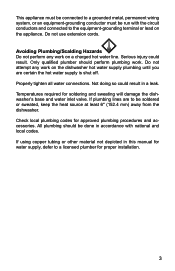
... Temperatures required for proper installation. 3 If using copper tubing or other material not depicted in this manual for water supply, defer to a licensed plumber for soldering and sweating will damage the dishwasher's base and water inlet valve. This appliance must be connected to a grounded metal, permanent wiring... on the appliance. Properly tighten all water connections. Not doing so could result. All plumbing should perform plumbing work on the dishwasher hot water supply plumbing until you are to be soldered or sweated, keep the heat source at least 6″ (152.4 mm) ...
... Temperatures required for proper installation. 3 If using copper tubing or other material not depicted in this manual for water supply, defer to a licensed plumber for soldering and sweating will damage the dishwasher's base and water inlet valve. This appliance must be connected to a grounded metal, permanent wiring... on the appliance. Properly tighten all water connections. Not doing so could result. All plumbing should perform plumbing work on the dishwasher hot water supply plumbing until you are to be soldered or sweated, keep the heat source at least 6″ (152.4 mm) ...
Installation Instructions
Page 29
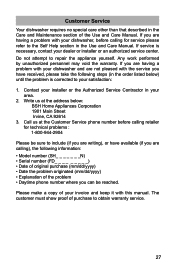
...calling for technical problems : 1-800-944-2904 Please be reached. The customer must show proof of the Use and Care Manual. If you are having a problem with your dishwasher, before calling retailer for service please refer to include (if you are writing), or have available (if you are not...8226; Date the problem originated (mm/dd/yyyy) • Explanation of your invoice and keep it with your dishwasher and are calling), the following steps (in the Use and Care Manual. Write us at the address below ) until the problem is necessary, contact your dealer or installer or an ...
...calling for technical problems : 1-800-944-2904 Please be reached. The customer must show proof of the Use and Care Manual. If you are having a problem with your dishwasher, before calling retailer for service please refer to include (if you are writing), or have available (if you are not...8226; Date the problem originated (mm/dd/yyyy) • Explanation of your invoice and keep it with your dishwasher and are calling), the following steps (in the Use and Care Manual. Write us at the address below ) until the problem is necessary, contact your dealer or installer or an ...
Instructions for Use
Page 6
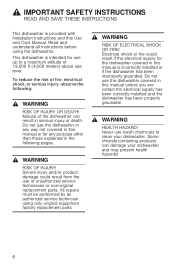
... and/or product damage could result if the electrical supply for any purpose other than those explained in this manual is provided with Installation Instructions and this manual or for the dishwasher covered in the following : yrujni suoires ro ,kcohs lacirtcele ,erif foksiR 9 WARNING 9 WARNING RISK OF ...ELECTRICAL SHOCK OR FIRE! Electrical shock or fire could result from the use the dishwasher in any way not covered in this Use and Care Manual. Do not use of fire, electrical shock, or serious injury, observe the following pages. 9 WARNING 9 WARNING ...
... and/or product damage could result if the electrical supply for any purpose other than those explained in this manual is provided with Installation Instructions and this manual or for the dishwasher covered in the following : yrujni suoires ro ,kcohs lacirtcele ,erif foksiR 9 WARNING 9 WARNING RISK OF ...ELECTRICAL SHOCK OR FIRE! Electrical shock or fire could result from the use the dishwasher in any way not covered in this Use and Care Manual. Do not use of fire, electrical shock, or serious injury, observe the following pages. 9 WARNING 9 WARNING ...
Instructions for Use
Page 11
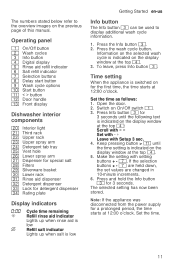
... the time starts at the top @: Scroll with < > Set with - + Leave with setting buttons + - Switch on the previous page of this manual. Set the time. 11 X are held down, the set values are changed in 10-minute increments. 6. Operating panel ( On/Off button 0 Wash ... P Salt refill indicator X Selection buttons ` Delay start button h Wash cycle options )" Start button )* < > button )2 Door handle ): Front display Dishwasher interior components 1" Interior light 1* Third rack 12 Upper rack 1: Upper spray arm 1B Detergent tab tray 1J Vent hole 1R Lower spray arm 1Z Dispenser...
... the time starts at the top @: Scroll with < > Set with - + Leave with setting buttons + - Switch on the previous page of this manual. Set the time. 11 X are held down, the set values are changed in 10-minute increments. 6. Operating panel ( On/Off button 0 Wash ... P Salt refill indicator X Selection buttons ` Delay start button h Wash cycle options )" Start button )* < > button )2 Door handle ): Front display Dishwasher interior components 1" Interior light 1* Third rack 12 Upper rack 1: Upper spray arm 1B Detergent tab tray 1J Vent hole 1R Lower spray arm 1Z Dispenser...

Instructions for Use
Page 46
... have received, please take the following steps until the problem is necessary, contact your Bosch® dishwasher and are not pleased with the service you are having a problem with this manual. Contact Customer Service from our web site: www.bosch-home.com/us at 1-800-944-2904 2. If service is corrected to repair the...
... have received, please take the following steps until the problem is necessary, contact your Bosch® dishwasher and are not pleased with the service you are having a problem with this manual. Contact Customer Service from our web site: www.bosch-home.com/us at 1-800-944-2904 2. If service is corrected to repair the...

