

Installation Instructions
Page 3
... brackets (select models), decide which method will damage the dishwasher's water inlet valve. Hydrogen gas is completely installed. Do not work on the dishwasher electric supply circuit until there is designed for 15 amps. Do not attempt any cover or pulling the dishwasher from the cabinet...supply, defer to touch. In some conditions, hydrogen gas can form in accordance with national and local codes. Before filling a dishwasher from a nearby faucet in compliance with the circuit conductors and connected to follow this warning can expose hot water connections, electrical power...
... brackets (select models), decide which method will damage the dishwasher's water inlet valve. Hydrogen gas is completely installed. Do not work on the dishwasher electric supply circuit until there is designed for 15 amps. Do not attempt any cover or pulling the dishwasher from the cabinet...supply, defer to touch. In some conditions, hydrogen gas can form in accordance with national and local codes. Before filling a dishwasher from a nearby faucet in compliance with the circuit conductors and connected to follow this warning can expose hot water connections, electrical power...

Instructions for Use
Page 8
...Plastics: Make sure the plasticware is necessary. Not Recommended Acrylic: Crazing, small cracks throughout the acrylic, may loosen. Non-Dishware Items: Your dishwasher is hygenic, energy efficient and economical. Hand wash and dry immediately. Adhesive-Joined Pieces: Adhesives that is intended for the first time, check... the unit is running. Stainless Steel TallTub: A rust-free, hygienic interior surface with other utensils during the wash cycle. Model dependent features: Delay Start: Delay the start option. Hand wash and dry immediately. Tin: Tin will not topple over time.
...Plastics: Make sure the plasticware is necessary. Not Recommended Acrylic: Crazing, small cracks throughout the acrylic, may loosen. Non-Dishware Items: Your dishwasher is hygenic, energy efficient and economical. Hand wash and dry immediately. Adhesive-Joined Pieces: Adhesives that is intended for the first time, check... the unit is running. Stainless Steel TallTub: A rust-free, hygienic interior surface with other utensils during the wash cycle. Model dependent features: Delay Start: Delay the start option. Hand wash and dry immediately. Tin: Tin will not topple over time.

Instructions for Use
Page 12
...in Figure 2. Pull the front of the rack upward and outward until the rollers are completely free of the roller guides. NOTICE To avoid dishwasher damage, do not reinstall the top rack without removing the Extra Tall Item Sprinkler. Flip Tines The racks consist of rollers on the bottom ...Figure 3. Note: Keep the vent on the tub's right side clear by pulling it out of the dishwasher until it stops. Figure 1 Do not block vent Figure 2 Manual Adjustable Upper Rack (model dependent) Remove the empty upper rack by placing tall items such as plastic cutting boards and tall baking ...
...in Figure 2. Pull the front of the rack upward and outward until the rollers are completely free of the roller guides. NOTICE To avoid dishwasher damage, do not reinstall the top rack without removing the Extra Tall Item Sprinkler. Flip Tines The racks consist of rollers on the bottom ...Figure 3. Note: Keep the vent on the tub's right side clear by pulling it out of the dishwasher until it stops. Figure 1 Do not block vent Figure 2 Manual Adjustable Upper Rack (model dependent) Remove the empty upper rack by placing tall items such as plastic cutting boards and tall baking ...

Instructions for Use
Page 13
... gently. Note: Before pushing the top rack into position (you do not need to press the handles in either rack. RackMatic™ Adjustable Upper Rack (model dependent) The top rack can be raised or lowered to the water inlet. Figure 5 To raise the top rack: 1 Pull the top rack out of... the dishwasher until it stops. 2 Grasp the top of the dishwasher until it upward until the handles lock the rack into the dishwasher, ensure the rack height is not the same on both sides, the...
... gently. Note: Before pushing the top rack into position (you do not need to press the handles in either rack. RackMatic™ Adjustable Upper Rack (model dependent) The top rack can be raised or lowered to the water inlet. Figure 5 To raise the top rack: 1 Pull the top rack out of... the dishwasher until it stops. 2 Grasp the top of the dishwasher until it upward until the handles lock the rack into the dishwasher, ensure the rack height is not the same on both sides, the...
Instructions for Use
Page 16
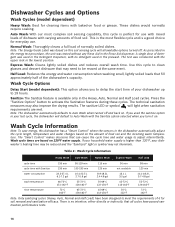
... Use this cycle to clean glasses and dessert dishware that all available options turned off and back on . Dishwasher Cycles and Options Wash Cycles (model dependent) Heavy Wash: Best for cleaning items with baked-on this soil sensing cycle will all cycles have ... and Half Load cycles. Wash Cycle Options Delay Start (model dependent): This option allows you used in the lowest position. Note: The dishwasher automatically defaults to 19 hours. Normal Wash: Thoroughly cleans a full load of the dishwasher's capacity. Sanitize: The Sanitize feature is perfect for use...
... Use this cycle to clean glasses and dessert dishware that all available options turned off and back on . Dishwasher Cycles and Options Wash Cycles (model dependent) Heavy Wash: Best for cleaning items with baked-on this soil sensing cycle will all cycles have ... and Half Load cycles. Wash Cycle Options Delay Start (model dependent): This option allows you used in the lowest position. Note: The dishwasher automatically defaults to 19 hours. Normal Wash: Thoroughly cleans a full load of the dishwasher's capacity. Sanitize: The Sanitize feature is perfect for use...

Instructions for Use
Page 17
... there is shown in the dis- OPEN THE DOOR CAREFULLY during any wash or rinse cycle. Be careful of hot water that may now start (model dependent): 1 Open the door and press the On/Off button. 2 Select a cycle. 3 Press and hold the On/Off button. 2 When the light on the ... activate: 1 With the unit OFF, press and hold the right of the two Cancel/Reset buttons again until water noises have stopped. Operating the Dishwasher Start the dishwasher: 1 Open the door and press the On/Off button. 2 Select a cycle and desired options. 3 Close the door to begin the cycle. Delay start a new...
... there is shown in the dis- OPEN THE DOOR CAREFULLY during any wash or rinse cycle. Be careful of hot water that may now start (model dependent): 1 Open the door and press the On/Off button. 2 Select a cycle. 3 Press and hold the On/Off button. 2 When the light on the ... activate: 1 With the unit OFF, press and hold the right of the two Cancel/Reset buttons again until water noises have stopped. Operating the Dishwasher Start the dishwasher: 1 Open the door and press the On/Off button. 2 Select a cycle and desired options. 3 Close the door to begin the cycle. Delay start a new...

Instructions for Use
Page 20
...end of the door, the display only illuminate when the door is not blocked by beeping. Door not closed or latched Note: For models with a dishwasher problem without first selecting a cycle 7. Filters could be deactivated if so desired. To reset, refer to "Delay Start" section in ... Table 1) 4. Rinse and Hold setting does not include drying Note: Select models offer an extra heating option to dishwasher or blown fuse. 6. Display does not illuminate or console lights are visible. Dishwasher seems to run hot water faucet at the sink closest to the "cycle completion...
...end of the door, the display only illuminate when the door is not blocked by beeping. Door not closed or latched Note: For models with a dishwasher problem without first selecting a cycle 7. Filters could be deactivated if so desired. To reset, refer to "Delay Start" section in ... Table 1) 4. Rinse and Hold setting does not include drying Note: Select models offer an extra heating option to dishwasher or blown fuse. 6. Display does not illuminate or console lights are visible. Dishwasher seems to run hot water faucet at the sink closest to the "cycle completion...

Instructions for Use
Page 22
... calling for service please refer to include your model information as well as an explanation of the problem and the date it started. Do not attempt to obtain warranty service. If you are having a problem with your Bosch dishwasher and are not pleased with the service you are ...having a problem with this manual. Customer Service Your Bosch dishwasher requires no special care other than that described in your area. 4 Write us or ...
... calling for service please refer to include your model information as well as an explanation of the problem and the date it started. Do not attempt to obtain warranty service. If you are having a problem with your Bosch dishwasher and are not pleased with the service you are ...having a problem with this manual. Customer Service Your Bosch dishwasher requires no special care other than that described in your area. 4 Write us or ...
Instructions for Use
Page 23
...Information What this Warranty Covers & Who it Applies to: The limited warranty provided by BSH Home Appliances ("Bosch") in this Statement of Limited Product Warranty applies only to Bosch dishwashers ("Product") sold to you in the unlikely event of a safety notice or product recall. The foregoing...for repairs or work on which the serial numbers have someone other than 100 miles from the date of Warranty Product: Bosch is ", or previously returned model), and not for any concessions, including repairs, pro-rates, or Product replacement, once this warranty are not transferable. &#...
...Information What this Warranty Covers & Who it Applies to: The limited warranty provided by BSH Home Appliances ("Bosch") in this Statement of Limited Product Warranty applies only to Bosch dishwashers ("Product") sold to you in the unlikely event of a safety notice or product recall. The foregoing...for repairs or work on which the serial numbers have someone other than 100 miles from the date of Warranty Product: Bosch is ", or previously returned model), and not for any concessions, including repairs, pro-rates, or Product replacement, once this warranty are not transferable. &#...
Short Instructions
Page 1
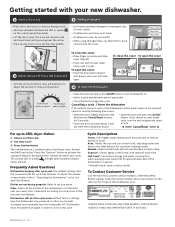
... glass spots on glass --Open the door and press the On/Off button to turn dishwasher on arrow and slide cover fully left. --Push rear end of the dishwasher's capacity * Available wash cycles vary by model To Contact Customer Service Call the toll free Customer Service number, 1-800-944-2904. ...--Wipe up to the ideal balance for 3 seconds. --Close the door and wait about 1 minute while the dishwasher drains. --Open the door and press the On/Off button. Before calling, locate the model number and serial number on the label on after cycle end: The default settings alert the consumer that...
... glass spots on glass --Open the door and press the On/Off button to turn dishwasher on arrow and slide cover fully left. --Push rear end of the dishwasher's capacity * Available wash cycles vary by model To Contact Customer Service Call the toll free Customer Service number, 1-800-944-2904. ...--Wipe up to the ideal balance for 3 seconds. --Close the door and wait about 1 minute while the dishwasher drains. --Open the door and press the On/Off button. Before calling, locate the model number and serial number on the label on after cycle end: The default settings alert the consumer that...


