
Use and Care Guide
Page 3
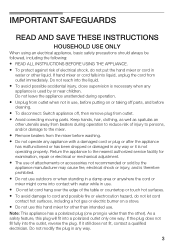
...away from beaters during operation. • Unplug from outlet immediately. Note: This appliance has a polarized plug (one way. As a safety feature, this hand mixer for other than the other). If the plug does not fill fully into contact with water while in use. • Do not let cord hang...a polarized outlet only one prong is therefore prohibited. • Do not use outdoors or when standing in a damp area or anywhere the cord or mixer might come into the outlet, reverse the plug. Do not reach into the liquid. • To avoid possible accidental injury, close supervision is necessary ...
...away from beaters during operation. • Unplug from outlet immediately. Note: This appliance has a polarized plug (one way. As a safety feature, this hand mixer for other than the other). If the plug does not fill fully into contact with water while in use. • Do not let cord hang...a polarized outlet only one prong is therefore prohibited. • Do not use outdoors or when standing in a damp area or anywhere the cord or mixer might come into the outlet, reverse the plug. Do not reach into the liquid. • To avoid possible accidental injury, close supervision is necessary ...
Use and Care Guide
Page 4
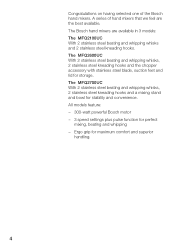
... stainless steel blade, suction feet and lid for perfect mixing, beating and whipping - All models feature: - 300Ćwatt powerful Bosch motor - 3 speed settings plus pulse function for storage. The Bosch hand mixers are the best available. Ergo grip for stability and convenience. The MFQ2700UC With 2 stainless steel beating and whipping whisks, 2Ă...
... stainless steel blade, suction feet and lid for perfect mixing, beating and whipping - All models feature: - 300Ćwatt powerful Bosch motor - 3 speed settings plus pulse function for storage. The Bosch hand mixers are the best available. Ergo grip for stability and convenience. The MFQ2700UC With 2 stainless steel beating and whipping whisks, 2Ă...
Use and Care Guide
Page 9
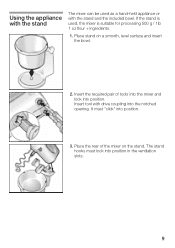
... a smooth, level surface and insert the bowl. 2. Insert tool with the stand and the included bowl. Place the rear of tools into the mixer and lock into position. The stand hooks must "click" into position in the ventilation slots. 9 If the stand is suitable for processing 500 g / 1lb... 1Ăoz flour + ingredients. 1. Using the appliance with the stand The mixer can be used , the mixer is used as a handĆheld appliance or with drive coupling into the notched opening. Place stand on the stand.
... a smooth, level surface and insert the bowl. 2. Insert tool with the stand and the included bowl. Place the rear of tools into the mixer and lock into position. The stand hooks must "click" into position in the ventilation slots. 9 If the stand is suitable for processing 500 g / 1lb... 1Ăoz flour + ingredients. 1. Using the appliance with the stand The mixer can be used , the mixer is used as a handĆheld appliance or with drive coupling into the notched opening. Place stand on the stand.
Use and Care Guide
Page 10
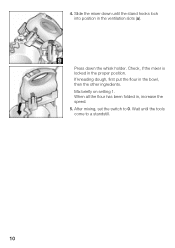
4. Slide the mixer down the whisk holder. Press down until the tools come to 0. Check, if the mixer is locked in the ventilation slots (a). When all the flour has been folded in the bowl, then the other ingredients. After mixing, set the switch to a standstill. 10 Wait until the stand hooks lock into position in the proper position. Mix briefly on setting 1. If kneading dough, first put the flour in , increase the speed. 5.
4. Slide the mixer down the whisk holder. Press down until the tools come to 0. Check, if the mixer is locked in the ventilation slots (a). When all the flour has been folded in the bowl, then the other ingredients. After mixing, set the switch to a standstill. 10 Wait until the stand hooks lock into position in the proper position. Mix briefly on setting 1. If kneading dough, first put the flour in , increase the speed. 5.
Use and Care Guide
Page 11
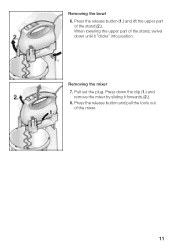
Removing the mixer 7. Removing the bowl 6. Press down until it forwards (2.). 8. Pull out the plug. When lowering the upper part of the mixer. 11 Press the release button and pull the tools out of the stand, swivel down the clip (1.) and remove the mixer by sliding it "clicks" into position. Press the release button (1.) and lift the upper part of the stand (2.).
Removing the mixer 7. Removing the bowl 6. Press down until it forwards (2.). 8. Pull out the plug. When lowering the upper part of the mixer. 11 Press the release button and pull the tools out of the stand, swivel down the clip (1.) and remove the mixer by sliding it "clicks" into position. Press the release button (1.) and lift the upper part of the stand (2.).