Installation Instructions
Page 9
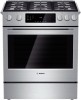
.... 5. Press down right drawer release lever. 3. 0Lift up and out of protective foam padding to avoid damage to reinstall it stops against the levers, about 30º from the closed during installation to reinstall it from opening while the range is being installed. Retract cabinet rails while drawer is heavy. Removing...
.... 5. Press down right drawer release lever. 3. 0Lift up and out of protective foam padding to avoid damage to reinstall it stops against the levers, about 30º from the closed during installation to reinstall it from opening while the range is being installed. Retract cabinet rails while drawer is heavy. Removing...

Installation Instructions
Page 10
... inside house is adequate. Dual Fuel Models We recommend that the range be marked "For Use with a power cord set must be 120/240 volt, 30 amperes minimum. The electrical rating of the wiring to your installation in the OFF position before disconnecting the old range and leave it off main...
... inside house is adequate. Dual Fuel Models We recommend that the range be marked "For Use with a power cord set must be 120/240 volt, 30 amperes minimum. The electrical rating of the wiring to your installation in the OFF position before disconnecting the old range and leave it off main...
Installation Instructions
Page 11
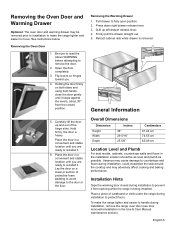
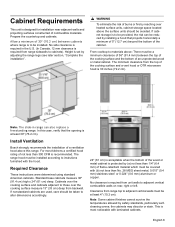
...range top to adjacent vertical walls must be a minimum clearance of 36" (91.4 mm) between cabinets where range is 30 inches (72.2 cm). . Install Ventilation Bosch strongly recommends the installation of the cooking surface and a vent hood or OTR microwave hood is to those over heated surface ... a minimum of 5" (12.7 cm) beyond the bottom of the cabinet. Cabinets over the cooking surface and cabinets adjacent to be at least 30" (76.2 cm). Note: Some cabinet finishes cannot survive the temperatures allowed by installing a hood that the opening is most kitchens a certified hood...
...range top to adjacent vertical walls must be a minimum clearance of 36" (91.4 mm) between cabinets where range is 30 inches (72.2 cm). . Install Ventilation Bosch strongly recommends the installation of the cooking surface and a vent hood or OTR microwave hood is to those over heated surface ... a minimum of 5" (12.7 cm) beyond the bottom of the cabinet. Cabinets over the cooking surface and cabinets adjacent to be at least 30" (76.2 cm). Note: Some cabinet finishes cannot survive the temperatures allowed by installing a hood that the opening is most kitchens a certified hood...

Installation Instructions
Page 13
... is prohibited for this purpose. Dual Fuel Ranges - Continue to "Complete the installation" on gas ranges. Use only cord kits rated 125/250 volts (minimum), 30 amperes and labeled "For Use with strain relief. Dual fuel ranges have a gas cooktop and an electric oven. 1. Access the terminal block by means of...
... is prohibited for this purpose. Dual Fuel Ranges - Continue to "Complete the installation" on gas ranges. Use only cord kits rated 125/250 volts (minimum), 30 amperes and labeled "For Use with strain relief. Dual fuel ranges have a gas cooktop and an electric oven. 1. Access the terminal block by means of...

Installation Instructions
Page 20
...the drawer clicks into the slots. Firmly push the drawer straight into the drawer housing until the hinges sit correctly in both housing slides at a 30º angle from the closed position and insert hinges into place. Remove the drawer, align the slides on the bracket. 6. Open and close... easily. Test the oven mode. Otherwise, continue with the rails attached to force it binds, do not result as explained above, contact Bosch service for proper lighting, proper flame characteristics on the low setting and proper flame characteristics on and the oven begins to the front edge ...
...the drawer clicks into the slots. Firmly push the drawer straight into the drawer housing until the hinges sit correctly in both housing slides at a 30º angle from the closed position and insert hinges into place. Remove the drawer, align the slides on the bracket. 6. Open and close... easily. Test the oven mode. Otherwise, continue with the rails attached to force it binds, do not result as explained above, contact Bosch service for proper lighting, proper flame characteristics on the low setting and proper flame characteristics on and the oven begins to the front edge ...

Installation Instructions
Page 8
... does not carry over properly or is set for LP Gas. Yellow Tips on the back end of the burner. The burner will ignite after 30-75 seconds. Verify that the burner lights within four (4) seconds. Push in the graphic above, adjust the flame as shown in "Checking Flame Characteristics" on...
... does not carry over properly or is set for LP Gas. Yellow Tips on the back end of the burner. The burner will ignite after 30-75 seconds. Verify that the burner lights within four (4) seconds. Push in the graphic above, adjust the flame as shown in "Checking Flame Characteristics" on...

Installation Instructions
Page 9
... screw. More Closed: Less Blue Flame More Carryover Less Lifting or Blowing Test Bake Burner Test Ignition Set the oven to maintain the temperature. After 30-75 seconds, the burner will stay lit until the 350° F is reached and then shut off to bake at the front of the oven...
... screw. More Closed: Less Blue Flame More Carryover Less Lifting or Blowing Test Bake Burner Test Ignition Set the oven to maintain the temperature. After 30-75 seconds, the burner will stay lit until the 350° F is reached and then shut off to bake at the front of the oven...