Installation Instructions
Page 11
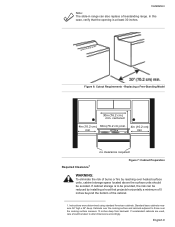
... alter dimensions accordingly. Figure 6: Cutout Requirements - If cabinet storage is at least 30 inches. Standard base cabinets measure 36" high x 24" deep. Replacing a Free-Standing Model 30in (76.2 cm ) min. Instructions were determined using standard American cabinets. In this case, verify that projects horizontally a minimum of 5 inches beyond the bottom of...
... alter dimensions accordingly. Figure 6: Cutout Requirements - If cabinet storage is at least 30 inches. Standard base cabinets measure 36" high x 24" deep. Replacing a Free-Standing Model 30in (76.2 cm ) min. Instructions were determined using standard American cabinets. In this case, verify that projects horizontally a minimum of 5 inches beyond the bottom of...
Installation Instructions
Page 20
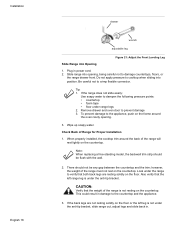
... not to prevent damage 3. Look under the range to the countertop and the appliance. 3. This could result in power cord. 2. Note: When replacing a free-standing model, the backwall trim strip should not be flush with the wall. 2. If the back legs are resting solidly on the countertop. Installation English 18 drawer...
... not to prevent damage 3. Look under the range to the countertop and the appliance. 3. This could result in power cord. 2. Note: When replacing a free-standing model, the backwall trim strip should not be flush with the wall. 2. If the back legs are resting solidly on the countertop. Installation English 18 drawer...
Installation Instructions
Page 22
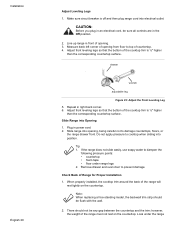
... the corresponding countertop surface. drawer wrench adjustable leg Figure 23: Adjust the Front Leveling Leg 5. Plug in front of opening. 3. Note: When replacing a free-standing model, the backwall trim strip should not be any gap between the countertop and the trim; Slide range into Opening 1. Line up range in power cord...
... the corresponding countertop surface. drawer wrench adjustable leg Figure 23: Adjust the Front Leveling Leg 5. Plug in front of opening. 3. Note: When replacing a free-standing model, the backwall trim strip should not be any gap between the countertop and the trim; Slide range into Opening 1. Line up range in power cord...
Installation Instructions
Page 26
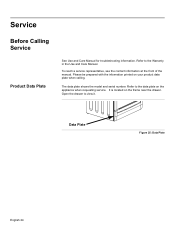
Please be prepared with the information printed on the frame near the drawer. It is located on your product data plate when calling. To reach a service representative, see the contact information at the front of the manual. The data plate shows the model and serial number. Open the drawer to the data plate on the appliance when requesting service. Refer to view it. Data Plate Figure 25: Data Plate English 24 Refer to the Warranty in the Use and Care Manual. Service Before Calling Service Product Data Plate See Use and Care Manual for troubleshooting information.
Please be prepared with the information printed on the frame near the drawer. It is located on your product data plate when calling. To reach a service representative, see the contact information at the front of the manual. The data plate shows the model and serial number. Open the drawer to the data plate on the appliance when requesting service. Refer to view it. Data Plate Figure 25: Data Plate English 24 Refer to the Warranty in the Use and Care Manual. Service Before Calling Service Product Data Plate See Use and Care Manual for troubleshooting information.


