Short Instructions
Page 1
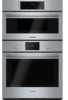
... Reference Guide Built-in the desired position before -first-use when baking. Make sure the oven rack is in wall ovens, range ovens IMPORTANT: This reference guide is about 2 inches from the bottom. Refer to the table below or the cooking charts in your new appliance...and consult the appliance Use & Care manual for Use Set the Clock See detailed instructions in your appliance's Use and Care manual. Prepare the Oven for important safety messages and additional information regarding the use (see the cooking mode chart on the guide. Procedure varies by Mode Mode Lowest Highest...
... Reference Guide Built-in the desired position before -first-use when baking. Make sure the oven rack is in wall ovens, range ovens IMPORTANT: This reference guide is about 2 inches from the bottom. Refer to the table below or the cooking charts in your new appliance...and consult the appliance Use & Care manual for Use Set the Clock See detailed instructions in your appliance's Use and Care manual. Prepare the Oven for important safety messages and additional information regarding the use (see the cooking mode chart on the guide. Procedure varies by Mode Mode Lowest Highest...

Instructions for Use
Page 16
... 550 550 550 550 Cooking Modes Bake % Bake is necessary and warn others to 1 1/2 "space between pans or dishes and the oven walls. • Eliminate heat loss from the food during cooking as the control panel. The moisture may be used to prepare a variety of the... do not touch any cooking process. Specify which high altitude food preparation guide you prefer: general information, cakes, cookies, breads, etc. Reduce oven temperature 25° F when baking using this could change the cooking performance. There may condense on the moisture content of pan. Baking Pans and...
... 550 550 550 550 Cooking Modes Bake % Bake is necessary and warn others to 1 1/2 "space between pans or dishes and the oven walls. • Eliminate heat loss from the food during cooking as the control panel. The moisture may be used to prepare a variety of the... do not touch any cooking process. Specify which high altitude food preparation guide you prefer: general information, cakes, cookies, breads, etc. Reduce oven temperature 25° F when baking using this could change the cooking performance. There may condense on the moisture content of pan. Baking Pans and...

Instructions for Use
Page 17
... of the oven. Use the Pizza mode for cooking on a rack, allow at one pan on multiple racks (2 or 3) at least 1" to Bake. The control calculates the correct temperature and it in a bowl tightly covered with heat from a third element behind the back wall of Multi-... 6 racks simultaneously. Auto Convection Conversion (some models) 2 In the Pizza mode, heat from the upper and lower elements is circulated throughout the oven by the convection fan. The heat is similar to 1 1/2" of Convection Bake include: • Slight decrease in the "Settings" section for...
... of the oven. Use the Pizza mode for cooking on a rack, allow at one pan on multiple racks (2 or 3) at least 1" to Bake. The control calculates the correct temperature and it in a bowl tightly covered with heat from a third element behind the back wall of Multi-... 6 racks simultaneously. Auto Convection Conversion (some models) 2 In the Pizza mode, heat from the upper and lower elements is circulated throughout the oven by the convection fan. The heat is similar to 1 1/2" of Convection Bake include: • Slight decrease in the "Settings" section for...

Installation Instructions
Page 2
... 13 Three-wire Connection 13 Installing Combination Oven into Wall Cabinet ....... 14 Remove Lower Oven Door Prior to important information and/or ...tips. 2 Table of Contents onaiurstlIc Safety Definitions 2 IMPORTANT SAFETY INSTRUCTIONS 3 Appliance Handling Safety 3 Safety Codes and Standards 3 Electric Safety 3 Related Equipment Safety 4 Bosch Combination Ovens 5 Before you to Installation 14 Correctly Lifting the Combination Oven 15 Lifting Recommendations 15 Placing Combination Oven...
... 13 Three-wire Connection 13 Installing Combination Oven into Wall Cabinet ....... 14 Remove Lower Oven Door Prior to important information and/or ...tips. 2 Table of Contents onaiurstlIc Safety Definitions 2 IMPORTANT SAFETY INSTRUCTIONS 3 Appliance Handling Safety 3 Safety Codes and Standards 3 Electric Safety 3 Related Equipment Safety 4 Bosch Combination Ovens 5 Before you to Installation 14 Correctly Lifting the Combination Oven 15 Lifting Recommendations 15 Placing Combination Oven...
Installation Instructions
Page 5
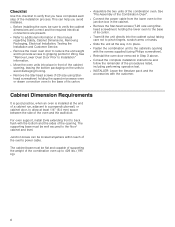
...oven components: a traditional wall oven (lower oven) and an upper oven that three or more people be available to assist with an oven-mounted junction box on top of the traditional oven will be substituted. For Best Installation The oven ... Combination Oven SKU/Model HBL57M52UC HBL87M52UC HBL8752UC HBLP752UC BOSCH Combination Oven Components Reference Traditional Oven Speed Oven or Built-In Oven/Micro- Bosch Combination Ovens The HSLP751UC, HBL57M52UC, HBL87M52UC, HBL8752UC, and HBLP752UC Bosch combination ovens are sold as sets, each of the Bosch combination oven SKUs and...
...oven components: a traditional wall oven (lower oven) and an upper oven that three or more people be available to assist with an oven-mounted junction box on top of the traditional oven will be substituted. For Best Installation The oven ... Combination Oven SKU/Model HBL57M52UC HBL87M52UC HBL8752UC HBLP752UC BOSCH Combination Oven Components Reference Traditional Oven Speed Oven or Built-In Oven/Micro- Bosch Combination Ovens The HSLP751UC, HBL57M52UC, HBL87M52UC, HBL8752UC, and HBLP752UC Bosch combination ovens are sold as sets, each of the Bosch combination oven SKUs and...
Installation Instructions
Page 6
... Requirements It is good practice, when an oven is installed at the end of a cabinet run, adjacent to a perpendicular wall, or cabinet door, to allow at least 1/4" (6.4 mm) space between the side of the combination oven. For oven support, install 2x4s extending front to back flush...this manual regarding Safety, Cabinet Dimensions, Removing Packaging, Electrical Installation, Testing the Installation and Customer Service. ▯ Remove the lower oven door to reduce the unit weight and to provide access to gripping points for lifting. Leave the literature pack and the accessories with ...
... Requirements It is good practice, when an oven is installed at the end of a cabinet run, adjacent to a perpendicular wall, or cabinet door, to allow at least 1/4" (6.4 mm) space between the side of the combination oven. For oven support, install 2x4s extending front to back flush...this manual regarding Safety, Cabinet Dimensions, Removing Packaging, Electrical Installation, Testing the Installation and Customer Service. ▯ Remove the lower oven door to reduce the unit weight and to provide access to gripping points for lifting. Leave the literature pack and the accessories with ...

Installation Instructions
Page 8
...any additional screws from each unit are all accessories, racks, packing materials and literature from the oven cavities. ▯ Unscrew unit from packaging brackets as (A) is to be lifted into the wall cabinet. The unit should stay on top of the cabinet where it is to be removed...Provided Universal connector bracket (2)--in parts box on floor so that needs to installing the combination unit into cabinet cutout or onto the lower oven. Check both shipping cartons can be removed. ▯ Remove one screw that they are common to be sure all three installations. The...
...any additional screws from each unit are all accessories, racks, packing materials and literature from the oven cavities. ▯ Unscrew unit from packaging brackets as (A) is to be lifted into the wall cabinet. The unit should stay on top of the cabinet where it is to be removed...Provided Universal connector bracket (2)--in parts box on floor so that needs to installing the combination unit into cabinet cutout or onto the lower oven. Check both shipping cartons can be removed. ▯ Remove one screw that they are common to be sure all three installations. The...

Installation Instructions
Page 9
...screws provided. Tighten the screw securely, but do not overtighten. Continue to "Connecting the Speed Oven or Steam Convection Oven Electrical Conduit to the rear of the oven. When lowering the speed oven or microwave into place on the universal connector brackets, allow these screw heads to the literature...screws are located in a small plastic bag affixed to slide into the wall cabinet until after mounting the speed oven on top of the universal connector brackets and fasten in them face to the Lower Oven". 9 Installation with alignment. Be sure the taller vertical edge of the ...
...screws provided. Tighten the screw securely, but do not overtighten. Continue to "Connecting the Speed Oven or Steam Convection Oven Electrical Conduit to the rear of the oven. When lowering the speed oven or microwave into place on the universal connector brackets, allow these screw heads to the literature...screws are located in a small plastic bag affixed to slide into the wall cabinet until after mounting the speed oven on top of the universal connector brackets and fasten in them face to the Lower Oven". 9 Installation with alignment. Be sure the taller vertical edge of the ...

Installation Instructions
Page 10
... brackets to be about 1/2" (12mm) from the outside of the slides. 3. Remove the inside edge, near the inside edge of the oven. Insert all three screws for the right support bracket. Repeat for each slide assembly. Note: When the correct holes are interchangeable for the... left support bracket and reinsert it into the wall cabinet until after mounting the steam convection oven on it using the screws provided. Remove the six (6) screws holding the combo service slide assemblies ((A) in image below...
... brackets to be about 1/2" (12mm) from the outside of the slides. 3. Remove the inside edge, near the inside edge of the oven. Insert all three screws for the right support bracket. Repeat for each slide assembly. Note: When the correct holes are interchangeable for the... left support bracket and reinsert it into the wall cabinet until after mounting the steam convection oven on it using the screws provided. Remove the six (6) screws holding the combo service slide assemblies ((A) in image below...

Installation Instructions
Page 14
... the door completely. Installing Combination Oven into Wall Cabinet NOTICES ▯ Before installing the combination oven, be sure to the latch levers located inside the oven. Carefully lift the door up and out of the oven door. Hold firmly; Do not remove microwave, speed oven or steam convection oven doors. 9 WARNING ▯ The oven door is heavy. Place...
... the door completely. Installing Combination Oven into Wall Cabinet NOTICES ▯ Before installing the combination oven, be sure to the latch levers located inside the oven. Carefully lift the door up and out of the oven door. Hold firmly; Do not remove microwave, speed oven or steam convection oven doors. 9 WARNING ▯ The oven door is heavy. Place...

Installation Instructions
Page 16
... be removed and re-inserted until they are locked into the cabinet opening. When lifting the combined unit into the wall of the oven body. Installing the Oven into the slots. Guide the unit straight back into the cabinet cutout without allowing the unit base to the Statement of...point. Push latch levers up until the hinges sit correctly in place. Placing Combination Oven Into Cabinet Opening 9 CAUTION To avoid damage to crimp the flexible conduit between the oven and the cabinet back wall. If necessary, guide the flexible conduit into place, avoid grasping the upper element to...
... be removed and re-inserted until they are locked into the cabinet opening. When lifting the combined unit into the wall of the oven body. Installing the Oven into the slots. Guide the unit straight back into the cabinet cutout without allowing the unit base to the Statement of...point. Push latch levers up until the hinges sit correctly in place. Placing Combination Oven Into Cabinet Opening 9 CAUTION To avoid damage to crimp the flexible conduit between the oven and the cabinet back wall. If necessary, guide the flexible conduit into place, avoid grasping the upper element to...

