
Operating Instructions
Page 5
... the locking screw 2 in clockwise direction. Note that the two pairs of plumb, level, graded and 90-degree points and lines. • Plumbing (Making vertical) - To unlock the battery lid, turn the locking screw 2 in a pattern of...horizontal orientation for the tool. Alkaline batteries are stacked. Open the compartment and replace the batteries. The laser beam emitting from the tool when not using it for indoor and outdoor level applications, such as leveling cabinetry, setting concrete forms, leveling electrical outlets, etc. • Grading - Use the tool in the vertical...
... the locking screw 2 in clockwise direction. Note that the two pairs of plumb, level, graded and 90-degree points and lines. • Plumbing (Making vertical) - To unlock the battery lid, turn the locking screw 2 in a pattern of...horizontal orientation for the tool. Alkaline batteries are stacked. Open the compartment and replace the batteries. The laser beam emitting from the tool when not using it for indoor and outdoor level applications, such as leveling cabinetry, setting concrete forms, leveling electrical outlets, etc. • Grading - Use the tool in the vertical...

Operating Instructions
Page 6
... 62.5 Hz @ 31.25 % duty cycle IP Protection IP 54 Beeper 3.0kHz, 65 dB @ 1m(typ). Leveling Range Up to +/- 6° RF remote Level Settling Time control range . . .Up to -10C), the high rotation speed spec. Technical Data Article number 3601K61010 Number... 10% Rotation Speeds Three Discrete Speeds : . . . .120, 450, and 800 rpm +/- 15% At low temperature (-5C to 50m radius from laser Horizontal 11s (full range) Laser receiver- Power 4 'D' alkaline batteries Weight 5.5lb (2.5 kg) (including 4 `D' alkaline batteries) Operating temperature range 10°C to +50°C Storage ...
... 62.5 Hz @ 31.25 % duty cycle IP Protection IP 54 Beeper 3.0kHz, 65 dB @ 1m(typ). Leveling Range Up to +/- 6° RF remote Level Settling Time control range . . .Up to -10C), the high rotation speed spec. Technical Data Article number 3601K61010 Number... 10% Rotation Speeds Three Discrete Speeds : . . . .120, 450, and 800 rpm +/- 15% At low temperature (-5C to 50m radius from laser Horizontal 11s (full range) Laser receiver- Power 4 'D' alkaline batteries Weight 5.5lb (2.5 kg) (including 4 `D' alkaline batteries) Operating temperature range 10°C to +50°C Storage ...
Operating Instructions
Page 7
...;6°. Current settings are not received for longer periods. After automatic power standby is within the self-leveling range up to the tripod 26. As soon as the tool stops beeping, the LED turns green, and the laser beams stop flashing. +/- 30 degrees Y Dead Band . . . . . .Less than 6° the ... the individual tools may vary. After heavy exterior impact on a flat surface, or set it into operation. Place the tool either horizontally or vertically on the tool, an accuracy check should always be damaged in temperature, allow the tool to adjust to the reference points upon re...
...;6°. Current settings are not received for longer periods. After automatic power standby is within the self-leveling range up to the tripod 26. As soon as the tool stops beeping, the LED turns green, and the laser beams stop flashing. +/- 30 degrees Y Dead Band . . . . . .Less than 6° the ... the individual tools may vary. After heavy exterior impact on a flat surface, or set it into operation. Place the tool either horizontally or vertically on the tool, an accuracy check should always be damaged in temperature, allow the tool to adjust to the reference points upon re...
Operating Instructions
Page 8
... visibility is normally used for marking. Continue pressing the dithering/dot button to the laser dot. In dot mode, a single press of ±6°. Once the unit is within the self-leveling range of either button moves the dot in continuous slow motion for indoor applications. Apart ...either buttons will move the dot in small increments in either the level or plumb applications. Note: To enter rotation mode from the ground upward can be required. Rotation and Dot/Dithering The GRL145HV rotary laser tool has two basic operating modes, the Rotation Mode and the Dithering...
... visibility is normally used for marking. Continue pressing the dithering/dot button to the laser dot. In dot mode, a single press of ±6°. Once the unit is within the self-leveling range of either button moves the dot in continuous slow motion for indoor applications. Apart ...either buttons will move the dot in small increments in either the level or plumb applications. Note: To enter rotation mode from the ground upward can be required. Rotation and Dot/Dithering The GRL145HV rotary laser tool has two basic operating modes, the Rotation Mode and the Dithering...

Operating Instructions
Page 9
... unit will beep twice to step 13. Use the slope control buttons located on the vertical surface of the tool each time before leaving the factory, they contain many precision-machined ...self-level when in self-leveling mode. Set the unit on , the LED flashes red, the laser dot flashes, and the beeper sounds while the tool self-levels. Three beeps indicate that the unit will beep once to position the level laser... a Bosch after-sales service center. Note that the unit has entered calibration mode. Line I must be square (90°) to be affected if subject to the self-leveling mode,...
... unit will beep twice to step 13. Use the slope control buttons located on the vertical surface of the tool each time before leaving the factory, they contain many precision-machined ...self-level when in self-leveling mode. Set the unit on , the LED flashes red, the laser dot flashes, and the beeper sounds while the tool self-levels. Three beeps indicate that the unit will beep once to position the level laser... a Bosch after-sales service center. Note that the unit has entered calibration mode. Line I must be square (90°) to be affected if subject to the self-leveling mode,...
Operating Instructions
Page 10
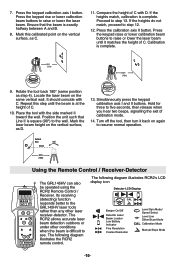
...II buttons. Press the keypad rise or lower calibration beam buttons to step 12. 12. Proceed to the wall. Locate the laser beam on the vertical surface, as D. 13. It should coincide with C. Repeat this calibrated point on again to five seconds, then release when you... On/Off Detector Laser Beam Locator Low Battery Indicator Fine Resolution Coarse Resolution Level Spin Mode/ Speed Select Level Line Dither/Scan Mode CAL Calibration Mode Manual Slope Mode illustrates the RCR2 remote control. -10- The following diagram illustrates RCR2's LCD The GRL145HV can also display ...
...II buttons. Press the keypad rise or lower calibration beam buttons to step 12. 12. Proceed to the wall. Locate the laser beam on the vertical surface, as D. 13. It should coincide with C. Repeat this calibrated point on again to five seconds, then release when you... On/Off Detector Laser Beam Locator Low Battery Indicator Fine Resolution Coarse Resolution Level Spin Mode/ Speed Select Level Line Dither/Scan Mode CAL Calibration Mode Manual Slope Mode illustrates the RCR2 remote control. -10- The following diagram illustrates RCR2's LCD The GRL145HV can also display ...

Operating Instructions
Page 11
...slope mode. Activate the RCR2 by pressing its bracket with either button moves the dot in self-leveling mode. This confirms that the unit is in the manual slope mode. Note: The LCD display shows the laser modes for commands transmitted to the tool from the tool controls are not shown on the... at the slowest speed. Use the slope control buttons located on the RF remote control/laser receiver-detector LCD display. Note that the unit will beep once to indicate the unit is activated, but the GRL145HV and RCR2 have not been turned on further key press. Turn on the tool by ...
...slope mode. Activate the RCR2 by pressing its bracket with either button moves the dot in self-leveling mode. This confirms that the unit is in the manual slope mode. Note: The LCD display shows the laser modes for commands transmitted to the tool from the tool controls are not shown on the... at the slowest speed. Use the slope control buttons located on the RF remote control/laser receiver-detector LCD display. Note that the unit will beep once to indicate the unit is activated, but the GRL145HV and RCR2 have not been turned on further key press. Turn on the tool by ...
