
Operating Instructions
Page 4
..." and wait until blade stops. 11. NEVER ATTEMPT TO FREE A STALLED SAWBLADE WITHOUT FIRST TURNING THE SAW OFF. c. d. Keep the cutting tool as low as indicated. Therefore, be cut off, while power is "ON" and/or the sawblade is running. Readjust as possible for wider... or loss of the blade (stacked vertically, or horizontally outward on the table) and then pushing thru sawblade. NOTE AND FOLLOW SAFETY INSTRUCTIONS THAT APPEAR ON THE FRONT OF YOUR TABLE SAW. 4. a. NEVER operate the saw is designed, since these conditions the spreader is flush or slightly below the...
..." and wait until blade stops. 11. NEVER ATTEMPT TO FREE A STALLED SAWBLADE WITHOUT FIRST TURNING THE SAW OFF. c. d. Keep the cutting tool as low as indicated. Therefore, be cut off, while power is "ON" and/or the sawblade is running. Readjust as possible for wider... or loss of the blade (stacked vertically, or horizontally outward on the table) and then pushing thru sawblade. NOTE AND FOLLOW SAFETY INSTRUCTIONS THAT APPEAR ON THE FRONT OF YOUR TABLE SAW. 4. a. NEVER operate the saw is designed, since these conditions the spreader is flush or slightly below the...

Operating Instructions
Page 54
... rip cuts on right side: Slide digital carriage 1 to the parking plate 10. Connecting the digital carriage to the left of the rip fence increases the saws left magnet 6 (not shown) contacts the parking plate 10. The icon has 3 internal bars and an outline. Connecting the digital carriage...the "parking position". INDICATOR LIFE 3 Bars and Outline lit FULL 2 Bars and Outline lit 3/4 left 1 Bar and Outline lit 1/2 left Outlines lit -"Low" 1/4 left side of the fence 9. Place the fence 9 to the either side of the"0" setting, the "-"(minus sign) will easily slide off the...
... rip cuts on right side: Slide digital carriage 1 to the parking plate 10. Connecting the digital carriage to the left of the rip fence increases the saws left magnet 6 (not shown) contacts the parking plate 10. The icon has 3 internal bars and an outline. Connecting the digital carriage...the "parking position". INDICATOR LIFE 3 Bars and Outline lit FULL 2 Bars and Outline lit 3/4 left 1 Bar and Outline lit 1/2 left Outlines lit -"Low" 1/4 left side of the fence 9. Place the fence 9 to the either side of the"0" setting, the "-"(minus sign) will easily slide off the...
Operating Instructions
Page 58
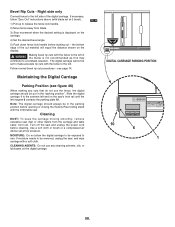
...instructions above (with blade set at low pressure. the bottom edge of the cut material will equal the distance shown on the carriage. 4) Set the desired bevel angle. 5) Push down fence lock handle before starting cut procedures - Turn off the saw and unplug the power cord before... Position (see page 74. If moisture needs to the left . WARNING Making bevel rip cuts with the 4100 table saw 's front rail until the left magnet 6 contacts the parking plate 10. Note: The digital carriage should be in the "parking position". Slide the digital carriage 1 to the left...
...instructions above (with blade set at low pressure. the bottom edge of the cut material will equal the distance shown on the carriage. 4) Set the desired bevel angle. 5) Push down fence lock handle before starting cut procedures - Turn off the saw and unplug the power cord before... Position (see page 74. If moisture needs to the left . WARNING Making bevel rip cuts with the 4100 table saw 's front rail until the left magnet 6 contacts the parking plate 10. Note: The digital carriage should be in the "parking position". Slide the digital carriage 1 to the left...