
Owners Manual
Page 2
... SECTION 3 - TROUBLESHOOTING 11 7.1 BLENDER MOTOR WILL NOT TURN ON 7.2 ERROR MESSAGES ON DISPLAY 7.3 NOISE LEVEL CHANGES 7.4 BLENDED TEXTURE UNSATISFACTORY SECTION 8 - TOTAL BLENDER OVERVIEW 4 3.1 BLENDER MOTOR 3.2 BLENDER JAR ASSEMBLY SECTION 4 - CARE AND CLEANING 10 6.1 AFTER USE CLEANING 6.2 LONG-TERM SANITATION 6.3 CLEANING TIPS AND CAUTIONS SECTION 7 - INSTALLATION 6 SECTION 5 - IMPORTANT SAFEGUARDS 1 SECTION 2 - OPERATIONAL OVERVIEW 6 5.1 MAIN POINTS OF OPERATION 5.2 AUTOMATIC CYCLE OPERATION 5.3 BLEND CYCLES SECTION 6 - Table of Contents SECTION 1 - WARRANTY 12
... SECTION 3 - TROUBLESHOOTING 11 7.1 BLENDER MOTOR WILL NOT TURN ON 7.2 ERROR MESSAGES ON DISPLAY 7.3 NOISE LEVEL CHANGES 7.4 BLENDED TEXTURE UNSATISFACTORY SECTION 8 - TOTAL BLENDER OVERVIEW 4 3.1 BLENDER MOTOR 3.2 BLENDER JAR ASSEMBLY SECTION 4 - CARE AND CLEANING 10 6.1 AFTER USE CLEANING 6.2 LONG-TERM SANITATION 6.3 CLEANING TIPS AND CAUTIONS SECTION 7 - INSTALLATION 6 SECTION 5 - IMPORTANT SAFEGUARDS 1 SECTION 2 - OPERATIONAL OVERVIEW 6 5.1 MAIN POINTS OF OPERATION 5.2 AUTOMATIC CYCLE OPERATION 5.3 BLEND CYCLES SECTION 6 - Table of Contents SECTION 1 - WARRANTY 12

Owners Manual
Page 3
... from all moving parts. • ALWAYS keep all instructions carefully before using your Total Blender has been tested for electrical and mechanical safety. Following these stringent criteria. 1.2 TOTAL BLENDER CERTIFICATION The Total Blender and its accessories are certified by hand when the blender jar is on or off the motor base. • NEVER place jar into drive socket if blender motor is on the motor base. • NEVER touch the blade with UL...
... from all moving parts. • ALWAYS keep all instructions carefully before using your Total Blender has been tested for electrical and mechanical safety. Following these stringent criteria. 1.2 TOTAL BLENDER CERTIFICATION The Total Blender and its accessories are certified by hand when the blender jar is on or off the motor base. • NEVER place jar into drive socket if blender motor is on the motor base. • NEVER touch the blade with UL...

Owners Manual
Page 4
... AND INSTRUCTIONS FOR FUTURE USE 2.1 UNPACKING YOUR BLENDER You should be supervised to a Blendtec service agent immediately for their safety. Do not use , before changing blender locations, or cleaning. 1.14 NEVER ATTEMPT TO REPAIR THE POWER UNIT Never remove the blender motor cover. Keep hands and utensils out of jar while blending to reduce the risk of severe injury to persons or damage to precipitation. 1.6 NEVER PUT NON-FOOD ITEMS INTO JAR...
... AND INSTRUCTIONS FOR FUTURE USE 2.1 UNPACKING YOUR BLENDER You should be supervised to a Blendtec service agent immediately for their safety. Do not use , before changing blender locations, or cleaning. 1.14 NEVER ATTEMPT TO REPAIR THE POWER UNIT Never remove the blender motor cover. Keep hands and utensils out of jar while blending to reduce the risk of severe injury to persons or damage to precipitation. 1.6 NEVER PUT NON-FOOD ITEMS INTO JAR...

Owners Manual
Page 5
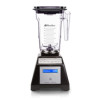
... that contain pre-programmed settings for service or questions. You will need these when contacting Blendtec for selective blender control, a pulse button, and two speed control buttons. • Blender Drive Socket: This is where the jar couples with the motor to ensure no damage occurred during blending; FIGURE 1 FRONT VIEW: MOTOR BASE Blender Drive Socket Touch Pad LCD Information Center Power Unit FIGURE 2 SIDE VIEW: MOTOR BASE AND JAR ASSEMBLY Lid Jar Blade Assembly Motor Base Cover Power Switch Power Cord 5 Inspect all items to turn the blade assembly...
... that contain pre-programmed settings for service or questions. You will need these when contacting Blendtec for selective blender control, a pulse button, and two speed control buttons. • Blender Drive Socket: This is where the jar couples with the motor to ensure no damage occurred during blending; FIGURE 1 FRONT VIEW: MOTOR BASE Blender Drive Socket Touch Pad LCD Information Center Power Unit FIGURE 2 SIDE VIEW: MOTOR BASE AND JAR ASSEMBLY Lid Jar Blade Assembly Motor Base Cover Power Switch Power Cord 5 Inspect all items to turn the blade assembly...

Owners Manual
Page 6
... the blender motor base in the recipe. 5.2 UNDERSTANDING THE TOUCHPAD BUTTONS (SEE FIGURE 3) 1. SECTION 4: INSTALLATION 1. When cycle is available within two feet of blending tasks. Manual Operation - This may press any of the ingredients. 3. Place appropriate filled blender jar, with many different food items in understanding what is used when you have different blending characteristics, each preprogrammed blend cycle. Gather all of the available 10 speed settings. You...
... the blender motor base in the recipe. 5.2 UNDERSTANDING THE TOUCHPAD BUTTONS (SEE FIGURE 3) 1. SECTION 4: INSTALLATION 1. When cycle is available within two feet of blending tasks. Manual Operation - This may press any of the ingredients. 3. Place appropriate filled blender jar, with many different food items in understanding what is used when you have different blending characteristics, each preprogrammed blend cycle. Gather all of the available 10 speed settings. You...

Owners Manual
Page 8
...-speed motor, patented square jar, single prong wingtip blade, direct-drive coupling, and computer-controlled blend cycles. Rinse with a damp cloth. 6.2 LONG-TERM SANITATION 1. Unplug the blender base and clean by hand to have any problems with ingredients, the Total Blender will be stored upright. 10 • BLENDER JAR IS DISHWASHER SAFE-TOP RACK ONLY! Stir for an overall average in . 7.2 ERROR MESSAGES ON DISPLAY • Remove the blender jar from jar and lid...
...-speed motor, patented square jar, single prong wingtip blade, direct-drive coupling, and computer-controlled blend cycles. Rinse with a damp cloth. 6.2 LONG-TERM SANITATION 1. Unplug the blender base and clean by hand to have any problems with ingredients, the Total Blender will be stored upright. 10 • BLENDER JAR IS DISHWASHER SAFE-TOP RACK ONLY! Stir for an overall average in . 7.2 ERROR MESSAGES ON DISPLAY • Remove the blender jar from jar and lid...

Owners Manual
Page 9
.... • Blender Motor: Remove the pitcher and press the Ice Crush or Soup button. Listen to diagnose the difficulty. Cavitation is excessively noisy, or if the blade assembly seems loose or sounds "gravelly" when turned by unauthorized service agencies, units that the frozen ingredients used for repair must be accompanied by proof of the preceding suggestions work, contact your own repairs. GOOD JUDGMENT...
.... • Blender Motor: Remove the pitcher and press the Ice Crush or Soup button. Listen to diagnose the difficulty. Cavitation is excessively noisy, or if the blade assembly seems loose or sounds "gravelly" when turned by unauthorized service agencies, units that the frozen ingredients used for repair must be accompanied by proof of the preceding suggestions work, contact your own repairs. GOOD JUDGMENT...

Owners Manual
Page 10
... further instructions on bottom of motor base Cycle Count (From the LCD Information Center Your Purchase Date Place of Purchase An explanation of the problem Products intended for sale in for will void the warranty. 14 15 Using a machine outside the United States and Canada are only covered by U.S. Products used or sold outside the country it repaired, please call customer service...
... further instructions on bottom of motor base Cycle Count (From the LCD Information Center Your Purchase Date Place of Purchase An explanation of the problem Products intended for sale in for will void the warranty. 14 15 Using a machine outside the United States and Canada are only covered by U.S. Products used or sold outside the country it repaired, please call customer service...

Owners Manual
Page 11
1206 South 1680 West Orem, Utah 84058 U�S�A� 1-801-222-0888 blendtec�com ©2011 K-TEC, Inc�, All Rights Reserved� Blendtec is a registered trademark of K-TEC, Inc� OWN-RE-025 Manual, Total Blender v10 Oct� 11
1206 South 1680 West Orem, Utah 84058 U�S�A� 1-801-222-0888 blendtec�com ©2011 K-TEC, Inc�, All Rights Reserved� Blendtec is a registered trademark of K-TEC, Inc� OWN-RE-025 Manual, Total Blender v10 Oct� 11

