Owners Manual
Page 1
THE TOM DICKSON EXTREME BLENDER MANUAL
THE TOM DICKSON EXTREME BLENDER MANUAL
Owners Manual
Page 2
TABLE OF CONTENTS SECTION SECTION 1: IMPORTANT SAFEGUARDS SECTION 2: UNPACKING SECTION 3: BLENDER OVERVIEW SECTION 4: INSTALLATION SECTION 5: CARE AND CLEANING SECTION 6: OPERATIONAL OVERVIEW SECTION 7: TROUBLESHOOTING SECTION 8: WARRANTY PAGE # 1 3 4 5 9 9 14 15 II
TABLE OF CONTENTS SECTION SECTION 1: IMPORTANT SAFEGUARDS SECTION 2: UNPACKING SECTION 3: BLENDER OVERVIEW SECTION 4: INSTALLATION SECTION 5: CARE AND CLEANING SECTION 6: OPERATIONAL OVERVIEW SECTION 7: TROUBLESHOOTING SECTION 8: WARRANTY PAGE # 1 3 4 5 9 9 14 15 II
Owners Manual
Page 3
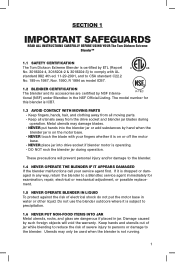
...INTO JAR Metal utensils, rocks, and glass are certified by NSF International (NSF) under Blendtec in any way, return the blender to a Blendtec service agent immediately for this blender is ICB7. 1.3 AVOID CONTACT WITH MOVING PARTS • Keep fingers, hands, hair, ... against the risk of severe injury to persons or damage to the blender. SECTION 1 IMPORTANT SAFEGUARDS READ ALL INSTRUCTIONS CAREFULLY BEFORE USING YOUR The Tom Dickson Extreme Blender™ 1.1 SAFETY CERTIFICATION The Tom Dickson Extreme Blender is certified by ETL (Report No. 3018204-4, 3018204-2 & 3018204-3)...
...INTO JAR Metal utensils, rocks, and glass are certified by NSF International (NSF) under Blendtec in any way, return the blender to a Blendtec service agent immediately for this blender is ICB7. 1.3 AVOID CONTACT WITH MOVING PARTS • Keep fingers, hands, hair, ... against the risk of severe injury to persons or damage to the blender. SECTION 1 IMPORTANT SAFEGUARDS READ ALL INSTRUCTIONS CAREFULLY BEFORE USING YOUR The Tom Dickson Extreme Blender™ 1.1 SAFETY CERTIFICATION The Tom Dickson Extreme Blender is certified by ETL (Report No. 3018204-4, 3018204-2 & 3018204-3)...
Owners Manual
Page 4
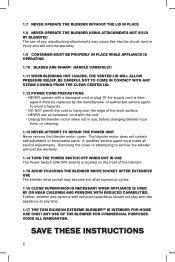
... THE TOM DICKSON EXTREME BLENDER™ IS INTENDED FOR HOME USE ONLY! HANDLE CAREFULLY! 1.11 WHEN BLENDING HOT LIQUIDS, THE VENTED LID WILL ALLOW PRESSURE RELIEF. The blender motor does not contain self-adjustable or serviceable parts. 1.7 NEVER OPERATE THE BLENDER WITHOUT THE LID IN PLACE 1.8 NEVER OPERATE THE BLENDER USING ATTACHMENTS NOT SOLD BY BLENDTEC The use...
... THE TOM DICKSON EXTREME BLENDER™ IS INTENDED FOR HOME USE ONLY! HANDLE CAREFULLY! 1.11 WHEN BLENDING HOT LIQUIDS, THE VENTED LID WILL ALLOW PRESSURE RELIEF. The blender motor does not contain self-adjustable or serviceable parts. 1.7 NEVER OPERATE THE BLENDER WITHOUT THE LID IN PLACE 1.8 NEVER OPERATE THE BLENDER USING ATTACHMENTS NOT SOLD BY BLENDTEC The use...
Owners Manual
Page 5
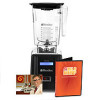
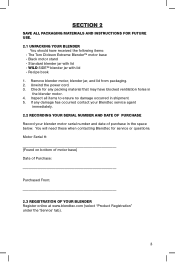
...contacting Blendtec for any damage has occurred contact your Blendtec service agent immediately. 2.2 RECORDING YOUR SERIAL NUMBER AND DATE OF PURCHASE Record your blender motor serial number and date of Purchase: Purchased From: 2.3 REGISTRATION OF YOUR BLENDER Register online at www.blendtec.com... Remove blender motor, blender jar, and lid from packaging. 2. If any packing material that may have received the following items: • The Tom Dickson Extreme Blender™ motor base • Black motor stand • Standard blender jar with lid • WILD SIDE™ blender jar ...
...contacting Blendtec for any damage has occurred contact your Blendtec service agent immediately. 2.2 RECORDING YOUR SERIAL NUMBER AND DATE OF PURCHASE Record your blender motor serial number and date of Purchase: Purchased From: 2.3 REGISTRATION OF YOUR BLENDER Register online at www.blendtec.com... Remove blender motor, blender jar, and lid from packaging. 2. If any packing material that may have received the following items: • The Tom Dickson Extreme Blender™ motor base • Black motor stand • Standard blender jar with lid • WILD SIDE™ blender jar ...
Owners Manual
Page 6
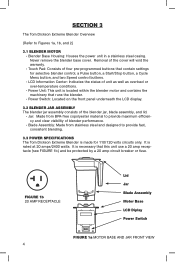
... FIGURE 1a MOTOR BASE AND JAR FRONT VIEW 4 It is rated at 20 amps/2400 watts. SECTION 3 The Tom Dickson Extreme Blender Overview (Refer to provide fast, consistent blending. 3.3 POWER SPECIFICATIONS The Tom Dickson Extreme Blender is made for selective blender control, a Pulse button, a Start/Stop button, a Cycle Menu button, and two Speed control buttons. • LCD Information Center...
... FIGURE 1a MOTOR BASE AND JAR FRONT VIEW 4 It is rated at 20 amps/2400 watts. SECTION 3 The Tom Dickson Extreme Blender Overview (Refer to provide fast, consistent blending. 3.3 POWER SPECIFICATIONS The Tom Dickson Extreme Blender is made for selective blender control, a Pulse button, a Start/Stop button, a Cycle Menu button, and two Speed control buttons. • LCD Information Center...
Owners Manual
Page 7
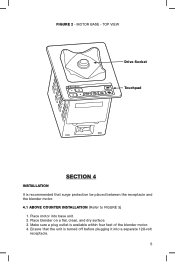
Place motor into a separate 120-volt receptacle. 5 Make sure a plug outlet is turned off before plugging it into base unit. 2. MOTOR BASE - Place blender on a flat, clean, and dry surface. 3. TOP VIEW Drive Socket Touchpad SECTION 4 INSTALLATION It is recommended that the unit is available within four feet of the blender motor. 4. Ensure that surge protection be placed between the receptacle and the blender motor. 4.1 ABOVE COUNTER INSTALLATION (Refer to FIGURE 3) 1. FIGURE 2 -
Place motor into a separate 120-volt receptacle. 5 Make sure a plug outlet is turned off before plugging it into base unit. 2. MOTOR BASE - Place blender on a flat, clean, and dry surface. 3. TOP VIEW Drive Socket Touchpad SECTION 4 INSTALLATION It is recommended that the unit is available within four feet of the blender motor. 4. Ensure that surge protection be placed between the receptacle and the blender motor. 4.1 ABOVE COUNTER INSTALLATION (Refer to FIGURE 3) 1. FIGURE 2 -

Owners Manual
Page 8
FIGURE 3 - ABOVE-COUNTER DIMENSIONS 16 1/8" (410 mm) 6 3/8" (162 mm) 8 1/4" (210 mm) 6
FIGURE 3 - ABOVE-COUNTER DIMENSIONS 16 1/8" (410 mm) 6 3/8" (162 mm) 8 1/4" (210 mm) 6
Owners Manual
Page 9
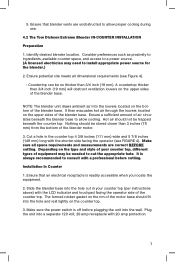
...be needed to allow cooling. It is always recommended to allow proper cooling during use. 4.2 The Tom Dickson Extreme Blender IN-COUNTER INSTALLATION Preparation 1. Ensure that blender vents are correct BEFORE cutting. 5. Installation In Counter 1. The formed rubber gasket on the upper sides... 120 volt, 20 amp receptacle with a professional before plugging the unit into the hole cut the appropriate hole. Identify desired blender location. Nothing should be no thicker than 3/4 inch (19 mm). Ensure that an electrical receptacle is off before cutting. ...
...be needed to allow cooling. It is always recommended to allow proper cooling during use. 4.2 The Tom Dickson Extreme Blender IN-COUNTER INSTALLATION Preparation 1. Ensure that blender vents are correct BEFORE cutting. 5. Installation In Counter 1. The formed rubber gasket on the upper sides... 120 volt, 20 amp receptacle with a professional before plugging the unit into the hole cut the appropriate hole. Identify desired blender location. Nothing should be no thicker than 3/4 inch (19 mm). Ensure that an electrical receptacle is off before cutting. ...
Owners Manual
Page 10
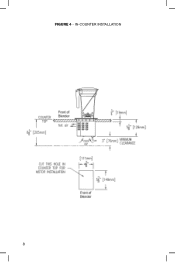
FIGURE 4 - IN-COUNTER INSTALLATION 8
FIGURE 4 - IN-COUNTER INSTALLATION 8
Owners Manual
Page 11
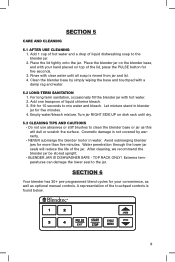
... manual controls. TOP RACK ONLY! Clean the blender base by warranty. • NEVER submerge the blender motor in blender jar for more than five minutes. SECTION 5 CARE AND CLEANING 5.1 AFTER USE CLEANING 1. Let mixture stand in water. Extreme temperatures can damage the lower seal to mix water... and bleach. Place the blender jar on the blender base, and with clear water until dry. 5.3 CLEANING TIPS AND CAUTIONS • Do not...
... manual controls. TOP RACK ONLY! Clean the blender base by warranty. • NEVER submerge the blender motor in blender jar for more than five minutes. SECTION 5 CARE AND CLEANING 5.1 AFTER USE CLEANING 1. Let mixture stand in water. Extreme temperatures can damage the lower seal to mix water... and bleach. Place the blender jar on the blender base, and with clear water until dry. 5.3 CLEANING TIPS AND CAUTIONS • Do not...
Owners Manual
Page 12
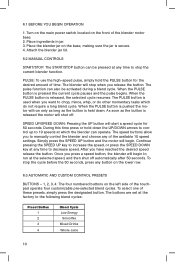
... Continue pressing the SPEED UP key to increase the speed, or press the SPEED DOWN key at the factory to decrease speed. Attach the blender jar lid. 6.2 MANUAL CONTROLS START/STOP: The START/STOP button can be activated during a blend cycle. When the PULSE button is pressed...any time to the following blend cycles: Preset Button 1 2 3 4 Blend Cycle Low Energy Smoothie Mixed Drinks Whole Juice 10 To stop the current blender function. 6.1 BEFORE YOU BEGIN OPERATION 1. The pulse function can operate. Once you want to 10 speeds at the selected speed, and then shut off ...
... Continue pressing the SPEED UP key to increase the speed, or press the SPEED DOWN key at the factory to decrease speed. Attach the blender jar lid. 6.2 MANUAL CONTROLS START/STOP: The START/STOP button can be activated during a blend cycle. When the PULSE button is pressed...any time to the following blend cycles: Preset Button 1 2 3 4 Blend Cycle Low Energy Smoothie Mixed Drinks Whole Juice 10 To stop the current blender function. 6.1 BEFORE YOU BEGIN OPERATION 1. The pulse function can operate. Once you want to 10 speeds at the selected speed, and then shut off ...
Owners Manual
Page 13
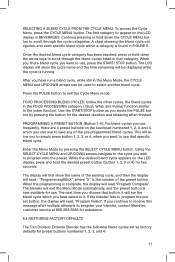
...mode. Press the PULSE button to use . This will be used to program your blender, contact Blendtec customer service at 800-253-6383 for assistance. 6.4 RESTORING FACTORY DEFAULTS The Tom Dickson Extreme Blender has the following blend cycles set as you want to program onto the preset. If... the blender fails to program the preset button, the display will exit the Menu Mode ...
...mode. Press the PULSE button to use . This will be used to program your blender, contact Blendtec customer service at 800-253-6383 for assistance. 6.4 RESTORING FACTORY DEFAULTS The Tom Dickson Extreme Blender has the following blend cycles set as you want to program onto the preset. If... the blender fails to program the preset button, the display will exit the Menu Mode ...
Owners Manual
Page 14
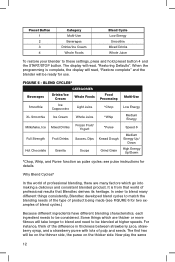
...Down *Chop, Whip, and Puree function as pulse cycles; In order to blend many factors which are many different things consistently, Blendtec developed blend cycles to match the blending needs of the type of blend cycles.) Because different ingredients have different blending characteristics, each ingredient...1 2 3 4 Category Multi-Use Beverages Drinks/Ice Cream Whole Foods Blend Cycle Low Energy Smoothie Mixed Drinks Whole Juice To restore your blender to these settings, press and hold preset button 4 and the START/STOP button. When the programming is from that world of pulp and ...
...Down *Chop, Whip, and Puree function as pulse cycles; In order to blend many factors which are many different things consistently, Blendtec developed blend cycles to match the blending needs of the type of blend cycles.) Because different ingredients have different blending characteristics, each ingredient...1 2 3 4 Category Multi-Use Beverages Drinks/Ice Cream Whole Foods Blend Cycle Low Energy Smoothie Mixed Drinks Whole Juice To restore your blender to these settings, press and hold preset button 4 and the START/STOP button. When the programming is from that world of pulp and ...
Owners Manual
Page 15
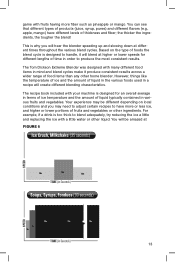
...) have more fiber such as pineapple or mango. This is designed to produce the most consistent results. The Tom Dickson Extreme Blender was designed with many different food items in a recipe will hear the blender speeding up and slowing down at FIGURE 6 13 game with fruits having more or less ice, and higher or... lower portions of fruits and vegetables or other home blender. However, things like the temperature of ice and the amount of liquid in the various foods used in mind and blend cycles make it ...
...) have more fiber such as pineapple or mango. This is designed to produce the most consistent results. The Tom Dickson Extreme Blender was designed with many different food items in a recipe will hear the blender speeding up and slowing down at FIGURE 6 13 game with fruits having more or less ice, and higher or... lower portions of fruits and vegetables or other home blender. However, things like the temperature of ice and the amount of liquid in the various foods used in mind and blend cycles make it ...
Owners Manual
Page 16
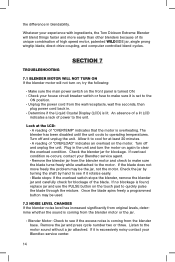
... prong wingtip blade, direct drive coupling, and computer controlled blend cycles. If overload condition re-occurs, contact your Blendtec service agent. • Remove the blender jar from the blender motor and check to make sure it to the ON position. • Unplug the power cord from the wall...cord back in. • Determine if the Liquid Crystal Display (LCD) is turned ON. • Check your experience with ingredients, the Tom Dickson Extreme Blender will not turn the motor on the touch pad to operating temperatures. Remove the jar and press cycle number two or three. Look at ...
... prong wingtip blade, direct drive coupling, and computer controlled blend cycles. If overload condition re-occurs, contact your Blendtec service agent. • Remove the blender jar from the blender motor and check to make sure it to the ON position. • Unplug the power cord from the wall...cord back in. • Determine if the Liquid Crystal Display (LCD) is turned ON. • Check your experience with ingredients, the Tom Dickson Extreme Blender will not turn the motor on the touch pad to operating temperatures. Remove the jar and press cycle number two or three. Look at ...
Owners Manual
Page 17
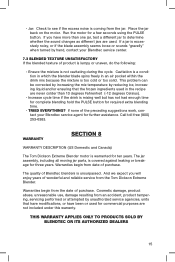
... WARRANTY APPLIES ONLY TO PRODUCTS SOLD BY BLENDTEC OR ITS AUTHORIZED DEALERS 15 Cavitation is a condition in which the blender blade spins freely in the recipe are not included under this warranty. Warranties begin from the Tom Dickson Extreme Blender. WARRANTY SECTION 8 WARRANTY DESCRIPTION (US Domestic and Canada) The Tom Dickson Extreme Blender motor is too cold or too solid...
... WARRANTY APPLIES ONLY TO PRODUCTS SOLD BY BLENDTEC OR ITS AUTHORIZED DEALERS 15 Cavitation is a condition in which the blender blade spins freely in the recipe are not included under this warranty. Warranties begin from the Tom Dickson Extreme Blender. WARRANTY SECTION 8 WARRANTY DESCRIPTION (US Domestic and Canada) The Tom Dickson Extreme Blender motor is too cold or too solid...

Owners Manual
Page 18
... purchase date: Place of purchase: An explanation of ten years on the motor and three years on the bottom of the blender motor base) Cycle Count (from Blendtec, box up your own repairs. Do not attempt to do your existing unit and enclose the following: Your name: Address:... warranties of fitness and merchantability are not included. 3. Do not attempt to do your unit may require replacement. If the blender is not under warranty, Blendtec will be repaired or the product replaced, at no cost. Cosmetic damage and abuse are limited in material and workmanship for ...
... purchase date: Place of purchase: An explanation of ten years on the motor and three years on the bottom of the blender motor base) Cycle Count (from Blendtec, box up your own repairs. Do not attempt to do your existing unit and enclose the following: Your name: Address:... warranties of fitness and merchantability are not included. 3. Do not attempt to do your unit may require replacement. If the blender is not under warranty, Blendtec will be repaired or the product replaced, at no cost. Cosmetic damage and abuse are limited in material and workmanship for ...
Owners Manual
Page 19
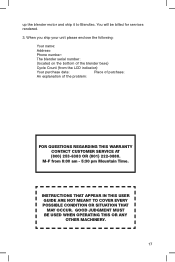
... your unit please enclose the following: Your name: Address: Phone number: The blender serial number: (located on the bottom of the blender base) Cycle Count (from 8:00 am - 5:30 pm Mountain Time. up the blender motor and ship it to Blendtec. GOOD JUDGMENT MUST BE USED WHEN OPERATING THIS OR ANY OTHER MACHINERY. 17...
... your unit please enclose the following: Your name: Address: Phone number: The blender serial number: (located on the bottom of the blender base) Cycle Count (from 8:00 am - 5:30 pm Mountain Time. up the blender motor and ship it to Blendtec. GOOD JUDGMENT MUST BE USED WHEN OPERATING THIS OR ANY OTHER MACHINERY. 17...

Owners Manual
Page 20
1206 South 1680 West Orem, UT 84058 801-222-0888 www. blendtec.com OWN-RD-041 Manual, The Tom Dickson Extreme Blender v1 May 10
1206 South 1680 West Orem, UT 84058 801-222-0888 www. blendtec.com OWN-RD-041 Manual, The Tom Dickson Extreme Blender v1 May 10