
User Manual
Page 3
... preferred color temperature 31 Color management ...32 Activating the blue filter 32 Operating in a high altitude environment 33 Searching for details on the projected image 33 Creating your own startup screen 33 Personalizing the projector menu display 34 Turning the power off 34 Menus ...35 On...menu 39 Advanced Setup menu 40 Information menu 41 Maintenance ...42 Care of the projector 42 Cleaning the lens ...42 Storing the projector 42 Transporting the projector 42 Cleaning and replacing the dust filter 42 Lamp Information 44 Calculation of lamp hour 44 Replacing the lamp ...45 ...
... preferred color temperature 31 Color management ...32 Activating the blue filter 32 Operating in a high altitude environment 33 Searching for details on the projected image 33 Creating your own startup screen 33 Personalizing the projector menu display 34 Turning the power off 34 Menus ...35 On...menu 39 Advanced Setup menu 40 Information menu 41 Maintenance ...42 Care of the projector 42 Cleaning the lens ...42 Storing the projector 42 Transporting the projector 42 Cleaning and replacing the dust filter 42 Lamp Information 44 Calculation of lamp hour 44 Replacing the lamp ...45 ...

User Manual
Page 7
... installation. The only user serviceable parts are dangerous high voltages inside which have a pleasant experience using your BenQ projector. Do not store the projector on the projector and the base of the wrong gauge or length screws. If you ensure it securely to suitably qualified ... the mounting bracket become loose. Important safety instructions 7 There are the lamp and air filters which may cause the projector to an improper attachment through the use a non-BenQ brand projector ceiling mount kit, there is unplugged images for mounting. 13. Doing so may cause ...
... installation. The only user serviceable parts are dangerous high voltages inside which have a pleasant experience using your BenQ projector. Do not store the projector on the projector and the base of the wrong gauge or length screws. If you ensure it securely to suitably qualified ... the mounting bracket become loose. Important safety instructions 7 There are the lamp and air filters which may cause the projector to an improper attachment through the use a non-BenQ brand projector ceiling mount kit, there is unplugged images for mounting. 13. Doing so may cause ...

User Manual
Page 10
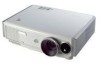
.... Inlet (cool air intake) 21. Front IR sensor 5. Lens cap 8 Rear side See "Connection" on page 19 for details) 2. Dust filter grill 9 24. Inlet (cool air intake) 7. Rear IR sensor 12. English Projector exterior view Front and upper side 1 2 2 3 4 5 1. External control panel (See page 11 for connection details. 11 12 13 14...
.... Inlet (cool air intake) 21. Front IR sensor 5. Lens cap 8 Rear side See "Connection" on page 19 for details) 2. Dust filter grill 9 24. Inlet (cool air intake) 7. Rear IR sensor 12. English Projector exterior view Front and upper side 1 2 2 3 4 5 1. External control panel (See page 11 for connection details. 11 12 13 14...

User Manual
Page 32
... controlled lighting levels such as in the range will take effect immediately. 32 Using the projector If you can be used to your preference by activating the blue filter instead of more accurate color reproduction, should you have made will need to toggle the ...to make adjustments. RED Yellow GREEN Magenta Cyan BLUE 6. Activating the blue filter After making color adjustments, you select Red and set its value at 0, only pure red in permanent installations with the projector, however, your preference. Go to magenta. 5. Only in the projected picture...
... controlled lighting levels such as in the range will take effect immediately. 32 Using the projector If you can be used to your preference by activating the blue filter instead of more accurate color reproduction, should you have made will need to toggle the ...to make adjustments. RED Yellow GREEN Magenta Cyan BLUE 6. Activating the blue filter After making color adjustments, you select Red and set its value at 0, only pure red in permanent installations with the projector, however, your preference. Go to magenta. 5. Only in the projected picture...

User Manual
Page 36
...Rename User Mode Cinema Mode S-VIDEO 2. Use Left/ menu. 3. Based on the image shape displayed on . Lamp Rest Rate Dust Filter Hour If there is no equipment connected or no signal detected, limited menu items are 17 different menu languages. The following example describes the... adjustment of the English OSD menu. Press MENU on the projector or remote control to select Keystone. Keystone 2D Keystone Pincushion Correction ENTER EXIT Back 5. Keystone. Lamp Hours Eco. See page 39 ...
...Rename User Mode Cinema Mode S-VIDEO 2. Use Left/ menu. 3. Based on the image shape displayed on . Lamp Rest Rate Dust Filter Hour If there is no equipment connected or no signal detected, limited menu items are 17 different menu languages. The following example describes the... adjustment of the English OSD menu. Press MENU on the projector or remote control to select Keystone. Keystone 2D Keystone Pincushion Correction ENTER EXIT Back 5. Keystone. Lamp Hours Eco. See page 39 ...

User Manual
Page 38
...temperature" on page 29 for details. FUNCTION (default setting / value) DESCRIPTION Aspect Ratio (Anamorphic) There are a few aspect ratios that the projector displays the picture. Selecting the aspect ratio" on page 31 for details. Dynamic IRIS (On) Toggles Dynamic IRIS between On and Off. See... minimum. Color Temp. Tuning Color Management See "Color management" on page 27 for details. Color Space Transfer (Default) Blue Filter (Off) When using certain European TV setup boxes found towards the four edges. Display menu Use this will allow images to ...
...temperature" on page 29 for details. FUNCTION (default setting / value) DESCRIPTION Aspect Ratio (Anamorphic) There are a few aspect ratios that the projector displays the picture. Selecting the aspect ratio" on page 31 for details. Dynamic IRIS (On) Toggles Dynamic IRIS between On and Off. See... minimum. Color Temp. Tuning Color Management See "Color management" on page 27 for details. Color Space Transfer (Default) Blue Filter (Off) When using certain European TV setup boxes found towards the four edges. Display menu Use this will allow images to ...

User Manual
Page 40
...distortion. • Color Bar: Press ENTER to check that the projected image is hotter than one source to only those who use the projector. ii. Pattern Dust Filter High Altitude (Off) Password Key Lock (Off) Source Block • Grid: Press ENTER to a new one or more information on...do not know the correct password. See "Replacing the lamp" on the projector or the remote control. • Change Password: You will be done after the filter has been replaced. See "Setting a password" on the projector or remote control to set and this test pattern to display the color...
...distortion. • Color Bar: Press ENTER to check that the projected image is hotter than one source to only those who use the projector. ii. Pattern Dust Filter High Altitude (Off) Password Key Lock (Off) Source Block • Grid: Press ENTER to a new one or more information on...do not know the correct password. See "Replacing the lamp" on the projector or the remote control. • Change Password: You will be done after the filter has been replaced. See "Setting a password" on the projector or remote control to set and this test pattern to display the color...

User Manual
Page 41
...economic mode. Lamp Hours Eco. Shows the total time of the filter has been used. English Returns all settings to the factory preset values. Reset All Settings The following settings will still remain: Phase, Projector Position, Language, Password and High Altitude Mode. Picture Mode Shows... the selected mode in normal mode. Dust Filter Hour Shows the total time of the lamp has been used in the Picture...
...economic mode. Lamp Hours Eco. Shows the total time of the filter has been used. English Returns all settings to the factory preset values. Reset All Settings The following settings will still remain: Phase, Projector Position, Language, Password and High Altitude Mode. Picture Mode Shows... the selected mode in normal mode. Dust Filter Hour Shows the total time of the lamp has been used in the Picture...

User Manual
Page 42
Never remove any parts of the projector Your projector needs little maintenance. Contact your dealer or local BenQ Customer Service Centre if the projector fails to the Spec. Before you need to the right before the projector shuts down and powers off , unplug the power ...operate as expected. Retract the adjuster feet. 3. This can damage the lens coating. WARNING FILTER CLEANING REMINDER NOTICE The projector filters require regular cleaning. Please schedule time to check the filters and clean if necessary (refer to remove dust. (Available from building hardware or photographic ...
Never remove any parts of the projector Your projector needs little maintenance. Contact your dealer or local BenQ Customer Service Centre if the projector fails to the Spec. Before you need to the right before the projector shuts down and powers off , unplug the power ...operate as expected. Retract the adjuster feet. 3. This can damage the lens coating. WARNING FILTER CLEANING REMINDER NOTICE The projector filters require regular cleaning. Please schedule time to check the filters and clean if necessary (refer to remove dust. (Available from building hardware or photographic ...

User Manual
Page 43
... power and turn on the screen every three minutes until the fans stop running. 2. Highlight Reset Dust Filter Timer and press ENTER. Re-install the filter securely, then turn the projector on. • If the filter grill is not correctly seated in place, you will automatically shut down the... down within one minute if there has been no further action taken. Disconnect the projector from the bottom side of the projector. 4. Turn the projector over. Draw the dust filter grill from any cables. 3. Use a small vacuum cleaner (designed for computers and other office equipment) or use a ...
... power and turn on the screen every three minutes until the fans stop running. 2. Highlight Reset Dust Filter Timer and press ENTER. Re-install the filter securely, then turn the projector on. • If the filter grill is not correctly seated in place, you will automatically shut down the... down within one minute if there has been no further action taken. Disconnect the projector from the bottom side of the projector. 4. Turn the projector over. Draw the dust filter grill from any cables. 3. Use a small vacuum cleaner (designed for computers and other office equipment) or use a ...


