
User Manual
Page 2
... power off 39 Menu operation 40 Maintenance 50 Care of the projector 50 Lamp information 51 Troubleshooting......... 58 Specifications 59 Projector specifications 59 Dimensions 60 Ceiling mount installation 61 Timing chart 62 Warranty and Copyright information 66
... power off 39 Menu operation 40 Maintenance 50 Care of the projector 50 Lamp information 51 Troubleshooting......... 58 Specifications 59 Projector specifications 59 Dimensions 60 Ceiling mount installation 61 Timing chart 62 Warranty and Copyright information 66

User Manual
Page 6
... the base of displaying inverted images for mounting the projector and ensure it . Use only BenQ's Ceiling Mount Kit for ceiling mount installation. Ceiling mounting the projector We want you use a proper fitting BenQ projector ceiling mount kit and that you purchased your BenQ projector. Lamp contains mercury. You can purchase a BenQ projector ceiling mount kit from the ceiling due to have a pleasant experience using your...
... the base of displaying inverted images for mounting the projector and ensure it . Use only BenQ's Ceiling Mount Kit for ceiling mount installation. Ceiling mounting the projector We want you use a proper fitting BenQ projector ceiling mount kit and that you purchased your BenQ projector. Lamp contains mercury. You can purchase a BenQ projector ceiling mount kit from the ceiling due to have a pleasant experience using your...

User Manual
Page 9
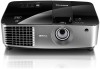
Projector exterior view Front/upper side 1 2 3 MX716 4 1 2 3 MX717 5 Rear/lower side 12 10 11 13 14 MX716 19 22 15 16 17 18 1. 2. 6 3. 4. 5. 7 6. 8 7. 8. 9. 9 10. 11. 6 12. 13. 14. 7 15. 8 16. 9 17. 18. 19. ... anti-theft lock slot 12V DC output terminal Used to connect these devices. Rear adjuster foot Front adjuster foot Ceiling mount holes 24 10 11 12 13 14 15 16 17 18 AUDIO-IN MX717 19 20 22 24 23 21 22 23 Introduction 9 External control panel (See "Controls and functions" on page...
Projector exterior view Front/upper side 1 2 3 MX716 4 1 2 3 MX717 5 Rear/lower side 12 10 11 13 14 MX716 19 22 15 16 17 18 1. 2. 6 3. 4. 5. 7 6. 8 7. 8. 9. 9 10. 11. 6 12. 13. 14. 7 15. 8 16. 9 17. 18. 19. ... anti-theft lock slot 12V DC output terminal Used to connect these devices. Rear adjuster foot Front adjuster foot Ceiling mount holes 24 10 11 12 13 14 15 16 17 18 AUDIO-IN MX717 19 20 22 24 23 21 22 23 Introduction 9 External control panel (See "Controls and functions" on page...

User Manual
Page 15
...Select this location with the projector suspended upside-down from your projector 15 Note that a special rear projection screen and the BenQ Projector Ceiling Mount Kit are required for quick setup and portability. 3. Positioning your dealer to be installed in front of four possible installation... SYSTEM SETUP: Basic > Projector Position menu after you turn the projector on . Rear Ceiling Select this installation location. Purchase the BenQ Projector Ceiling Mount Kit from the ceiling behind the screen. This is the most common way to position the projector for this ...
...Select this location with the projector suspended upside-down from your projector 15 Note that a special rear projection screen and the BenQ Projector Ceiling Mount Kit are required for quick setup and portability. 3. Positioning your dealer to be installed in front of four possible installation... SYSTEM SETUP: Basic > Projector Position menu after you turn the projector on . Rear Ceiling Select this installation location. Purchase the BenQ Projector Ceiling Mount Kit from the ceiling behind the screen. This is the most common way to position the projector for this ...

User Manual
Page 61
Ceiling mount installation 160 MX716 Ceiling Mount screw: M4 x 8 (Max L = 8 mm) 137 74.19 80 46.21 115 446.15 397.90 364.40 95.33 156.33 311.81 MX717 119.21 244.12 242.04 149.50 84 228 87 130 191 339 133 237.4 Unit: mm Specifications 61 448 397.40 364.40
Ceiling mount installation 160 MX716 Ceiling Mount screw: M4 x 8 (Max L = 8 mm) 137 74.19 80 46.21 115 446.15 397.90 364.40 95.33 156.33 311.81 MX717 119.21 244.12 242.04 149.50 84 228 87 130 191 339 133 237.4 Unit: mm Specifications 61 448 397.40 364.40


