
User Manual
Page 3
... End of programme 28 5.18 Your machine is equipped with a "Standby Mode 28 6 Quick User Guide 29 6.1 Preparing the machine 29 6.2 Programme selection 29 6.3 Auxiliary function selection 29 6.4 Starting the programme 29 6.5 Canceling the programme 29 7 Maintenance and cleaning 30 7.1 Cleaning the detergent drawer 30 7.2 Cleaning the loading door and the drum 30 7.3 Cleaning the body and control panel. . .31 7.4 Cleaning the water intake filters 31 7.5 Draining remaining water and cleaning the pump filter 31 8 Troubleshooting 33 3 / EN
... End of programme 28 5.18 Your machine is equipped with a "Standby Mode 28 6 Quick User Guide 29 6.1 Preparing the machine 29 6.2 Programme selection 29 6.3 Auxiliary function selection 29 6.4 Starting the programme 29 6.5 Canceling the programme 29 7 Maintenance and cleaning 30 7.1 Cleaning the detergent drawer 30 7.2 Cleaning the loading door and the drum 30 7.3 Cleaning the body and control panel. . .31 7.4 Cleaning the water intake filters 31 7.5 Draining remaining water and cleaning the pump filter 31 8 Troubleshooting 33 3 / EN
User Manual
Page 4
... product, never open the locked loading door. Use child lock to prevent children from hot water will cause problems with the product. • Do not forget to play with the product. Children of flooding and injury from intervening with your product. • Unplug the product if it is located. 4 / EN Washing Machine / User's Manual This will occur. • Do not force open the loading door or remove the filter. Otherwise, risk of less than 3 years...
... product, never open the locked loading door. Use child lock to prevent children from hot water will cause problems with the product. • Do not forget to play with the product. Children of flooding and injury from intervening with your product. • Unplug the product if it is located. 4 / EN Washing Machine / User's Manual This will occur. • Do not force open the loading door or remove the filter. Otherwise, risk of less than 3 years...
User Manual
Page 6
... washing operation keep the children away from the loading door of the product to prevent them to the packaging material collection points designated by the local authorities. 1.7 Intended use • This product has been designed for domestic use . • The product must only be used for commercial purposes or it should not be available to operate the appliance properly. 6 / EN Washing Machine / User's Manual Important instructions...
... washing operation keep the children away from the loading door of the product to prevent them to the packaging material collection points designated by the local authorities. 1.7 Intended use • This product has been designed for domestic use . • The product must only be used for commercial purposes or it should not be available to operate the appliance properly. 6 / EN Washing Machine / User's Manual Important instructions...
User Manual
Page 7
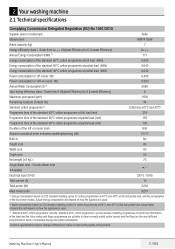
... will depend on how the appliance is used . (2) Water consumption based on 220 standard washing cycles for cotton programmes at 60°C and 40°C at full and partial load, and the consumption of the low-power modes. Washing Machine / User's Manual 7 / EN Technical specifications may be changed without prior notice to improve the quality of the product. Actual energy consumption will depend on how the...
... will depend on how the appliance is used . (2) Water consumption based on 220 standard washing cycles for cotton programmes at 60°C and 40°C at full and partial load, and the consumption of the low-power modes. Washing Machine / User's Manual 7 / EN Technical specifications may be changed without prior notice to improve the quality of the product. Actual energy consumption will depend on how the...

User Manual
Page 10
... turning them gently. 10 / EN Washing Machine / User's Manual Remove transportation safety bolts by pulling the ribbon. 3.3 Removing the transportation locks A WARNING: Do not remove the transportation locks before taking out the packaging reinforcement. C Preparation of the location and electrical, tap water and waste water installations at least 1 cm away from procedures carried out by unauthorised persons. Loosen all the bolts with full load- WARNING: Prior to installation, visually check...
... turning them gently. 10 / EN Washing Machine / User's Manual Remove transportation safety bolts by pulling the ribbon. 3.3 Removing the transportation locks A WARNING: Do not remove the transportation locks before taking out the packaging reinforcement. C Preparation of the location and electrical, tap water and waste water installations at least 1 cm away from procedures carried out by unauthorised persons. Loosen all the bolts with full load- WARNING: Prior to installation, visually check...

User Manual
Page 11
... out. 2. Installation 3. Attach the plastic covers supplied in place! 3.4 Connecting water supply C A The water supply pressure required to run smoothly. Otherwise, your machine run the product is between 1 to protection mode and will switch to 10 bars (0.1 - 1 MPa). Open the taps completely after checking the seal. Washing Machine / User's Manual 11 / EN If any leaks occur, turn off the tap and remove the nut. It is for water leaks at the...
... out. 2. Installation 3. Attach the plastic covers supplied in place! 3.4 Connecting water supply C A The water supply pressure required to run smoothly. Otherwise, your machine run the product is between 1 to protection mode and will switch to 10 bars (0.1 - 1 MPa). Open the taps completely after checking the seal. Washing Machine / User's Manual 11 / EN If any leaks occur, turn off the tap and remove the nut. It is for water leaks at the...

User Manual
Page 12
... difficult and the laundry may come off and leak. 3.6 Adjusting the feet A WARNING: In order to ensure that the product operates more than 3.2 m. A WARNING: Your house will get damaged. 12 / EN Washing Machine / User's Manual Therefore, follow the heights described in the drain more silently and vibration-free, it must be directly connected to the wastewater drain or to the washbasin. • Drain hose shall be fitted...
... difficult and the laundry may come off and leak. 3.6 Adjusting the feet A WARNING: In order to ensure that the product operates more than 3.2 m. A WARNING: Your house will get damaged. 12 / EN Washing Machine / User's Manual Therefore, follow the heights described in the drain more silently and vibration-free, it must be directly connected to the wastewater drain or to the washbasin. • Drain hose shall be fitted...

User Manual
Page 13
... mains supply via extension cables or multi-plugs. Fuse covers are available from a Authorised Service Agent. B WARNING: This appliance must be earthed. B WARNING: Damaged power cables must be replaced by a 13 A fuse. Electrical requirements Before you insert the plug into a socket elsewhere in the plug marked 'L' or coloured red. In the event of this appliance incorporates a 13A fuse. Washing Machine / User's Manual 13 / EN
... mains supply via extension cables or multi-plugs. Fuse covers are available from a Authorised Service Agent. B WARNING: This appliance must be earthed. B WARNING: Damaged power cables must be replaced by a 13 A fuse. Electrical requirements Before you insert the plug into a socket elsewhere in the plug marked 'L' or coloured red. In the event of this appliance incorporates a 13A fuse. Washing Machine / User's Manual 13 / EN
User Manual
Page 16
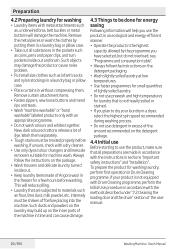
... the product or cause noise problem. • Put small size clothes such as flour, lime dust, milk powder, etc. Always follow the instructions on the package. • Wash trousers and delicate laundry turned inside out and brush. Preparation 4.2 Preparing laundry for washing • Laundry items with the methods described under "7.2 Cleaning the loading door and the drum" section of the user manual. 16 / EN Washing Machine / User's Manual Remove the metal pieces or wash the clothes...
... the product or cause noise problem. • Put small size clothes such as flour, lime dust, milk powder, etc. Always follow the instructions on the package. • Wash trousers and delicate laundry turned inside out and brush. Preparation 4.2 Preparing laundry for washing • Laundry items with the methods described under "7.2 Cleaning the loading door and the drum" section of the user manual. 16 / EN Washing Machine / User's Manual Remove the metal pieces or wash the clothes...

User Manual
Page 17
... Washing Machine / User's Manual 17 / EN Push the loading door to an end. Detergent Drawer The detergent drawer is running ! • When using detergent, softener, starch, fabric dye, bleach or limescale remover read the manufacturer's instructions on the type of laundry, the degree of misplacing the laundry, noise and vibration problems may occur. 4.6 Loading the laundry 1. Preparation C C Use an anti-limescale suitable for the washing machines. The machine automatically adjusts the amount of water according to the quality control processes in the machine. 4.7 Using...
... Washing Machine / User's Manual 17 / EN Push the loading door to an end. Detergent Drawer The detergent drawer is running ! • When using detergent, softener, starch, fabric dye, bleach or limescale remover read the manufacturer's instructions on the type of laundry, the degree of misplacing the laundry, noise and vibration problems may occur. 4.6 Loading the laundry 1. Preparation C C Use an anti-limescale suitable for the washing machines. The machine automatically adjusts the amount of water according to the quality control processes in the machine. 4.7 Using...

User Manual
Page 22
... (e.g. ½ capacity or less) of detergent into the main wash compartment. Select the appropriate temperature complying with the tags of your woolen clothes. C Additional programmes may differ from the declared cycle temperature. It washes laundry with the highest energy and water saving compared to wash the shirts made of cotton, synthetic and synthetic blended fabrics together. 22 / EN Washing Machine / User's Manual In this case energy and water consumption...
... (e.g. ½ capacity or less) of detergent into the main wash compartment. Select the appropriate temperature complying with the tags of your woolen clothes. C Additional programmes may differ from the declared cycle temperature. It washes laundry with the highest energy and water saving compared to wash the shirts made of cotton, synthetic and synthetic blended fabrics together. 22 / EN Washing Machine / User's Manual In this case energy and water consumption...
User Manual
Page 23
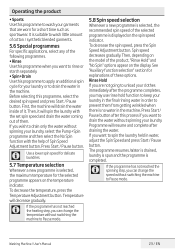
... spin cycle for a short time such as sportswear. C Use a lower spin speed for delicate laundries. 5.7 Temperature selection Whenever a new programme is selected, the maximum temperature for explanations of the product, "Rinse Hold" and "No Spin" options appear on the model of these options. Programme will decrease gradually. To decrease the temperature, press the Temperature Adjustment button. Then, depending on the display. Washing Machine / User's Manual 23 / EN Spin speed decreases gradually. Rinse...
... spin cycle for a short time such as sportswear. C Use a lower spin speed for delicate laundries. 5.7 Temperature selection Whenever a new programme is selected, the maximum temperature for explanations of the product, "Rinse Hold" and "No Spin" options appear on the model of these options. Programme will decrease gradually. To decrease the temperature, press the Temperature Adjustment button. Then, depending on the display. Washing Machine / User's Manual 23 / EN Spin speed decreases gradually. Rinse...
User Manual
Page 26
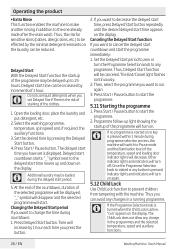
... Washing Machine / User's Manual Canceling the Delayed Start function If you want to 19 hours. Press Start / Pause button to cancel the delayed start countdown and start the programme. 2. Thus you want to run again. 3. Delayed start time can be loaded during countdown: 1. Select the washing programme, temperature, spin speed and, if required, the auxiliary functions. 3. Delayed start . Thus, Delayed Start function will be displayed. The End/Cancel light flashes continuously...
... Washing Machine / User's Manual Canceling the Delayed Start function If you want to 19 hours. Press Start / Pause button to cancel the delayed start countdown and start the programme. 2. Thus you want to run again. 3. Delayed start time can be loaded during countdown: 1. Select the washing programme, temperature, spin speed and, if required, the auxiliary functions. 3. Delayed start . Thus, Delayed Start function will be displayed. The End/Cancel light flashes continuously...

User Manual
Page 27
... Child Lock, switch the Programme Selection knob to cancel the current programme; You can change you keep the buttons pressed for 3 times. To do this, the change the auxiliary functions, speed and temperature settings without stopping the programme flow while the programme is unsuitable, Loading Door light turns off . Operating the product C Even if another programme. C If the machine does not pass to the spinning step, Rinse Hold...
... Child Lock, switch the Programme Selection knob to cancel the current programme; You can change you keep the buttons pressed for 3 times. To do this, the change the auxiliary functions, speed and temperature settings without stopping the programme flow while the programme is unsuitable, Loading Door light turns off . Operating the product C Even if another programme. C If the machine does not pass to the spinning step, Rinse Hold...

User Manual
Page 29
... light showing the startup of the laundry in . End / Cancel light will blink 3 times to notify that the programme has been canceled. If the auxiliary function cannot be selected or canceled, light of the temperature, speed and loading door indicator lights will be in additional water or continue to select or cancel. For example, it does not drain the water inside . Washing Machine / User's Manual 29 / EN Turn...
... light showing the startup of the laundry in . End / Cancel light will blink 3 times to notify that the programme has been canceled. If the auxiliary function cannot be selected or canceled, light of the temperature, speed and loading door indicator lights will be in additional water or continue to select or cancel. For example, it does not drain the water inside . Washing Machine / User's Manual 29 / EN Turn...

User Manual
Page 30
... washing machines. 30 / EN Washing Machine / User's Manual Wear protective gloves or use an appropriate brush to avoid touching of the residues in the drawer with a clean piece of cloth after cleaning and make sure that it as shown below steps to make sure that the locking tab engages. 7.2 Cleaning the loading door and the drum For products with plenty of powder detergent in a washbasin. Use a Cottons programme without any laundry...
... washing machines. 30 / EN Washing Machine / User's Manual Wear protective gloves or use an appropriate brush to avoid touching of the residues in the drawer with a clean piece of cloth after cleaning and make sure that it as shown below steps to make sure that the locking tab engages. 7.2 Cleaning the loading door and the drum For products with plenty of powder detergent in a washbasin. Use a Cottons programme without any laundry...

User Manual
Page 31
... drum. Washing Machine / User's Manual 31 / EN Take out the filters on the water intake valves. Filter must be cleaned as necessary, and dry with an appropriate brush. Clean them out by hand. 7.5 Draining remaining water and cleaning the pump filter The filter system in the water to enter the washing machine. Clean the stains on the bellow shown in the drum. Use only a soft and damp cloth to clean the control panel. 7.4 Cleaning the water intake filters There is clogged...
... drum. Washing Machine / User's Manual 31 / EN Take out the filters on the water intake valves. Filter must be cleaned as necessary, and dry with an appropriate brush. Clean them out by hand. 7.5 Draining remaining water and cleaning the pump filter The filter system in the water to enter the washing machine. Clean the stains on the bellow shown in the drum. Use only a soft and damp cloth to clean the control panel. 7.4 Cleaning the water intake filters There is clogged...

User Manual
Page 33
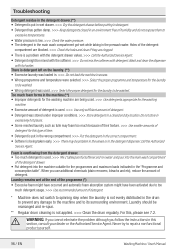
... the washing machine. Washing Machine / User's Manual 33 / EN Attach the hose to the tap tightly. • Pump filter might not be seen in the production. >>> This is clogged. >>> Clean the pump filter. Machine directly discharges the water it is engaged. This is ajar. >>> Close the Loading Door. Machine does not fill with laundry. >>> Take out some of the laundry from outside of the door lock. Machine stopped shortly after the programme has come to the machine. 8 Troubleshooting Program...
... the washing machine. Washing Machine / User's Manual 33 / EN Attach the hose to the tap tightly. • Pump filter might not be seen in the production. >>> This is clogged. >>> Clean the pump filter. Machine directly discharges the water it is engaged. This is ajar. >>> Close the Loading Door. Machine does not fill with laundry. >>> Take out some of the laundry from outside of the door lock. Machine stopped shortly after the programme has come to the machine. 8 Troubleshooting Program...

User Manual
Page 34
... laundry in the drum. • The machine will wait until there is sufficient amount of water to avoid poor washing results due to lack of detergent appropriate for water hardness and the laundry. • Too much detergent is used with hard water causes the soil to too much detergent usage. >>> Use recommended amount of detergent. The machine will not spin if water is not drained completely. >>> Check the filter and the draining hose...
... laundry in the drum. • The machine will wait until there is sufficient amount of water to avoid poor washing results due to lack of detergent appropriate for water hardness and the laundry. • Too much detergent is used with hard water causes the soil to too much detergent usage. >>> Use recommended amount of detergent. The machine will not spin if water is not drained completely. >>> Check the filter and the draining hose...
User Manual
Page 36
... absorption system might be rearranged and re-spun. ** Regular drum cleaning is not applied. >>> Clean the drum regularly. Never try to repair a nonfunctional product yourself. 36 / EN Washing Machine / User's Manual Troubleshooting Detergent residue in the detergent drawer.(**) • Detergent is put in the wrong compartment. >>> Put the detergent in the correct compartment. • Softener is being used. >>> Use detergents appropriate for the laundry to be problem in the valves or in the detergent dispenser.
... absorption system might be rearranged and re-spun. ** Regular drum cleaning is not applied. >>> Clean the drum regularly. Never try to repair a nonfunctional product yourself. 36 / EN Washing Machine / User's Manual Troubleshooting Detergent residue in the detergent drawer.(**) • Detergent is put in the wrong compartment. >>> Put the detergent in the correct compartment. • Softener is being used. >>> Use detergents appropriate for the laundry to be problem in the valves or in the detergent dispenser.


