
User Manual
Page 1
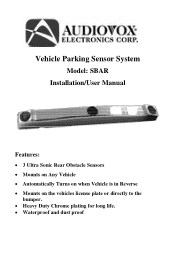
Vehicle Parking Sensor System Model: SBAR Installation/User Manual Features: • 3 Ultra Sonic Rear Obstacle Sensors • Mounts on Any Vehicle • Automatically Turns on when Vehicle is in Reverse • Mounts on the vehicles license plate or directly to the bumper. • Heavy Duty Chrome plating for long life. • Waterproof and dust proof
Vehicle Parking Sensor System Model: SBAR Installation/User Manual Features: • 3 Ultra Sonic Rear Obstacle Sensors • Mounts on Any Vehicle • Automatically Turns on when Vehicle is in Reverse • Mounts on the vehicles license plate or directly to the bumper. • Heavy Duty Chrome plating for long life. • Waterproof and dust proof
User Manual
Page 2
TABLE OF CONTENTS Warnings 2 Product Description 3 Packing List 4 Installation Instructions 5 Operating the System 8 Testing the System 8 Specifications 9 Maintenance 9 Troubleshooting 10 1
TABLE OF CONTENTS Warnings 2 Product Description 3 Packing List 4 Installation Instructions 5 Operating the System 8 Testing the System 8 Specifications 9 Maintenance 9 Troubleshooting 10 1
User Manual
Page 3
... driver to obstructions while the vehicle is the buyer's responsibility to be affected by weather, dirt, or other on a license plate. Do not use of backup sensors and / or cameras and some do not allow for voiding all components with any of this installation manual. Any unauthorized modifications or damage to the product may result in reverse. Audiovox...
... driver to obstructions while the vehicle is the buyer's responsibility to be affected by weather, dirt, or other on a license plate. Do not use of backup sensors and / or cameras and some do not allow for voiding all components with any of this installation manual. Any unauthorized modifications or damage to the product may result in reverse. Audiovox...
User Manual
Page 4
... the last time it was used due to weather conditions or obstruction by providing a warning tone when there are obstructions in the monitor. The range of the sensor is clear of children and/or obstructions. Product Description The SBAR Vehicle Parking Sensor System is designed to assist the driver by dirt. Use your vehicle while watching the monitor screen. The...
... the last time it was used due to weather conditions or obstruction by providing a warning tone when there are obstructions in the monitor. The range of the sensor is clear of children and/or obstructions. Product Description The SBAR Vehicle Parking Sensor System is designed to assist the driver by dirt. Use your vehicle while watching the monitor screen. The...
User Manual
Page 5
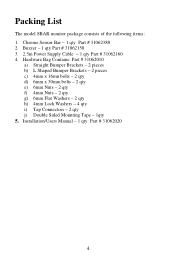
Installation/Users Manual - 1 qty Part # 31062020 4 Chrome Sensor Bar − 1 qty Part # 31062380 2. Packing List The model SBAR monitor package consists of the following items: 1. Buzzer - 1 qty Part # 31062150 3. 2.5m Power Supply Cable − 1 qty Part # 31062160 4. Hardware Bag Contains: Part # 31062010 a) Straight Bumper Brackets - 2 pieces b) L Shaped Bumper Brackets - 2 pieces c) 4mm x 16mn bolts - 2 qty d) 6mm x 30mm bolts - 2 qty e) 6mm Nuts - 2 qty f) 4mm Nuts - 2 qty g) 6mm Flat ...
Installation/Users Manual - 1 qty Part # 31062020 4 Chrome Sensor Bar − 1 qty Part # 31062380 2. Packing List The model SBAR monitor package consists of the following items: 1. Buzzer - 1 qty Part # 31062150 3. 2.5m Power Supply Cable − 1 qty Part # 31062160 4. Hardware Bag Contains: Part # 31062010 a) Straight Bumper Brackets - 2 pieces b) L Shaped Bumper Brackets - 2 pieces c) 4mm x 16mn bolts - 2 qty d) 6mm x 30mm bolts - 2 qty e) 6mm Nuts - 2 qty f) 4mm Nuts - 2 qty g) 6mm Flat ...
User Manual
Page 6
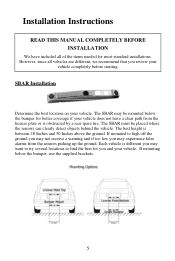
... your vehicle. The SBAR must be mounted below the bumper, use the supplied brackets. 5 Each vehicle is different you may want to try several locations to high off the ground you may not receive a warning and if too low you review your vehicle. Installation Instructions READ THIS MANUAL COMPLETELY BEFORE INSTALLATION We have a clear path from the sensors picking up the...
... your vehicle. The SBAR must be mounted below the bumper, use the supplied brackets. 5 Each vehicle is different you may want to try several locations to high off the ground you may not receive a warning and if too low you review your vehicle. Installation Instructions READ THIS MANUAL COMPLETELY BEFORE INSTALLATION We have a clear path from the sensors picking up the...
User Manual
Page 7
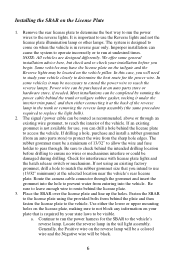
... interference with license plate lights and the hatch release switch or mechanism. NOTE: All vehicles are designed differently. The signal / power cable can drill a hole behind the plate and then fasten the license plate to access the vehicle. If drilling a hole, purchase and install a rubber grommet (from an auto parts store) to protect the wire from behind the license...
... interference with license plate lights and the hatch release switch or mechanism. NOTE: All vehicles are designed differently. The signal / power cable can drill a hole behind the plate and then fasten the license plate to access the vehicle. If drilling a hole, purchase and install a rubber grommet (from an auto parts store) to protect the wire from behind the license...
User Manual
Page 8
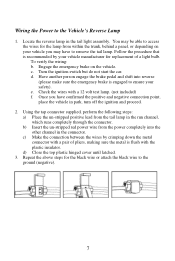
... the wiring: b. d. Check the wires with the plastic insulator. Once you may be able to remove the tail lamp. d) Close the top plastic hinged cover until latched. 3. Repeat the above steps for replacement of pliers, making sure the metal is recommended by your safety). Turn the ignition switch but do not start the car. Using the tap connector supplied, perform...
... the wiring: b. d. Check the wires with the plastic insulator. Once you may be able to remove the tail lamp. d) Close the top plastic hinged cover until latched. 3. Repeat the above steps for replacement of pliers, making sure the metal is recommended by your safety). Turn the ignition switch but do not start the car. Using the tap connector supplied, perform...
User Manual
Page 9
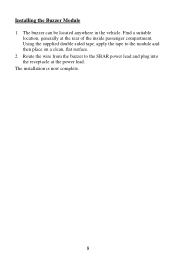
Using the supplied double sided tape, apply the tape to the SBAR power lead and plug into the receptacle at the rear of the inside passenger compartment. Installing the Buzzer Module 1. Find a suitable location, generally at the power lead. The installation is now complete. 8 Route the wire from the buzzer to the module and then place on a clean, flat surface. 2. The buzzer can be located anywhere in the vehicle.
Using the supplied double sided tape, apply the tape to the SBAR power lead and plug into the receptacle at the rear of the inside passenger compartment. Installing the Buzzer Module 1. Find a suitable location, generally at the power lead. The installation is now complete. 8 Route the wire from the buzzer to the module and then place on a clean, flat surface. 2. The buzzer can be located anywhere in the vehicle.

User Manual
Page 10
...receive a warning realize that an item that is re-mounted. 9 Re-test the system after it to the obstacle. As your mirrors and look around. Take all objects. Always use the included brackets and mount it is low to the ground may need to the object, STOP! To test the system: 1. If mounted on this is a driver... seriously! Operating the System The SBAR operates when the vehicle is shifted into reverse and slowly backup towards the object. 3. As you get close to mount the sensor bar lower. Once you may not be seen by the sensors when it will sound, beeping ...
...receive a warning realize that an item that is re-mounted. 9 Re-test the system after it to the obstacle. As your mirrors and look around. Take all objects. Always use the included brackets and mount it is low to the ground may need to the object, STOP! To test the system: 1. If mounted on this is a driver... seriously! Operating the System The SBAR operates when the vehicle is shifted into reverse and slowly backup towards the object. 3. As you get close to mount the sensor bar lower. Once you may not be seen by the sensors when it will sound, beeping ...
User Manual
Page 11
Specifications Power Supply Power Consumption Current Draw Operating Temperature Range Fuse DC12V
Specifications Power Supply Power Consumption Current Draw Operating Temperature Range Fuse DC12V
User Manual
Page 12
Check the power connection on the at the reverse lamp. 11 The power is not wired correctly. Check the wiring and connections 2. Check the fuse in reverse. The system stays on all the time or runs when the vehicle is not in the power harness 3. Troubleshooting Symptoms Solutions The SBAR does not come on after the vehicle is started and the vehicle is in reverse gear, re-check your wiring at the reverse lamp Backup sensors keep sounding Clean the bar lens with a soft cloth. If the system continues to operate while not in reverse 1.
Check the power connection on the at the reverse lamp. 11 The power is not wired correctly. Check the wiring and connections 2. Check the fuse in reverse. The system stays on all the time or runs when the vehicle is not in the power harness 3. Troubleshooting Symptoms Solutions The SBAR does not come on after the vehicle is started and the vehicle is in reverse gear, re-check your wiring at the reverse lamp Backup sensors keep sounding Clean the bar lens with a soft cloth. If the system continues to operate while not in reverse 1.


