
Users Manual
Page 36
... Windows Hello. Select the Sign-in options tab on the left side and click/tap Set up a PIN before you can enroll in the prompt screen and enter your PIN for verification. 5.
... Windows Hello. Select the Sign-in options tab on the left side and click/tap Set up a PIN before you can enroll in the prompt screen and enter your PIN for verification. 5.
Users Manual
Page 40
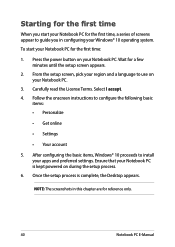
From the setup screen, pick your region and a language to use on your Notebook PC is complete, the Desktop appears. Ensure that your Notebook PC. 3. NOTE: The screenshots in ... the following basic items: • Personalize • Get online • Settings • Your account 5. To start your Notebook PC for the first time, a series of screens appear to guide you in this chapter are for a few minutes until the setup...
From the setup screen, pick your region and a language to use on your Notebook PC is complete, the Desktop appears. Ensure that your Notebook PC. 3. NOTE: The screenshots in ... the following basic items: • Personalize • Get online • Settings • Your account 5. To start your Notebook PC for the first time, a series of screens appear to guide you in this chapter are for a few minutes until the setup...

Users Manual
Page 41
Change account settings, lock, or sign out from your account Launch an app from the Start screen Launch Taskview Launch an app from the taskbar Launch Search Launch the Start menu Launch All apps Shut down, restart, or put your Notebook PC ...
Change account settings, lock, or sign out from your account Launch an app from the Start screen Launch Taskview Launch an app from the taskbar Launch Search Launch the Start menu Launch All apps Shut down, restart, or put your Notebook PC ...

Users Manual
Page 49
Launch the app you wish to snap. 2. Press and hold the key, then use the arrow keys to snap. Drag the title bar of your app and drop the app to the edge of the screen to snap the app. 3. Notebook PC E-Manual 49 Launch the app you wish to snap. Launch another app and repeat the above steps to snap another app. 1. Launch another app and repeat the above steps to snap another app. Using Snap 1. 2. 3.
Launch the app you wish to snap. 2. Press and hold the key, then use the arrow keys to snap. Drag the title bar of your app and drop the app to the edge of the screen to snap the app. 3. Notebook PC E-Manual 49 Launch the app you wish to snap. Launch another app and repeat the above steps to snap another app. 1. Launch another app and repeat the above steps to snap another app. Using Snap 1. 2. 3.

Users Manual
Page 51
Launches Start menu Launches Action Center Launches the desktop Launches the File Explorer Launches Settings Launches Connect panel Activates the Lock screen Minimizes all currently active windows Notebook PC E-Manual 51 Other keyboard shortcuts Using the keyboard, you can also use the following shortcuts to help you launch applications and navigate Windows® 10.
Launches Start menu Launches Action Center Launches the desktop Launches the File Explorer Launches Settings Launches Connect panel Activates the Lock screen Minimizes all currently active windows Notebook PC E-Manual 51 Other keyboard shortcuts Using the keyboard, you can also use the following shortcuts to help you launch applications and navigate Windows® 10.

Users Manual
Page 52
Launches Search Launches Project panel Opens the Run window Opens Ease of Access Center Opens the context menu of the Start button Launches the magnifier icon and zooms in your screen Zooms out your screen 52 Notebook PC E-Manual
Launches Search Launches Project panel Opens the Run window Opens Ease of Access Center Opens the context menu of the Start button Launches the magnifier icon and zooms in your screen Zooms out your screen 52 Notebook PC E-Manual

Users Manual
Page 56
Turning your Notebook PC by doing either of the following procedures: • Launch the Start menu, then select > Shut down to do a normal shutdown. • From the log-in screen, select > Shut down. • Press to launch Shut down Windows. Select Shut down from the drop-down list then select OK. • If your Notebook PC is unresponsive, press and hold the power button for at least four (4) seconds until your Notebook PC turns off your Notebook PC off You can turn off . 56 Notebook PC E-Manual
Turning your Notebook PC by doing either of the following procedures: • Launch the Start menu, then select > Shut down to do a normal shutdown. • From the log-in screen, select > Shut down. • Press to launch Shut down Windows. Select Shut down from the drop-down list then select OK. • If your Notebook PC is unresponsive, press and hold the power button for at least four (4) seconds until your Notebook PC turns off your Notebook PC off You can turn off . 56 Notebook PC E-Manual

Users Manual
Page 57
NOTE: You can also put your Notebook PC to Sleep mode by pressing the power button once. Putting your Notebook PC to sleep To put your Notebook PC to Sleep mode: • Launch the Start menu, then select > Sleep to put your Notebook PC to sleep. • From the log-in screen, select > Sleep. Press to launch Shut down list then select OK. Select Sleep from the drop-down Windows. Notebook PC E-Manual 57
NOTE: You can also put your Notebook PC to Sleep mode by pressing the power button once. Putting your Notebook PC to sleep To put your Notebook PC to Sleep mode: • Launch the Start menu, then select > Sleep to put your Notebook PC to sleep. • From the log-in screen, select > Sleep. Press to launch Shut down list then select OK. Select Sleep from the drop-down Windows. Notebook PC E-Manual 57

Users Manual
Page 61
Accessing BIOS Enter the BIOS settings by using any of the following methods: • Restart your Notebook PC then press during POST. • Launch the Start menu, and choose Settings > Update & security > Recovery, then select Restart now under Advanced startup. When you enter the Advanced startup screen, select Troubleshoot > Advanced options > UEFI Firmware Settings > Restart. Notebook PC E-Manual 61
Accessing BIOS Enter the BIOS settings by using any of the following methods: • Restart your Notebook PC then press during POST. • Launch the Start menu, and choose Settings > Update & security > Recovery, then select Restart now under Advanced startup. When you enter the Advanced startup screen, select Troubleshoot > Advanced options > UEFI Firmware Settings > Restart. Notebook PC E-Manual 61
Users Manual
Page 70
...• If the problem still exists, your Notebook PC might have a memory storage problem. Contact your local ASUS service center for assistance. 2. What should I do when my screen displays this ? Press any key to fix this message: "Remove disks or other media. My Notebook PC boots...8226; Remove any of the following suggestions: • Force shutdown your system. 70 Notebook PC E-Manual What can I turn on my screen. How can I do to restart."? Delete the applications you recently installed or were not included with your operating system package then restart your...
...• If the problem still exists, your Notebook PC might have a memory storage problem. Contact your local ASUS service center for assistance. 2. What should I do when my screen displays this ? Press any key to fix this message: "Remove disks or other media. My Notebook PC boots...8226; Remove any of the following suggestions: • Force shutdown your system. 70 Notebook PC E-Manual What can I turn on my screen. How can I do to restart."? Delete the applications you recently installed or were not included with your operating system package then restart your...

Users Manual
Page 86
... of this copyright protection technology must use approved power cords greater than or equal to CATV System Installer-Cable distribution system should include bonding the screen of Hearing Loss To prevent possible hearing damage, do not listen at the building entrance. TV Notices Note to : H05VV-F, 3G, 0.75mm2 or H05VV-F, 2G...
... of this copyright protection technology must use approved power cords greater than or equal to CATV System Installer-Cable distribution system should include bonding the screen of Hearing Loss To prevent possible hearing damage, do not listen at the building entrance. TV Notices Note to : H05VV-F, 3G, 0.75mm2 or H05VV-F, 2G...


