User Guide
Page 3
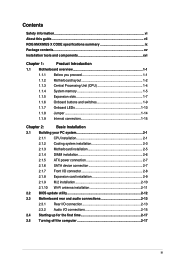
... this guide...vii ROG MAXIMUS X CODE specifications summary ix Package contents...xv Installation tools and components xvi Chapter 1: Product Introduction 1.1 Motherboard overview 1-1 1.1.1 Before you proceed 1-1 1.1.2 Motherboard layout 1-2 1.1.3 Central Processing Unit (CPU 1-4 1.1.4 System memory 1-5 1.1.5 Expansion slots 1-7 1.1.6 Onboard buttons and switches 1-9 1.1.7 Onboard LEDs 1-13 1.1.8 Jumper 1-14 1.1.9 Internal connectors 1-15 Chapter 2: Basic Installation 2.1 Building your PC system...
... this guide...vii ROG MAXIMUS X CODE specifications summary ix Package contents...xv Installation tools and components xvi Chapter 1: Product Introduction 1.1 Motherboard overview 1-1 1.1.1 Before you proceed 1-1 1.1.2 Motherboard layout 1-2 1.1.3 Central Processing Unit (CPU 1-4 1.1.4 System memory 1-5 1.1.5 Expansion slots 1-7 1.1.6 Onboard buttons and switches 1-9 1.1.7 Onboard LEDs 1-13 1.1.8 Jumper 1-14 1.1.9 Internal connectors 1-15 Chapter 2: Basic Installation 2.1 Building your PC system...
User Guide
Page 43
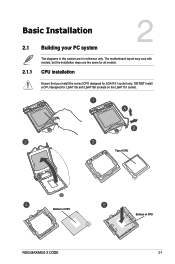
CPU installation Ensure that you install the correct CPU designed for LGA1155 and LGA1156 sockets on the LGA1151 socket. Chapter 2: Basic Installation Basic Installation 2.1 Building your PC system 2 2.1.1 The diagrams in this section are the same for all models. Chapter 2 Top of CPU Bottom of CPU ROG MAXIMUS X CODE Bottom of CPU 2-1 The motherboard layout may vary with models, but the installation steps are for reference only. DO NOT install a CPU designed for LGA1151 socket only.
CPU installation Ensure that you install the correct CPU designed for LGA1155 and LGA1156 sockets on the LGA1151 socket. Chapter 2: Basic Installation Basic Installation 2.1 Building your PC system 2 2.1.1 The diagrams in this section are the same for all models. Chapter 2 Top of CPU Bottom of CPU ROG MAXIMUS X CODE Bottom of CPU 2-1 The motherboard layout may vary with models, but the installation steps are for reference only. DO NOT install a CPU designed for LGA1151 socket only.
