
User Manual
Page 40
...the touchpad. Moving The Pointer Place your fingertip instead of your finger to operate the touchpad or else damage may occur to scroll a window up or down. Using the Touchpad Light pressure with the use of your finger in place of the touchpad. Scroll Up Scroll Down 40...Left Click Slide finger forward Slide finger left Slide finger right Slide finger backward Scrolling (on the right side to the touchpad's surface. A device driver is still required for working with all that is required to move the pointer. IMPORTANT! 4 Using the Notebook PC Pointing Device The Notebook PC...
...the touchpad. Moving The Pointer Place your fingertip instead of your finger to operate the touchpad or else damage may occur to scroll a window up or down. Using the Touchpad Light pressure with the use of your finger in place of the touchpad. Scroll Up Scroll Down 40...Left Click Slide finger forward Slide finger left Slide finger right Slide finger backward Scrolling (on the right side to the touchpad's surface. A device driver is still required for working with all that is required to move the pointer. IMPORTANT! 4 Using the Notebook PC Pointing Device The Notebook PC...

User Manual
Page 68
... increase your Notebook PC. Eject the floppy disk before disconnecting the USB floppy disk drive. When used in current operating systems, no drivers are necessary. USB Flash Memory Disk A USB flash memory disk is an optional item that can accept a standard 1.44MB (or ... floppy disk and provide storage up to several hundred megabytes, higher transfer speeds, and greater durability. A-2 To prevent system failures, use Windows "Safely Remove Hardware" on the taskbar before transporting the Notebook PC to prevent damage from shock. WARNING! A Appendix Optional Accessories These items...
... increase your Notebook PC. Eject the floppy disk before disconnecting the USB floppy disk drive. When used in current operating systems, no drivers are necessary. USB Flash Memory Disk A USB flash memory disk is an optional item that can accept a standard 1.44MB (or ... floppy disk and provide storage up to several hundred megabytes, higher transfer speeds, and greater durability. A-2 To prevent system failures, use Windows "Safely Remove Hardware" on the taskbar before transporting the Notebook PC to prevent damage from shock. WARNING! A Appendix Optional Accessories These items...
User Manual
Page 72
... features, extend functionality, help manage your retailer if you require such a solution. If updates or replacement of a pre-installed Microsoft Windows operating system. Contact your Notebook PC, or add functionality not provided by the native operating system. A Appendix Operating System and Software This... recovery disc is necessary even if your Notebook PC came pre-configured in good working state provided that your dealer for all drivers, utilities and software for web sites to provide additional software not included as part of hardware and software support may vary depending...
... features, extend functionality, help manage your retailer if you require such a solution. If updates or replacement of a pre-installed Microsoft Windows operating system. Contact your Notebook PC, or add functionality not provided by the native operating system. A Appendix Operating System and Software This... recovery disc is necessary even if your Notebook PC came pre-configured in good working state provided that your dealer for all drivers, utilities and software for web sites to provide additional software not included as part of hardware and software support may vary depending...
User Manual
Page 78
...text appears after purchase, power OFF, remove the additional memory, and power ON to see if the problem is available on the ASUS website. Unknown Reason - Un-install software applications. Check your system for assistance. Remove additional memory. Update the BIOS to the ... Update" and "ATKACPI" drivers first so that you have installed software applications recently, they may not be an "Open policy file error" message. ASUS bundled software When I power ON the Notebook PC, there will be compatible with WINFLASH in Windows or AFLASH in Windows Safe Mode. 3. Reinstall ...
...text appears after purchase, power OFF, remove the additional memory, and power ON to see if the problem is available on the ASUS website. Unknown Reason - Un-install software applications. Check your system for assistance. Remove additional memory. Update the BIOS to the ... Update" and "ATKACPI" drivers first so that you have installed software applications recently, they may not be an "Open policy file error" message. ASUS bundled software When I power ON the Notebook PC, there will be compatible with WINFLASH in Windows or AFLASH in Windows Safe Mode. 3. Reinstall ...
User Manual
Page 82
... two new partitions "C" (60%) and "D" (40%). 5. Please visit www.asus.com for updated drivers and utilities. Read the "ASUS Preload Wizard" screen and click Next. 4. Take your data files (such as Outlook PST files) to floppy disks or to its original working order. A Appendix Windows Vista Software Recovery Using Hard Disk Partition The Recovery...
... two new partitions "C" (60%) and "D" (40%). 5. Please visit www.asus.com for updated drivers and utilities. Read the "ASUS Preload Wizard" screen and click Next. 4. Take your data files (such as Outlook PST files) to floppy disks or to its original working order. A Appendix Windows Vista Software Recovery Using Hard Disk Partition The Recovery...
User Manual
Page 83
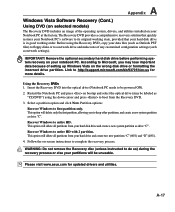
...only. This option will delete all partitions from the Recovery DVD. 3. This option will be labeled as network settings). Recover Windows to complete the recovery process. Follow the on-screen instructions to entire HD. Restart the Notebook PC and press on bootup and... WARNING: Do not remove the Recovery disc (unless instructed to http://support.microsoft.com/kb/937251/en-us for updated drivers and utilities. Please visit www.asus.com for more details. The Recovery DVD provides a comprehensive recovery solution that quickly restores your Notebook PC's software to boot...
...only. This option will delete all partitions from the Recovery DVD. 3. This option will be labeled as network settings). Recover Windows to complete the recovery process. Follow the on-screen instructions to entire HD. Restart the Notebook PC and press on bootup and... WARNING: Do not remove the Recovery disc (unless instructed to http://support.microsoft.com/kb/937251/en-us for updated drivers and utilities. Please visit www.asus.com for more details. The Recovery DVD provides a comprehensive recovery solution that quickly restores your Notebook PC's software to boot...


