
User Manual
Page 64
...following sections for system recovery. 2. After the system recovery, use the Add/Remove Software in the Recovery DVD may be something wrong with your Eee PC, the builtin hidden partition would be cleared and cannot be used for details. Hold during the system recovery. System Recovery There are three ways ...to edit the commands before recovering your data during bootup (requires a Recovery Partition). Refer to your Eee PC disk drive. Press enter to boot the selected OS, 'e' to perform the system recovery. Contact your...
...following sections for system recovery. 2. After the system recovery, use the Add/Remove Software in the Recovery DVD may be something wrong with your Eee PC, the builtin hidden partition would be cleared and cannot be used for details. Hold during the system recovery. System Recovery There are three ways ...to edit the commands before recovering your data during bootup (requires a Recovery Partition). Refer to your Eee PC disk drive. Press enter to boot the selected OS, 'e' to perform the system recovery. Contact your...
User Manual
Page 72
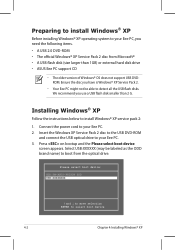
... boot device 4-2 Chapter 4: Installing Windows® XP Ensure the disc you use a USB flash disk smaller than 1GB) or external hard disk drive • ASUS Eee PC support CD • The older version of Windows® OS does not support USB DVDROM. We recommend you have is Windows® XP Service Pack 2. • Your...
... boot device 4-2 Chapter 4: Installing Windows® XP Ensure the disc you use a USB flash disk smaller than 1GB) or external hard disk drive • ASUS Eee PC support CD • The older version of Windows® OS does not support USB DVDROM. We recommend you have is Windows® XP Service Pack 2. • Your...
User Manual
Page 73
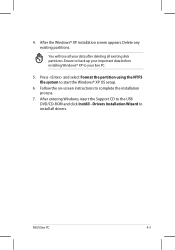
After the Windows® XP installation screen appears. After entering Windows, insert the Support CD to start the Windows® XP OS setup. 6. You will lose all your Eee PC. 5. Delete any existing partitions. Press and select Format the partition using the NTFS file system to the USB DVD/CD-ROM and click InstAll... your important data before installing Windows® XP to complete the installation process. 7. 4. Follow the on-screen instructions to your data after deleting all drivers. ASUS Eee PC 4-3
After the Windows® XP installation screen appears. After entering Windows, insert the Support CD to start the Windows® XP OS setup. 6. You will lose all your Eee PC. 5. Delete any existing partitions. Press and select Format the partition using the NTFS file system to the USB DVD/CD-ROM and click InstAll... your important data before installing Windows® XP to complete the installation process. 7. 4. Follow the on-screen instructions to your data after deleting all drivers. ASUS Eee PC 4-3


