

Users Manual English
Page 8
x 9.3 in . viii A320M-C specifications summary Internal connectors BIOS features Manageability Support DVD OS support Form...) 1 x Front panel audio connector 1 x 24-pin EATX Power connector 1 x 4-pin ATX 12V Power connector 1 x 2-pin Clear CMOS header 1 x System Panel connector 1 x Chassis intrusion connector 1 x Speaker connector 128 Mb Flash ROM, UEFI AMI BIOS, PnP, ....0, WfM2.0, SM BIOS 3.0, ACPI 5.0, Multi-language BIOS, ASUS EZ Flash 3, ASUS CrashFree BIOS 3, My Favorites, Quick Note, Last Modified log, F12 PrintScreen, ASUS DRAM SPD (Serial Presence Detect) memory information, F6 Qfan ...
x 9.3 in . viii A320M-C specifications summary Internal connectors BIOS features Manageability Support DVD OS support Form...) 1 x Front panel audio connector 1 x 24-pin EATX Power connector 1 x 4-pin ATX 12V Power connector 1 x 2-pin Clear CMOS header 1 x System Panel connector 1 x Chassis intrusion connector 1 x Speaker connector 128 Mb Flash ROM, UEFI AMI BIOS, PnP, ....0, WfM2.0, SM BIOS 3.0, ACPI 5.0, Multi-language BIOS, ASUS EZ Flash 3, ASUS CrashFree BIOS 3, My Favorites, Quick Note, Last Modified log, F12 PrintScreen, ASUS DRAM SPD (Serial Presence Detect) memory information, F6 Qfan ...

Users Manual English
Page 11
...) This connector is disabled by default. The chassis intrusion detection feature is for a chassis-mounted intrusion detection sensor or switch. After clearing the CMOS, reinstall the battery. Clear RTC RAM (2-pin CLRTC) This header allows you to short the two pins. 3. Use a metal object such as date, time... short the two pins again to [On]. To enable it, set the Chassis Intrude Detect Support item in the BIOS to clear the CMOS RTC RAM data. ASUS A320M-C 1-3 Plug the power cord and turn ON the computer. 4. The chassis intrusion sensor or switch sends a high-level signal...
...) This connector is disabled by default. The chassis intrusion detection feature is for a chassis-mounted intrusion detection sensor or switch. After clearing the CMOS, reinstall the battery. Clear RTC RAM (2-pin CLRTC) This header allows you to short the two pins. 3. Use a metal object such as date, time... short the two pins again to [On]. To enable it, set the Chassis Intrude Detect Support item in the BIOS to clear the CMOS RTC RAM data. ASUS A320M-C 1-3 Plug the power cord and turn ON the computer. 4. The chassis intrusion sensor or switch sends a high-level signal...
Users Manual English
Page 18
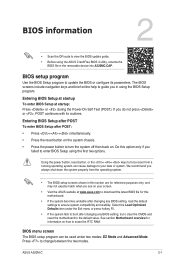
...see on your data or system. Do this motherboard. • If the system becomes unstable after changing any BIOS setting, try to clear the CMOS and reset the motherboard to ensure system compatibility and stability. Select the Load Optimized Defaults item under two modes: EZ Mode and Advanced ...you do not press or , POST continues with its parameters. BIOS setup program Use the BIOS Setup program to erase the RTC RAM. ASUS A320M-C 2-1 Entering BIOS Setup after POST To enter BIOS Setup after changing any BIOS setting, load the default settings to the default value. We...
...see on your data or system. Do this motherboard. • If the system becomes unstable after changing any BIOS setting, try to clear the CMOS and reset the motherboard to ensure system compatibility and stability. Select the Load Optimized Defaults item under two modes: EZ Mode and Advanced ...you do not press or , POST continues with its parameters. BIOS setup program Use the BIOS Setup program to erase the RTC RAM. ASUS A320M-C 2-1 Entering BIOS Setup after POST To enter BIOS Setup after changing any BIOS setting, load the default settings to the default value. We...


