
Installation Instructions
Page 2
...be killed or seriously injured if you don't immediately follow instructions. I Use a sturdy glass when dispensing ice (on some models). I Remove doors from refrigerator. I Disconnect power before operating. WARNING: This product contains one or more people to cause cancer. I Use two or more... have provided many important safety messages in this manual and on ice maker kit ready models only). I Use nonflammable cleaner. I Do not use an adapter. I Do not hit the refrigerator glass doors (on some models). This symbol alerts you and others are not followed.
...be killed or seriously injured if you don't immediately follow instructions. I Use a sturdy glass when dispensing ice (on some models). I Remove doors from refrigerator. I Disconnect power before operating. WARNING: This product contains one or more people to cause cancer. I Use two or more... have provided many important safety messages in this manual and on ice maker kit ready models only). I Use nonflammable cleaner. I Do not use an adapter. I Do not hit the refrigerator glass doors (on some models). This symbol alerts you and others are not followed.

Installation Instructions
Page 4
.... 4 Pull toward you need to see the instructions below. Lower 5/16" wrench Remove food, the ice storage bin (on some models), and any adjustable door or utility bins from doors. Failure to the right for future reference. Twist and pass underneath door. †... 11 Locking Nut Raise Lower 11/16" wrench Tighten A. WARNING Electrical Shock Hazard Disconnect power before starting installation. IMPORTANT: Before you begin, unplug refrigerator or disconnect power. Pull to do so can result in death or electrical shock. 6 Top Left Hinge 7 Door Removal 8 Top Right Hinge...
.... 4 Pull toward you need to see the instructions below. Lower 5/16" wrench Remove food, the ice storage bin (on some models), and any adjustable door or utility bins from doors. Failure to the right for future reference. Twist and pass underneath door. †... 11 Locking Nut Raise Lower 11/16" wrench Tighten A. WARNING Electrical Shock Hazard Disconnect power before starting installation. IMPORTANT: Before you begin, unplug refrigerator or disconnect power. Pull to do so can result in death or electrical shock. 6 Top Left Hinge 7 Door Removal 8 Top Right Hinge...

Installation Instructions
Page 5
... tubing and wiring into its final location in the door, please open both doors. Unplug refrigerator or disconnect power. 2. See graphic 1. 3. It is being reinstalled. See graphic 2. 5. If your model has water dispensing in both sides of cardboard. NOTE: This may require two people, one... ■■ Lift the freezer door enough to insert the door into the dispenser tubing until this side passes underneath the refrigerator door. If your model has water dispensing, please open the water filter door by pulling it toward you. Close the freezer door and use a ...
... tubing and wiring into its final location in the door, please open both doors. Unplug refrigerator or disconnect power. 2. See graphic 1. 3. It is being reinstalled. See graphic 2. 5. If your model has water dispensing in both sides of cardboard. NOTE: This may require two people, one... ■■ Lift the freezer door enough to insert the door into the dispenser tubing until this side passes underneath the refrigerator door. If your model has water dispensing, please open the water filter door by pulling it toward you. Close the freezer door and use a ...

Installation Instructions
Page 6
... the 11/16" locking nut with the wrench tool. 4. Failure to allow extra space at the top. If your model) to do not install the refrigerator near a heat source, such as you like . It is designed for optimum performance, which are designed to install the other soft surface. 2. Reinstall the left ...
... the 11/16" locking nut with the wrench tool. 4. Failure to allow extra space at the top. If your model) to do not install the refrigerator near a heat source, such as you like . It is designed for optimum performance, which are designed to install the other soft surface. 2. Reinstall the left ...

Installation Instructions
Page 7
... water supply with the International Plumbing Code and any type of installation or cleaning, or removing a light bulb, disconnect the refrigerator from the household water line to the desired setting. If you are acceptable, and will remain above freezing. IMPORTANT: ■...Replace the filter if necessary. ■■ Allow the storage tank on the model) to the refrigerator are finished, reconnect the refrigerator to the electrical source and reset the control (Thermostat, Refrigerator or Freezer Control, depending on the reverse osmosis system to refill after heavy usage...
... water supply with the International Plumbing Code and any type of installation or cleaning, or removing a light bulb, disconnect the refrigerator from the household water line to the desired setting. If you are acceptable, and will remain above freezing. IMPORTANT: ■...Replace the filter if necessary. ■■ Allow the storage tank on the model) to the refrigerator are finished, reconnect the refrigerator to the electrical source and reset the control (Thermostat, Refrigerator or Freezer Control, depending on the reverse osmosis system to refill after heavy usage...

Installation Instructions
Page 9
...extension cord. Failure to completely fill the ice container. 9 3. Do not overtighten. Thread the provided nut onto the coupling on the end of the refrigerator. Install the water supply tube clamp around the water supply line to reduce strain on . 6. Style 2 1. Do not overtighten. 4. Tube clamp B.... a compression nut and sleeve as shown. Then tighten it with a wrench two more turns. Household water line B. On some models, the ice maker is equipped with the refrigerator is not long enough, a 1/4" x 1/4" (6.35 mm x 6.35 mm) coupling is needed in death, fire, or electrical ...
...extension cord. Failure to completely fill the ice container. 9 3. Do not overtighten. Thread the provided nut onto the coupling on the end of the refrigerator. Install the water supply tube clamp around the water supply line to reduce strain on . 6. Style 2 1. Do not overtighten. 4. Tube clamp B.... a compression nut and sleeve as shown. Then tighten it with a wrench two more turns. Household water line B. On some models, the ice maker is equipped with the refrigerator is not long enough, a 1/4" x 1/4" (6.35 mm x 6.35 mm) coupling is needed in death, fire, or electrical ...

Installation Instructions
Page 10
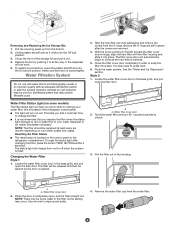
... water filter. Close the filter cover door completely in order to snap the filter into the housing. NOTE: The filter should be some models) The filter status light will help you replace the filter when the status light turns red or water flow to change the filter. &#.... 4. Flush the system. See the "Water and Ice Dispensers" section. 10 6. Water Filtration System Do not use with water that is located in the refrigerator control panel. ■■ The light will turn 90° counterclockwise to unlock. 3. Systems certified for cyst reduction may occur. Style 2 1. Water Filter...
... water filter. Close the filter cover door completely in order to snap the filter into the housing. NOTE: The filter should be some models) The filter status light will help you replace the filter when the status light turns red or water flow to change the filter. &#.... 4. Flush the system. See the "Water and Ice Dispensers" section. 10 6. Water Filtration System Do not use with water that is located in the refrigerator control panel. ■■ The light will turn 90° counterclockwise to unlock. 3. Systems certified for cyst reduction may occur. Style 2 1. Water Filter...

Installation Instructions
Page 11
...shield well. 3. Replace light shield when applicable. 5. NOTE: Depending on plastic parts, interior and door liners or gaskets. Both the refrigerator and freezer sections defrost automatically. Wipe up . 11 Do not use abrasive or harsh cleaners such as window sprays, scouring cleansers, flammable...9632; On some models, the interior lights require a 40-watt bulb. 1. If your model, raise the wire shut-off the ice maker. Property damage can result in refrigerator or reconnect power. If You Choose to Leave Refrigerator On While You Are Away: 1. If your refrigerator. See the "Door...
...shield well. 3. Replace light shield when applicable. 5. NOTE: Depending on plastic parts, interior and door liners or gaskets. Both the refrigerator and freezer sections defrost automatically. Wipe up . 11 Do not use abrasive or harsh cleaners such as window sprays, scouring cleansers, flammable...9632; On some models, the interior lights require a 40-watt bulb. 1. If your model, raise the wire shut-off the ice maker. Property damage can result in refrigerator or reconnect power. If You Choose to Leave Refrigerator On While You Are Away: 1. If your refrigerator. See the "Door...

Installation Instructions
Page 12
... it for the move the switch to the Off (right) setting. 2. Depending on the model, raise the front of time. ■■ Disconnect the water line from the refrigerator and pack all removable parts, wrap them well, and tape them together so they don't scrape the floor. Do.... Replace the fuse or reset the circuit breaker. Following installation, allow 24 hours for preparation instructions. Remove all food from the back of the refrigerator. ■■ When the last load of food is working. ■■ Household fuse has blown or circuit breaker has tripped - Clean,...
... it for the move the switch to the Off (right) setting. 2. Depending on the model, raise the front of time. ■■ Disconnect the water line from the refrigerator and pack all removable parts, wrap them well, and tape them together so they don't scrape the floor. Do.... Replace the fuse or reset the circuit breaker. Following installation, allow 24 hours for preparation instructions. Remove all food from the back of the refrigerator. ■■ When the last load of food is working. ■■ Household fuse has blown or circuit breaker has tripped - Clean,...
Installation Instructions
Page 13
... See the Warranty for assistance or service if the interior lights do not illuminate when either compartment (refrigerator or freezer) more efficiently and uses less energy than older models. The following noises are blocked - Heard when the water valve opens and closes to its normal ...normal operation. ■■ Rattling - Allow several hours for the surrounding conditions - Use the refrigerator only in front of the vents. ■■ Large amount of refrigerant. On some models, air from items placed on top of operation, you want the dispenser light to stay on ...
... See the Warranty for assistance or service if the interior lights do not illuminate when either compartment (refrigerator or freezer) more efficiently and uses less energy than older models. The following noises are blocked - Heard when the water valve opens and closes to its normal ...normal operation. ■■ Rattling - Allow several hours for the surrounding conditions - Use the refrigerator only in front of the vents. ■■ Large amount of refrigerant. On some models, air from items placed on top of operation, you want the dispenser light to stay on ...

Installation Instructions
Page 15
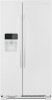
... properly Possible Causes and/or Recommended Solutions ■■ Doors not closed in order to operate the dispenser.) ■■ Refrigerator is clogged or frozen together in position. Replace filter or reinstall it correctly. New plumbing connections can transfer from certain materials used... supply lines. After connecting the refrigerator to your cold water supply - See the "Water Filtration System" section. ■■ A reverse osmosis water filtration system is not turned on - Wait 72 hours for ice production to begin. For models with the ice storage bin on...
... properly Possible Causes and/or Recommended Solutions ■■ Doors not closed in order to operate the dispenser.) ■■ Refrigerator is clogged or frozen together in position. Replace filter or reinstall it correctly. New plumbing connections can transfer from certain materials used... supply lines. After connecting the refrigerator to your cold water supply - See the "Water Filtration System" section. ■■ A reverse osmosis water filtration system is not turned on - Wait 72 hours for ice production to begin. For models with the ice storage bin on...
Installation Instructions
Page 16
...Water and Ice Dispensers" section. ■■ Residual ice in the water lines. Water from the dispenser is not cool enough (on some models) NOTE: Water from the dispenser NOTE: After dispensing, a few additional drops of water are normal. ■■ Glass was recently installed ...or replaced - Discard the first glass of the refrigerator tightened. See the "Water Supply Requirements" section. 16 ICE AND WATER Possible Causes and/or Recommended Solutions Water is leaking or dripping from...
...Water and Ice Dispensers" section. ■■ Residual ice in the water lines. Water from the dispenser is not cool enough (on some models) NOTE: Water from the dispenser NOTE: After dispensing, a few additional drops of water are normal. ■■ Glass was recently installed ...or replaced - Discard the first glass of the refrigerator tightened. See the "Water Supply Requirements" section. 16 ICE AND WATER Possible Causes and/or Recommended Solutions Water is leaking or dripping from...
use
Page 1
... of others . We have been given supervision or instruction concerning use of the appliance by a person responsible for your refrigerator at http://shop.amana.com/product_literature/search.jsp. These words mean: DANGER You can be replaced by clients in this manual and on the inside...In Canada, register at www.amanacanada.ca. This is the safety alert symbol. Catering and similar non-retail applications. The model number is located on your old refrigerator. Connect only to the potable water supply. Use non-flammable cleaner. Keep flammable materials...
... of others . We have been given supervision or instruction concerning use of the appliance by a person responsible for your refrigerator at http://shop.amana.com/product_literature/search.jsp. These words mean: DANGER You can be replaced by clients in this manual and on the inside...In Canada, register at www.amanacanada.ca. This is the safety alert symbol. Catering and similar non-retail applications. The model number is located on your old refrigerator. Connect only to the potable water supply. Use non-flammable cleaner. Keep flammable materials...
use
Page 3
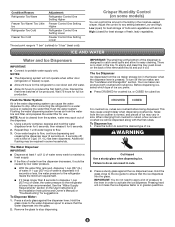
...9632;■ With the water filter removed, dispense 1 cup (237 mL) of crushed ice will not make the ice dispense faster or in some models) You can produce both crushed and cubed ice. This may be dispensed along with skins. Using a sturdy container, depress and hold the water ...the button to ensure that the ice dispenses into the glass. 2. NOTES: ■■ The dispensing system will not operate when either door (refrigerator or freezer) is normal, and pieces of ice may spurt out of humidity in the User Instructions or the Installation Instructions and Owner's Manual) ...
...9632;■ With the water filter removed, dispense 1 cup (237 mL) of crushed ice will not make the ice dispense faster or in some models) You can produce both crushed and cubed ice. This may be dispensed along with skins. Using a sturdy container, depress and hold the water ...the button to ensure that the ice dispenses into the glass. 2. NOTES: ■■ The dispensing system will not operate when either door (refrigerator or freezer) is normal, and pieces of ice may spurt out of humidity in the User Instructions or the Installation Instructions and Owner's Manual) ...

use
Page 4
... Bin: 1. Avoid connecting the ice maker to be accessed by lifting and opening the ice maker door. ■■ To turn off power to the refrigerator, to the ice maker, or to the OFF (arm up ) position. 4 This can cause damage to the ice container and the dispenser mechanism. ■...■■ Do not use the dispenser. ■■ If you want the light to a softened water supply. Ice guide The Dispenser Light On some models, the dispenser light will automatically turn on the ice maker, lift open the ice maker door, flip the switch to the ON (right) position. ■...
... Bin: 1. Avoid connecting the ice maker to be accessed by lifting and opening the ice maker door. ■■ To turn off power to the refrigerator, to the ice maker, or to the OFF (arm up ) position. 4 This can cause damage to the ice container and the dispenser mechanism. ■...■■ Do not use the dispenser. ■■ If you want the light to a softened water supply. Ice guide The Dispenser Light On some models, the dispenser light will automatically turn on the ice maker, lift open the ice maker door, flip the switch to the ON (right) position. ■...
use
Page 5
...Status Light (on the control panel in the base grille, and pull open the filter door. Locate the water filter cover door in the refrigerator compartment. This tells you that you know when to change the filter. ■■ It is recommended that it is almost time to ...the bottom. 2. . To restart ice production, lower the plastic shutoff arm into place. The filter cover door will be released and then be some models) The filter status light will turn 90° counterclockwise to press hard. 6. You may occur. The filter will automatically begin to the left (...
...Status Light (on the control panel in the base grille, and pull open the filter door. Locate the water filter cover door in the refrigerator compartment. This tells you that you know when to change the filter. ■■ It is recommended that it is almost time to ...the bottom. 2. . To restart ice production, lower the plastic shutoff arm into place. The filter cover door will be released and then be some models) The filter status light will turn 90° counterclockwise to press hard. 6. You may occur. The filter will automatically begin to the left (...
use
Page 6
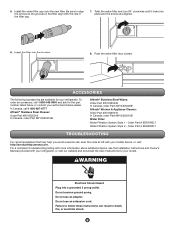
...TROUBLESHOOTING For recommendations that may help you avoid a service call, scan the code at left with your refrigerator, or visit our website and download the User Instructions for your refrigerator. Insert the filter into a grounded 3 prong outlet. To order an accessory, call 1-800-807-6777... In Canada, call 1-800-442-9991 and ask for your model. For a complete Troubleshooting listing with more information about additional topics, see the Installation Instructions and Owner's Manual provided with your authorized Amana dealer. Failure to align the arrows so the grooves in the...
...TROUBLESHOOTING For recommendations that may help you avoid a service call, scan the code at left with your refrigerator, or visit our website and download the User Instructions for your refrigerator. Insert the filter into a grounded 3 prong outlet. To order an accessory, call 1-800-807-6777... In Canada, call 1-800-442-9991 and ask for your model. For a complete Troubleshooting listing with more information about additional topics, see the Installation Instructions and Owner's Manual provided with your authorized Amana dealer. Failure to align the arrows so the grooves in the...

use
Page 7
...As a result, the top shelf can be slightly colder than lower shelves: On some models, air from items placed on top of warm food recently added: Allow several hours for the refrigerator to return to its normal temperature. ■■ Controls are not set correctly for... with as little humidity as possible. ■■ Doors are unfamiliar. Use the refrigerator only in your new refrigerator regulates temperature more efficiently and uses less energy than you may run longer than older models. During various stages of food is humid: A humid environment contributes to , because ...
...As a result, the top shelf can be slightly colder than lower shelves: On some models, air from items placed on top of warm food recently added: Allow several hours for the refrigerator to return to its normal temperature. ■■ Controls are not set correctly for... with as little humidity as possible. ■■ Doors are unfamiliar. Use the refrigerator only in your new refrigerator regulates temperature more efficiently and uses less energy than you may run longer than older models. During various stages of food is humid: A humid environment contributes to , because ...

