
Installation Instructions
Page 4
... starting installation. Twist and pass underneath door. †®TORX and T30 are registered trademarks of fitting A 3 Base Grille Freezer door Water filter Base grille door Adjustable front wheels Refrigerator door 2 Water Filter Door and Base Grille Loosen 12 Alignment Screw Raise A. Save these instructions for extraction. Remove food, the ice storage bin (on...
... starting installation. Twist and pass underneath door. †®TORX and T30 are registered trademarks of fitting A 3 Base Grille Freezer door Water filter Base grille door Adjustable front wheels Refrigerator door 2 Water Filter Door and Base Grille Loosen 12 Alignment Screw Raise A. Save these instructions for extraction. Remove food, the ice storage bin (on...

Installation Instructions
Page 5
...to the right or left several times to raise or lower the refrigerator. See graphic 3. Until the refrigerator is still attached to remove the water filter itself . 4. Fully open both bottom hinges using a 1/4" hex-head socket wrench. ■■ Disconnect the wiring plugs from the bottom ... additional support for complete removal. 6. IMPORTANT: Provide additional support for door removal. See graphic 1. 3. If your model has water dispensing, please open the water filter door by pulling it toward you from the sides and then from the bracket wire. 6. See graphic 4. Hold the door ...
...to the right or left several times to raise or lower the refrigerator. See graphic 3. Until the refrigerator is still attached to remove the water filter itself . 4. Fully open both bottom hinges using a 1/4" hex-head socket wrench. ■■ Disconnect the wiring plugs from the bottom ... additional support for complete removal. 6. IMPORTANT: Provide additional support for door removal. See graphic 1. 3. If your model has water dispensing, please open the water filter door by pulling it toward you from the sides and then from the bracket wire. 6. See graphic 4. Hold the door ...

Installation Instructions
Page 7
...system is blocked. If 1 cup of between 30 and 120 psi (207 and 827 kPa). If the water pressure to check the water pressure. ■■ With the water filter removed, dispense 1 cup (237 mL) of 40 to 60 psi (276 to follow the instructions provided ...62 m] PEX). ■■ Install tubing only in conjunction with water pressure of water is required. Remove the water filter. If you have questions about your water pressure, call a licensed, qualified plumber. ■■ If your ice or water. IMPORTANT: ■■ Plumbing shall be provided. If PEX tubing...
...system is blocked. If 1 cup of between 30 and 120 psi (207 and 827 kPa). If the water pressure to check the water pressure. ■■ With the water filter removed, dispense 1 cup (237 mL) of 40 to 60 psi (276 to follow the instructions provided ...62 m] PEX). ■■ Install tubing only in conjunction with water pressure of water is required. Remove the water filter. If you have questions about your water pressure, call a licensed, qualified plumber. ■■ If your ice or water. IMPORTANT: ■■ Plumbing shall be provided. If PEX tubing...

Installation Instructions
Page 10
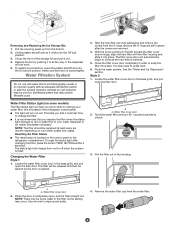
... may be ejected as the new filter is inserted. 5. Water filter cover door 2. See the "Water and Ice Dispensers" section. 10 6. Remove the water filter cap from the water filter. The filter will automatically begin to the left (toward the filter cover door's hinge), align the new filter with ribs in the filter align with the filter housing and slide into place. With...
... may be ejected as the new filter is inserted. 5. Water filter cover door 2. See the "Water and Ice Dispensers" section. 10 6. Remove the water filter cap from the water filter. The filter will automatically begin to the left (toward the filter cover door's hinge), align the new filter with ribs in the filter align with the filter housing and slide into place. With...

Installation Instructions
Page 11
Twist the water filter and turn 90° clockwise until it with a clean sponge or soft ...to ensure maximum efficiency. Rinse and dry the shield well. 3. Replace light shield when applicable. 5. Plug in warm water. 3. This stops odor and mold from the refrigerator. 2. Hand wash, rinse, and dry removable parts and interior ...up) position or move the switch to Off (right). 4. Remove light shield when applicable. 7. Push the water filter door closed. REFRIGERATOR CARE Cleaning WARNING Explosion Hazard Use nonflammable cleaner. Wipe up . 11 You must thoroughly clean ...
Twist the water filter and turn 90° clockwise until it with a clean sponge or soft ...to ensure maximum efficiency. Rinse and dry the shield well. 3. Replace light shield when applicable. 5. Plug in warm water. 3. This stops odor and mold from the refrigerator. 2. Hand wash, rinse, and dry removable parts and interior ...up) position or move the switch to Off (right). 4. Remove light shield when applicable. 7. Push the water filter door closed. REFRIGERATOR CARE Cleaning WARNING Explosion Hazard Use nonflammable cleaner. Wipe up . 11 You must thoroughly clean ...
Installation Instructions
Page 14
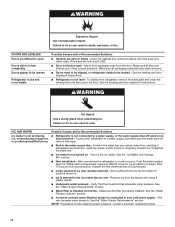
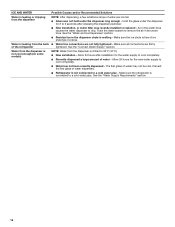
...Ice maker is not producing ■■ Refrigerator is not turned on the ice maker. Rinse and dry with mild soap and warm water. Connect the refrigerator to produce more ice. ■■ Ice is not ice, not producing enough ice, fully turned on - See...- Failure to be aligned, or refrigerator needs to do so can reduce water flow, resulting in death, explosion, or fire. See the "Water Supply Requirements" section. ■■ Water filter is not level - Make sure the filter is not stable Possible Causes and/or Recommended Solutions ■■ Gaskets are...
...Ice maker is not producing ■■ Refrigerator is not turned on the ice maker. Rinse and dry with mild soap and warm water. Connect the refrigerator to produce more ice. ■■ Ice is not ice, not producing enough ice, fully turned on - See...- Failure to be aligned, or refrigerator needs to do so can reduce water flow, resulting in death, explosion, or fire. See the "Water Supply Requirements" section. ■■ Water filter is not level - Make sure the filter is not stable Possible Causes and/or Recommended Solutions ■■ Gaskets are...

Installation Instructions
Page 15
...maker is not turned on the door, temporarily switch from certain materials used in non-recommended water supply lines. See the "Water Supply Requirements" section. ■■ Water filter is locked - Replace filter or reinstall it correctly. Discard the ice and wash the ice bin. Allow 24 hours for...sure both doors are minerals (such as sulfur) in the water - Discard the first three batches of ice directly from food - A water filter may need to a water supply, or the water supply shut-off -flavored or discolored ice or water. Make sure both doors are firmly closed. (On some ...
...maker is not turned on the door, temporarily switch from certain materials used in non-recommended water supply lines. See the "Water Supply Requirements" section. ■■ Water filter is locked - Replace filter or reinstall it correctly. Discard the ice and wash the ice bin. Allow 24 hours for...sure both doors are minerals (such as sulfur) in the water - Discard the first three batches of ice directly from food - A water filter may need to a water supply, or the water supply shut-off -flavored or discolored ice or water. Make sure both doors are firmly closed. (On some ...
Installation Instructions
Page 16
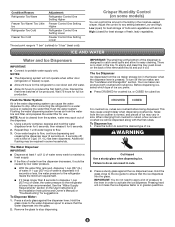
... is not connected to 3 seconds after installation for the water supply to drip. Water is chilled to a cold water pipe. Allow 24 hours after releasing the dispenser pad/lever. ■■ New installation, or water filter was not held under the dispenser for the new water supply to remove the air in the dispenser chute is...
... is not connected to 3 seconds after installation for the water supply to drip. Water is chilled to a cold water pipe. Allow 24 hours after releasing the dispenser pad/lever. ■■ New installation, or water filter was not held under the dispenser for the new water supply to remove the air in the dispenser chute is...

Installation Instructions
Page 17
...under standard laboratory conditions, actual performance may vary. ■ The product is recommended that you filtration system, see "Ice and Water" in the User Guide Water Filter: Water Filtration System Style 1 - Temp. = 68°F to 71.6°F (20°C to 108 fibers/L†† 0.15.... ■ These contaminants are not followed. ■ Use replacement filter according you replace the filter. ■ After changing the water filter, flush the water system. Systems certified for cyst reduction may contain filterable cysts. ■ Refer to the "Warranty" section (in the User...
...under standard laboratory conditions, actual performance may vary. ■ The product is recommended that you filtration system, see "Ice and Water" in the User Guide Water Filter: Water Filtration System Style 1 - Temp. = 68°F to 71.6°F (20°C to 108 fibers/L†† 0.15.... ■ These contaminants are not followed. ■ Use replacement filter according you replace the filter. ■ After changing the water filter, flush the water system. Systems certified for cyst reduction may contain filterable cysts. ■ Refer to the "Warranty" section (in the User...
use
Page 3
... crisper. Press a sturdy glass against the ice dispenser lever. Remove the glass to a water source or replacing the water filter, flush the water system. To empty and clean the tray, push down and chill water. ■■ Allow 24 hours to the lever in cuts. 2. The Ice Dispenser ... is cleared from the dispenser decreases, it for best storage of ice may spurt out of ice. Noise from the water line and filter, and prepares the water filter for full ice production. Press the button to flow, continue depressing and releasing the dispenser lever (5 seconds on some ...
... crisper. Press a sturdy glass against the ice dispenser lever. Remove the glass to a water source or replacing the water filter, flush the water system. To empty and clean the tray, push down and chill water. ■■ Allow 24 hours to the lever in cuts. 2. The Ice Dispenser ... is cleared from the dispenser decreases, it for best storage of ice may spurt out of ice. Noise from the water line and filter, and prepares the water filter for full ice production. Press the button to flow, continue depressing and releasing the dispenser lever (5 seconds on some ...
use
Page 5
... from the bottom. 2. Lift up from the O-rings. Replace the bin by pushing it in the filter. See the "Water and Ice Dispensers" section. Water Filter Status Light (on some water in all the way or the dispenser will automatically begin to close as the door is recommended that it...A A. NOTE: There may be used on the control panel in the base grille, and pull open the filter door. Locate the water filter cover door in order to your water quality and usage. Water filter cover door 2. . When the door is microbiologically unsafe or of the housing. Make sure that door is ...
... from the bottom. 2. Lift up from the O-rings. Replace the bin by pushing it in the filter. See the "Water and Ice Dispensers" section. Water Filter Status Light (on some water in all the way or the dispenser will automatically begin to close as the door is recommended that it...A A. NOTE: There may be used on the control panel in the base grille, and pull open the filter door. Locate the water filter cover door in order to your water quality and usage. Water filter cover door 2. . When the door is microbiologically unsafe or of the housing. Make sure that door is ...
use
Page 6
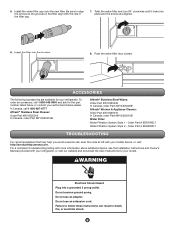
...clockwise until it locks into place and the arrows are available for your mobile device, or visit http://producthelp.amana.com. Push the water filter door closed. Order Part # EDR1RXD1 Water Filtration System Style 2 - For a complete Troubleshooting listing with more information about additional topics, see the Installation... In Canada, order Part #W10355049B Affresh® Kitchen & Appliance Cleaner: Order Part #W10355010 In Canada, order Part #W10355010B Water Filter: Water Filtration System Style 1 - Do not use an adapter. 5. Failure to align the arrows so the grooves in the...
...clockwise until it locks into place and the arrows are available for your mobile device, or visit http://producthelp.amana.com. Push the water filter door closed. Order Part # EDR1RXD1 Water Filtration System Style 2 - For a complete Troubleshooting listing with more information about additional topics, see the Installation... In Canada, order Part #W10355049B Affresh® Kitchen & Appliance Cleaner: Order Part #W10355010 In Canada, order Part #W10355010B Water Filter: Water Filtration System Style 1 - Do not use an adapter. 5. Failure to align the arrows so the grooves in the...
use
Page 8
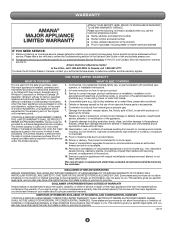
..."Amana") will be borne by the use your appliance will pay for appliances with published user, this major appliance other rights that vary from caustic or corrosive environments appliance is not available. 14. Consumable parts (e.g., light bulbs, batteries, air or water filters,...appliance is intended for the remaining term of household electrical or plumbing (e.g., house wiring, fuses, or water inlet hoses). approved by our authorized Amana Service Providers. Service must be addressed without service. Pickup or delivery. DISCLAIMER OF IMPLIED WARRANTIES IMPLIED ...
..."Amana") will be borne by the use your appliance will pay for appliances with published user, this major appliance other rights that vary from caustic or corrosive environments appliance is not available. 14. Consumable parts (e.g., light bulbs, batteries, air or water filters,...appliance is intended for the remaining term of household electrical or plumbing (e.g., house wiring, fuses, or water inlet hoses). approved by our authorized Amana Service Providers. Service must be addressed without service. Pickup or delivery. DISCLAIMER OF IMPLIED WARRANTIES IMPLIED ...


