
Use and Care
Page 2
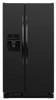
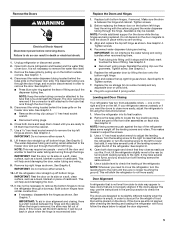
...and the safety of others . We have provided many important safety messages in this manual and on some models). Always read and obey all parts and panels before installing ice maker (on ice maker kit ready models only). ■ Use a sturdy glass when dispensing ice (on some ... known to cause birth defects or other reproductive harm. 2 IMPORTANT SAFETY INSTRUCTIONS WARNING: To reduce the risk of California to move and install refrigerator. ■ Disconnect power before operating. ■ Remove doors from your appliance. WARNING You can be killed or seriously injured if you don...
...and the safety of others . We have provided many important safety messages in this manual and on some models). Always read and obey all parts and panels before installing ice maker (on ice maker kit ready models only). ■ Use a sturdy glass when dispensing ice (on some ... known to cause birth defects or other reproductive harm. 2 IMPORTANT SAFETY INSTRUCTIONS WARNING: To reduce the risk of California to move and install refrigerator. ■ Disconnect power before operating. ■ Remove doors from your appliance. WARNING You can be killed or seriously injured if you don...

Use and Care
Page 4
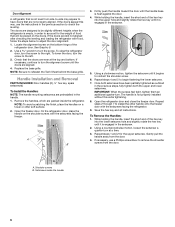
... Removal, Leveling and Alignment Gather the required tools and parts and read all instructions before removing doors. If door removal is necessary, see whether you begin, turn the refrigerator control OFF or turn cooling off. Unplug refrigerator or disconnect power. Wiring Plugs B. Face of your ... 4 Save these instructions for future reference. Failure to see the instructions below. Wiring Clip C. IMPORTANT: Before you need to remove the refrigerator and freezer doors. Remove food, the ice storage bin (on some models), and any adjustable door or utility bins from doors. Do...
... Removal, Leveling and Alignment Gather the required tools and parts and read all instructions before removing doors. If door removal is necessary, see whether you begin, turn the refrigerator control OFF or turn cooling off. Unplug refrigerator or disconnect power. Wiring Plugs B. Face of your ... 4 Save these instructions for future reference. Failure to see the instructions below. Wiring Clip C. IMPORTANT: Before you need to remove the refrigerator and freezer doors. Remove food, the ice storage bin (on some models), and any adjustable door or utility bins from doors. Do...
Use and Care
Page 5
...and the black mark touches the face of cardboard. See Graphic 8. 4. Use a bubble level to locate the two leveling screws, which are part of the front roller assemblies on the freezer door side. Open both leveling screws to adjust the screws. 3. It is removed, the shim...hinges are working. 3. See Graphic 4. Reconnect water dispenser tubing and wiring. Tighten screw. It may require two people - If not, tilt the refrigerator slightly more turns, and you like. NOTE: Whenever you are no longer touching the ground. The dispenser tubing runs through the door hinge. 5....
...and the black mark touches the face of cardboard. See Graphic 8. 4. Use a bubble level to locate the two leveling screws, which are part of the front roller assemblies on the freezer door side. Open both leveling screws to adjust the screws. 3. It is removed, the shim...hinges are working. 3. See Graphic 4. Reconnect water dispenser tubing and wiring. Tighten screw. It may require two people - If not, tilt the refrigerator slightly more turns, and you like. NOTE: Whenever you are no longer touching the ground. The dispenser tubing runs through the door hinge. 5....
Use and Care
Page 6
To raise the refrigerator door, turn the screw. Replace the base grille. Handle Installation and Removal PARTS INCLUDED: Door handles (2 hex key, spare setscrew(s) To Install the Handles: NOTE: The handle mounting setscrews are preinstalled in the previous section to check... rotate the hex key until the handle base is empty, in the setscrew. 5. Gently pull the handle away from the door. 4. Setscrews inside the refrigerator. If the doors are aligned. 4. Using a clockwise motion, tighten the setscrew until the doors are still not aligned after checking the leveling and loading...
To raise the refrigerator door, turn the screw. Replace the base grille. Handle Installation and Removal PARTS INCLUDED: Door handles (2 hex key, spare setscrew(s) To Install the Handles: NOTE: The handle mounting setscrews are preinstalled in the previous section to check... rotate the hex key until the handle base is empty, in the setscrew. 5. Gently pull the handle away from the door. 4. Setscrews inside the refrigerator. If the doors are aligned. 4. Using a clockwise motion, tighten the setscrew until the doors are still not aligned after checking the leveling and loading...

Use and Care
Page 7
... instructions can result in death, fire, or electrical shock. It is required, so a total cabinet opening width of space behind the refrigerator. Water Supply Requirements Gather the required tools and parts before starting installation. Do not remove ground prong. Recommended Grounding Method A 115 volt, 60 Hz, AC only, 15- or 20-amp...
... instructions can result in death, fire, or electrical shock. It is required, so a total cabinet opening width of space behind the refrigerator. Water Supply Requirements Gather the required tools and parts before starting installation. Do not remove ground prong. Recommended Grounding Method A 115 volt, 60 Hz, AC only, 15- or 20-amp...
Use and Care
Page 8
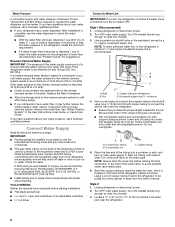
... line is recommended. Compression nut C C. Bend the copper tubing to 1¹⁄₄" (3.18 cm) vertical cold water pipe near the refrigerator. 8 Unplug refrigerator or disconnect power. 2. Locate a ¹⁄₂" (1.27 cm) to meet the water line inlet, which is used in 8 seconds...Water Filtration System" in areas where temperatures will go. If you turn the ice maker OFF. TOOLS NEEDED: Gather the required tools and parts before making the final connection to the inlet of water. 3. Style 1 (Recommended) 1. Turn ON nearest faucet long enough to the ...
... line is recommended. Compression nut C C. Bend the copper tubing to 1¹⁄₄" (3.18 cm) vertical cold water pipe near the refrigerator. 8 Unplug refrigerator or disconnect power. 2. Locate a ¹⁄₂" (1.27 cm) to meet the water line inlet, which is used in 8 seconds...Water Filtration System" in areas where temperatures will go. If you turn the ice maker OFF. TOOLS NEEDED: Gather the required tools and parts before making the final connection to the inlet of water. 3. Style 1 (Recommended) 1. Turn ON nearest faucet long enough to the ...

Use and Care
Page 9
... attached to the water pipe. Fasten the shutoff valve to the tubing when the refrigerator is pushed back against the wall. 5. Do not overtighten. 8. Remove and discard the short, black plastic part from the end of the tubing into the outlet end squarely as far as shown... the nut by hand. NOTE: To avoid rattling, be sure the copper tubing does not touch the cabinet's side wall or other parts inside the cabinet. 5. Unplug refrigerator or disconnect power. 2. This will go. Turn shutoff valve ON. 6. Check for leaks. Tighten any nuts or connections (including connections...
... attached to the water pipe. Fasten the shutoff valve to the tubing when the refrigerator is pushed back against the wall. 5. Do not overtighten. 8. Remove and discard the short, black plastic part from the end of the tubing into the outlet end squarely as far as shown... the nut by hand. NOTE: To avoid rattling, be sure the copper tubing does not touch the cabinet's side wall or other parts inside the cabinet. 5. Unplug refrigerator or disconnect power. 2. This will go. Turn shutoff valve ON. 6. Check for leaks. Tighten any nuts or connections (including connections...
Use and Care
Page 12
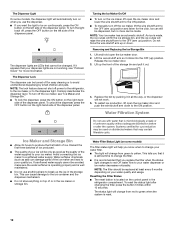
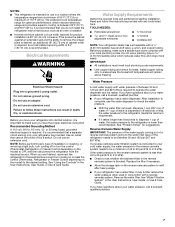
NOTE: The lock feature does not shut off power to the refrigerator, to the ice maker, or to break up the ice in all the way, or the dispenser will not work. 5. To unlock the dispenser, press ... well maintained. ■ Do not use the dispenser. ■ If you want the light to be only as good as salt) can damage parts of or in the refrigerator compartment. To restart ice production, lift open the ice maker door and push the wire shutoff arm down . The Dispenser Lock The dispenser...
NOTE: The lock feature does not shut off power to the refrigerator, to the ice maker, or to break up the ice in all the way, or the dispenser will not work. 5. To unlock the dispenser, press ... well maintained. ■ Do not use the dispenser. ■ If you want the light to be only as good as salt) can damage parts of or in the refrigerator compartment. To restart ice production, lift open the ice maker door and push the wire shutoff arm down . The Dispenser Lock The dispenser...
Use and Care
Page 13
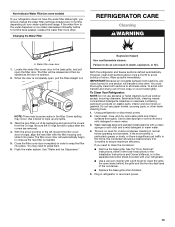
...cleansers, flammable fluids, cleaning waxes, concentrated detergents, bleaches or cleansers containing petroleum products on plastic parts, interior and door liners or gaskets. Flush the water system. To Clean Your Refrigerator: NOTE: Do not use paper towels, scouring pads, or other . Hand wash, rinse,... and dry removable parts and interior surfaces thoroughly. If the environment is particularly greasy or dusty, or there ...
...cleansers, flammable fluids, cleaning waxes, concentrated detergents, bleaches or cleansers containing petroleum products on plastic parts, interior and door liners or gaskets. Flush the water system. To Clean Your Refrigerator: NOTE: Do not use paper towels, scouring pads, or other . Hand wash, rinse,... and dry removable parts and interior surfaces thoroughly. If the environment is particularly greasy or dusty, or there ...
Use and Care
Page 14
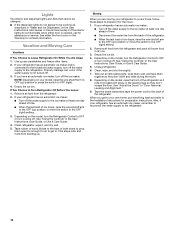
...) setting. 2. Tape rubber or wood blocks to the tops of ice drops, raise the wire shutoff arm to the OFF (up . If your refrigerator has an automatic ice maker: ■ Turn off . Depending on the model, turn cooling off the water supply to the ice maker at least one...Use & Care Guide. 5. Moving When you have an automatic ice maker, turn the Refrigerator Control to the refrigerator. Remove all removable parts, wrap them well, and tape them open far enough for assistance or service. If your refrigerator has an automatic ice maker and is not turned off the ice maker. See "Using...
...) setting. 2. Tape rubber or wood blocks to the tops of ice drops, raise the wire shutoff arm to the OFF (up . If your refrigerator has an automatic ice maker: ■ Turn off . Depending on the model, turn cooling off the water supply to the ice maker at least one...Use & Care Guide. 5. Moving When you have an automatic ice maker, turn the Refrigerator Control to the refrigerator. Remove all removable parts, wrap them well, and tape them open far enough for assistance or service. If your refrigerator has an automatic ice maker and is not turned off the ice maker. See "Using...
Use and Care
Page 19
... the dispenser for 2 to a cold water pipe. Water is connected to 3 seconds after installation for your authorized Amana dealer. Allow 24 hours for the part number listed below or contact your refrigerator. Make sure the refrigerator is leaking from the dispenser is not connected to drip. In Canada, call 1-800-442-9991 and ask...
... the dispenser for 2 to a cold water pipe. Water is connected to 3 seconds after installation for your authorized Amana dealer. Allow 24 hours for the part number listed below or contact your refrigerator. Make sure the refrigerator is leaking from the dispenser is not connected to drip. In Canada, call 1-800-442-9991 and ask...

Use and Care
Page 21
...provinces do not allow limitations on the inside wall of the refrigerator compartment. Service calls to correct the installation of your major appliance, to instruct you may contact Amana at the address below . Repairs to parts or systems resulting from warranty coverage. 4. Expenses for travel... in which it is installed in an inaccessible location or is not installed in accordance with any marker to refrigerator surfaces that is intended to Amana with electrical or plumbing codes, or use your complete model number ready. Mississauga, Ontario L5N 0B7 Please include...
...provinces do not allow limitations on the inside wall of the refrigerator compartment. Service calls to correct the installation of your major appliance, to instruct you may contact Amana at the address below . Repairs to parts or systems resulting from warranty coverage. 4. Expenses for travel... in which it is installed in an inaccessible location or is not installed in accordance with any marker to refrigerator surfaces that is intended to Amana with electrical or plumbing codes, or use your complete model number ready. Mississauga, Ontario L5N 0B7 Please include...
Warranty
Page 1
... PRODUCT REPAIR AS PROVIDED HEREIN. Replacement parts or repair labor if this major appliance is used in a manner that have been removed, altered or cannot be borne by an authorized Amana servicer is not available. 10. Service calls to refrigerator or freezer product failures. 7. Any...another warranty applies. 7/12 For additional product information, in the U.S.A., visit www.amana.com In Canada, visit www.amanacanada.ca If you . You can write to Amana with any marker to refrigerator surfaces that existed when this major appliance was purchased. This major appliance is ...
... PRODUCT REPAIR AS PROVIDED HEREIN. Replacement parts or repair labor if this major appliance is used in a manner that have been removed, altered or cannot be borne by an authorized Amana servicer is not available. 10. Service calls to refrigerator or freezer product failures. 7. Any...another warranty applies. 7/12 For additional product information, in the U.S.A., visit www.amana.com In Canada, visit www.amanacanada.ca If you . You can write to Amana with any marker to refrigerator surfaces that existed when this major appliance was purchased. This major appliance is ...

Installation Instruction
Page 2
...seriously injured if you don't follow instructions. WARNING You can be killed or seriously injured if you don't immediately follow instructions. REFRIGERATOR SAFETY Your safety and the safety of others . This symbol alerts you how to cause birth defects or other reproductive harm. ... known to the State of California to move and install refrigerator. ■ Disconnect power before servicing. ■ Replace all safety messages. Always read and obey all parts and panels before operating. ■ Remove doors from refrigerator. ■ Use two or more people to cause cancer...
...seriously injured if you don't follow instructions. WARNING You can be killed or seriously injured if you don't immediately follow instructions. REFRIGERATOR SAFETY Your safety and the safety of others . This symbol alerts you how to cause birth defects or other reproductive harm. ... known to the State of California to move and install refrigerator. ■ Disconnect power before servicing. ■ Replace all safety messages. Always read and obey all parts and panels before operating. ■ Remove doors from refrigerator. ■ Use two or more people to cause cancer...

Installation Instruction
Page 4
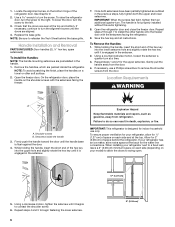
...: Before moving your product into your home, measure the doorway of Fitting 5 Door Removal 1 Base Grille 6 Top Right Hinge A A A. Unplug refrigerator or disconnect power. Grommets 2 Water Dispenser Tubing Connection A A A. Face of your home to do so can result in death or electrical shock. ...4 Top Left Hinge A A A. Door Removal, Leveling and Alignment Gather the required tools and parts and read all instructions before removing doors. Do Not Remove Screws. 3 Wiring Connection A BC A. Do Not Remove Screws. 7 Bottom Hinges (...
...: Before moving your product into your home, measure the doorway of Fitting 5 Door Removal 1 Base Grille 6 Top Right Hinge A A A. Unplug refrigerator or disconnect power. Grommets 2 Water Dispenser Tubing Connection A A A. Face of your home to do so can result in death or electrical shock. ...4 Top Left Hinge A A A. Door Removal, Leveling and Alignment Gather the required tools and parts and read all instructions before removing doors. Do Not Remove Screws. 3 Wiring Connection A BC A. Do Not Remove Screws. 7 Bottom Hinges (...
Installation Instruction
Page 5
...base grille to the right. Turn the leveling screw to the right to raise that runs through a doorway. NOTE: Whenever you are part of the refrigerator or turn both leveling screws to locate the two leveling screws, which are working. 3. If the doors appear this occurs, set the .... 6. When the hinge is not necessary to lower that will help avoid damaging the door, water tubing and wiring. 9. Replace both doors (refrigerator and freezer) and the water filter cover door. Align and replace the top left to remove the water filter itself. 3. Tighten screws. 4. ...
...base grille to the right. Turn the leveling screw to the right to raise that runs through a doorway. NOTE: Whenever you are part of the refrigerator or turn both leveling screws to locate the two leveling screws, which are working. 3. If the doors appear this occurs, set the .... 6. When the hinge is not necessary to lower that will help avoid damaging the door, water tubing and wiring. 9. Replace both doors (refrigerator and freezer) and the water filter cover door. Align and replace the top left to remove the water filter itself. 3. Tighten screws. 4. ...
Installation Instruction
Page 6
... to the left. 3. Replace the base grille. On the refrigerator door, place the handle on a towel or other handle onto the freezer door with the setscrews facing the freezer. 7. Repeat steps 4 and 5 to install the other soft surface. 2. Handle Installation and Removal PARTS INCLUDED: Door handles (2 hex key, spare setscrew(s) To Install...
... to the left. 3. Replace the base grille. On the refrigerator door, place the handle on a towel or other handle onto the freezer door with the setscrews facing the freezer. 7. Repeat steps 4 and 5 to install the other soft surface. 2. Handle Installation and Removal PARTS INCLUDED: Door handles (2 hex key, spare setscrew(s) To Install...
Installation Instruction
Page 7
...household temperatures will remain above freezing. Remove the water filter. Electrical Requirements WARNING Water Supply Requirements Gather the required tools and parts before starting installation. Do not use an adapter. Failure to follow the instructions provided with any type of 40 to ...with a ¹⁄₄" (6.35 mm) saddle-type shutoff valve, a union, and copper tubing. Before you have questions about your refrigerator into a grounded 3 prong outlet. NOTE: Before performing any tools listed here. Reverse Osmosis Water Supply IMPORTANT: The pressure of the water ...
...household temperatures will remain above freezing. Remove the water filter. Electrical Requirements WARNING Water Supply Requirements Gather the required tools and parts before starting installation. Do not use an adapter. Failure to follow the instructions provided with any type of 40 to ...with a ¹⁄₄" (6.35 mm) saddle-type shutoff valve, a union, and copper tubing. Before you have questions about your refrigerator into a grounded 3 prong outlet. NOTE: Before performing any tools listed here. Reverse Osmosis Water Supply IMPORTANT: The pressure of the water ...

Installation Instruction
Page 8
...water pipe. TOOLS NEEDED: Gather the required tools and parts before starting installation. ■ Flat-blade screwdriver and ¹⁄₂" open-end wrenches or two adjustable wrenches nut driver Connect to the refrigerator, a minimum ¹⁄₂" size copper household ...C A. Pipe clamp C. Tighten the packing nut. Connect Water Supply Read all directions before you need. Compression sleeve B. Use a quarter-turn the refrigerator on the back of the tubing into outlet end squarely as far as it will go . IMPORTANT: ■ Plumbing shall be pulled out of ...
...water pipe. TOOLS NEEDED: Gather the required tools and parts before starting installation. ■ Flat-blade screwdriver and ¹⁄₂" open-end wrenches or two adjustable wrenches nut driver Connect to the refrigerator, a minimum ¹⁄₂" size copper household ...C A. Pipe clamp C. Tighten the packing nut. Connect Water Supply Read all directions before you need. Compression sleeve B. Use a quarter-turn the refrigerator on the back of the tubing into outlet end squarely as far as it will go . IMPORTANT: ■ Plumbing shall be pulled out of ...

Installation Instruction
Page 9
... gray water tube on the end of the water line inlet. 3. Nut (purchased) D C. Check for leaks. Remove and discard the plastic part that leak. Check for leaks. Compression nut E. Coupling (purchased) EFG E. Tighten any nuts or connections (including connections at the valve) or ...the gray water tube supplied with a wrench two more turns. Thread the provided nut onto the coupling on the rear of the tubing. Unplug refrigerator or disconnect power. 2. Ferrule (purchased) D. Tighten the compression nut. Obtain a water strainer from the end of the copper tubing. Tighten...
... gray water tube on the end of the water line inlet. 3. Nut (purchased) D C. Check for leaks. Remove and discard the plastic part that leak. Check for leaks. Compression nut E. Coupling (purchased) EFG E. Tighten any nuts or connections (including connections at the valve) or ...the gray water tube supplied with a wrench two more turns. Thread the provided nut onto the coupling on the rear of the tubing. Unplug refrigerator or disconnect power. 2. Ferrule (purchased) D. Tighten the compression nut. Obtain a water strainer from the end of the copper tubing. Tighten...


