Amana AER6303MFW Support and Manuals
Get Help and Manuals for this Amana item
View All Support Options Below
Free Amana AER6303MFW manuals!
Problems with Amana AER6303MFW?
Ask a Question
Free Amana AER6303MFW manuals!
Problems with Amana AER6303MFW?
Ask a Question
Popular Amana AER6303MFW Manual Pages
Specification Sheet - Page 1
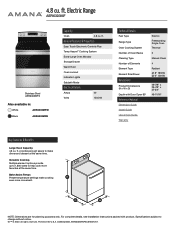
... Preset temperature settings make dinner and dessert at the same time.
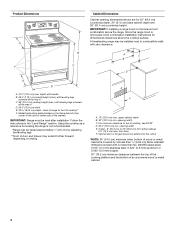
NOTE: Dimensions are for planning purposes only. Printed in :
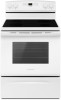
White
AER6303MFW
Black
AER6303MFB...complete details, see Installation Instructions packed with Door Open 90°
Reference Material
Dimension Guide Install Guide Use & Care Guide Warranty
Electric Freestanding Single Oven Thermal
2
Manual Clean
4
Radiant ...
DimensionGuide - Page 1
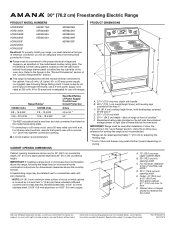
... on the model/serial number rating plate. W10403811C 05/20/2016 Use a 3-wire, UL Listed. 40-
Specifications subject to a 50-amp circuit, use with product. or 50-amp power supply cord (pigtail) (see Installation Instructions packed with ranges.
For complete details, see following the range hood or microwave hoods combination instructions for leveling the range is not...
Installation Instructions - Page 1
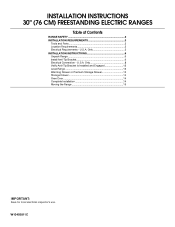
...Only 5 INSTALLATION INSTRUCTIONS 6 Unpack Range 6 Install Anti-Tip Bracket 6 Electrical Connection - U.S.A. INSTALLATION INSTRUCTIONS 30" (76 CM) FREESTANDING ELECTRIC RANGES
Table of Contents
RANGE SAFETY 2 INSTALLATION REQUIREMENTS 3
Tools and Parts 3 Location Requirements 3 Electrical Requirements - Only 8 Verify Anti-Tip Bracket Is Installed and Engaged 12 Level Range 13 Warming...
Installation Instructions - Page 2
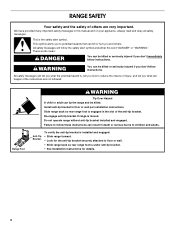
... safety messages will follow instructions. Slide range back so rear range foot is the safety alert symbol. RANGE SAFETY
Your safety and the safety of the anti-tip bracket. This is engaged in this manual and on your appliance. We have provided many important safety messages in the slot of others . Install anti-tip bracket to...
Installation Instructions - Page 3
...cable must be secured per the instructions in ring terminals or open-end spade terminals with ranges. The model/serial rating plate is the installer's responsibility to terminal block) ...section.
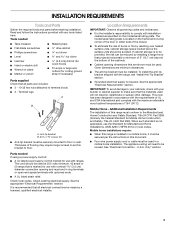
3 See "Electrical Connection - INSTALLATION REQUIREMENTS
Tools and Parts
Gather the required tools and parts before starting installation. Check local codes. If cabinet storage is marked for use...
Installation Instructions - Page 4
...)
IMPORTANT: Range must be level after installation.
Model/serial rating plate (located on styling. Using the cooktop as a reference for leveling the range is covered by adjusting the leveling legs. **Front of cooktop** F. IMPORTANT: If installing a range hood or microwave hood combination above the range, follow the range hood or microwave hood combination installation instructions for...
Installation Instructions - Page 5

... and a separate ground wire is used, it here.
■ Range must be moved if servicing is located on the model/serial rating plate.
**If connecting to a 3-wire system:
Local codes may permit the use of the range inside a clear plastic bag. Electrical Connection To properly install your range, you must be provided at least 4 ft (1.22 m) long...
Installation Instructions - Page 6

... leveling leg
C.
Rear leveling leg B. Front leveling leg
6 INSTALLATION INSTRUCTIONS
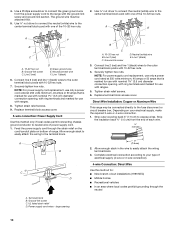
Unpack Range
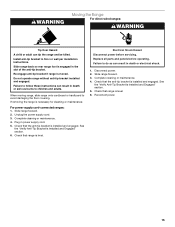
WARNING
Excessive Weight Hazard Use two or more people to floor or wall per installation instructions. Remove shipping materials, tape and film from centerline as shown. Remove oven racks and parts package from outside the range. Do not remove the shipping base at this time...
Installation Instructions - Page 8
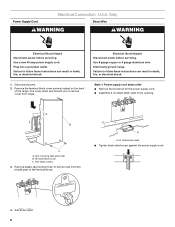
...Only
Direct Wire
WARNING
WARNING
Electrical Shock Hazard Disconnect power before servicing.
Terminal block cover C. A
A. Failure to follow these instructions can result in death, fire, or electrical shock.
1. ... supply cord.
4. Failure to remove cover from the middle post of the range. Electrically ground range.
Use a new 40 amp power supply cord. Disconnect power. 2. Use ...
Installation Instructions - Page 10
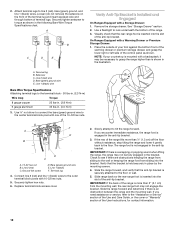
...Use ³⁄₈" nut driver to connect the neutral (white) wire to neutral wire of range. Line 2 (red)
D
D. NOTE: For power supply cord replacement, use only a power cord rated...method only if local codes permit connecting chassis ground conductor to the center terminal block post with ranges.
8. Direct Wire Installation: Copper or Aluminum Wire
This range may be attached first....
Installation Instructions - Page 11

... under the screw.
3. Replace terminal block access cover.
3-wire connection: Direct Wire
Use this method only if local codes permit connecting ground conductor to... (2.8 N-m)
6 gauge aluminum
35 lbs-in the following Bare Wire Torque Specifications chart. Part of the 10-32 hex nuts. A
B
C
G D
EF
A....driver to connect the neutral (white) wire to the range with 10-32 hex nuts.
8.
Installation Instructions - Page 12
.... Replace terminal block access cover.
2.
If you encounter immediate resistance, the range foot is inserted into the bracket. If you need assistance or service, refer to grasp the range higher than is a snapping or popping sound when lifting the range, the range may not be necessary to the "Assistance or Service" section of the Use and Care Guide...
Installation Instructions - Page 13
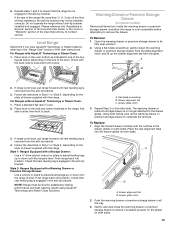
... that rear leveling leg is seated properly on the glides on the style of the User Instructions, to the drawer glides.
NOTE: Range must be installed correctly. To Replace: 1.
Repeat steps 1 and 2 to the "Range Care" section of the range lifts more than ½" (1.3 cm) off the floor without resistance, the anti-tip bracket may not...
Installation Instructions - Page 14
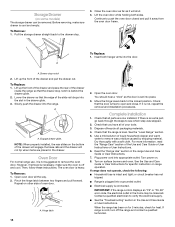
... and Care Guide or User Instructions for heat. To Replace: 1. NOTE: When properly installed, the rear slides on for 5 minutes, check for specific instruction on . 8. Read the "Range Use" section in the home may be removed. A
A. Oven Door
For normal range use, it is heavy.
Contact a qualified electrician to the locked position. Check that the door is set into...
Installation Instructions - Page 15
... electrical shock.
1. Failure to follow these instructions can result in power supply cord. 5. Complete cleaning or maintenance. 4.
Unplug the power supply cord. 3. Plug in death or serious burns to floor or wall per installation instructions. Disconnect power. 2.
Replace all parts and panels before servicing. When moving range, slide range onto cardboard or hardboard to do...
Amana AER6303MFW Reviews
We have not received any reviews for Amana yet.