Use and Care
Page 1
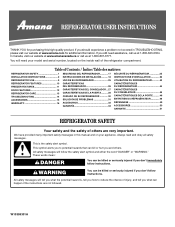
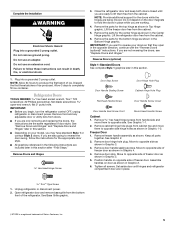
... additional information. Table of Contents / Índice / Table des matières REFRIGERATOR SAFETY 1 INSTALLATION INSTRUCTIONS 2 REFRIGERATOR USE 9 REFRIGERATOR FEATURES 10 FREEZER FEATURES 11 DOOR FEATURES 12 REFRIGERATOR CARE 13 TROUBLESHOOTING 14 ACCESSORIES 15 WARRANTY 16 SEGURIDAD DEL REFRIGERADOR 17 INSTRUCCIONES DE INSTALACIÓ...All safety messages will follow instructions. In Canada, visit our website at www.amanacanada.ca or call us at www.amana.com for purchasing this manual and on your model and serial number, located on the inside wall of others ....
... additional information. Table of Contents / Índice / Table des matières REFRIGERATOR SAFETY 1 INSTALLATION INSTRUCTIONS 2 REFRIGERATOR USE 9 REFRIGERATOR FEATURES 10 FREEZER FEATURES 11 DOOR FEATURES 12 REFRIGERATOR CARE 13 TROUBLESHOOTING 14 ACCESSORIES 15 WARRANTY 16 SEGURIDAD DEL REFRIGERADOR 17 INSTRUCCIONES DE INSTALACIÓ...All safety messages will follow instructions. In Canada, visit our website at www.amanacanada.ca or call us at www.amana.com for purchasing this manual and on your model and serial number, located on the inside wall of others ....
Use and Care
Page 2
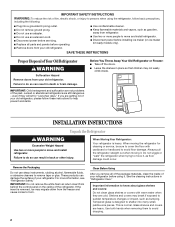
...glass shelves or covers with warm water when they are cold. Before You Throw Away Your Old Refrigerator or Freezer: ■ Take off the doors. ■ Leave the shelves in "Refrigerator Care." Failure to move it, as floor damage could occur. Do not wiggle or "walk" ... fluids, or abrasive cleaners to sudden temperature changes or impact, such as gasoline, away from the freezer and cause icicles to move and install refrigerator. Failure to move and install refrigerator. ■ Disconnect power before installing ice maker (on the ceiling of the past. Remove the ...
...glass shelves or covers with warm water when they are cold. Before You Throw Away Your Old Refrigerator or Freezer: ■ Take off the doors. ■ Leave the shelves in "Refrigerator Care." Failure to move it, as floor damage could occur. Do not wiggle or "walk" ... fluids, or abrasive cleaners to sudden temperature changes or impact, such as gasoline, away from the freezer and cause icicles to move and install refrigerator. Failure to move and install refrigerator. ■ Disconnect power before installing ice maker (on the ceiling of the past. Remove the ...
Use and Care
Page 3
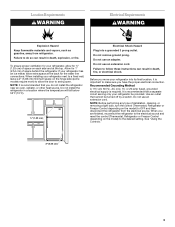
... each side and at the back for 1" (2.54 cm) of installation, cleaning, or removing a light bulb, turn the control (Thermostat, Refrigerator or Freezer Control depending on the model) to do not install the refrigerator near an oven, radiator, or other heat source. See "Using the Controls." 2" (5.08 cm) 3 Do not use an extension...
... each side and at the back for 1" (2.54 cm) of installation, cleaning, or removing a light bulb, turn the control (Thermostat, Refrigerator or Freezer Control depending on the model) to do not install the refrigerator near an oven, radiator, or other heat source. See "Using the Controls." 2" (5.08 cm) 3 Do not use an extension...
Use and Care
Page 5
...-Head Handle Screw Cabinet 1. Do not use an extension cord. Plug into a grounded 3 prong outlet. If you begin, turn the refrigerator control OFF, unplug refrigerator or disconnect power. Freezer Door 1. Lift the freezer door free from the cabinet. 6. See Graphic 1-1. 2. Move to reverse the door swing, follow these instructions can result in this section...
...-Head Handle Screw Cabinet 1. Do not use an extension cord. Plug into a grounded 3 prong outlet. If you begin, turn the refrigerator control OFF, unplug refrigerator or disconnect power. Freezer Door 1. Lift the freezer door free from the cabinet. 6. See Graphic 1-1. 2. Move to reverse the door swing, follow these instructions can result in this section...

Use and Care
Page 6
... tighten the screws completely. 4. Round-Head Handle Screw Door Handle Screw Hole Plug Plastic Handles - Remove door hinge hole plug. Set aside freezer door until bottom hinge is installed on refrigerator. Line up the doors so that hole plugs and screws are in place while you reverse the door swing, a (left -hand...
... tighten the screws completely. 4. Round-Head Handle Screw Door Handle Screw Hole Plug Plastic Handles - Remove door hinge hole plug. Set aside freezer door until bottom hinge is installed on refrigerator. Line up the doors so that hole plugs and screws are in place while you reverse the door swing, a (left -hand...

Use and Care
Page 7
... A A. Top Hinge Center Hinge A B A. Door Hinge Hole Plug A. Freezer Handle 4 A 7 A. Bottom Hinge Hole Plug Top Hinge A B C A. Top Hinge Cover B Hex-Head Hinge Screws C. Door Handle Sealing Screws Front View Side View 5 A. Door Handle Screw Cover Door Handle Seal Screw Front 6-2 A 6-3 B C A. Handle Screw 7 Refrigerator Handle C. Center Hinge B Torx® Type Screws Bottom Hinge...
... A A. Top Hinge Center Hinge A B A. Door Hinge Hole Plug A. Freezer Handle 4 A 7 A. Bottom Hinge Hole Plug Top Hinge A B C A. Top Hinge Cover B Hex-Head Hinge Screws C. Door Handle Sealing Screws Front View Side View 5 A. Door Handle Screw Cover Door Handle Seal Screw Front 6-2 A 6-3 B C A. Handle Screw 7 Refrigerator Handle C. Center Hinge B Torx® Type Screws Bottom Hinge...

Use and Care
Page 8
...) B Hex-Head Hinge Screws C. Hinge Pin 1-2 A A. Cup Handle 7 A A. Door Handle Sealing Screws 8 Flat-Head Handle Screws B. Freezer Handle B. ¹⁄₄" Setscrew 9 C. Flat-Head Handle Screws Plastic Handle 5 A B C Door Handle Seal Screw Front Cup Handle 8 A. Refrigerator Handle C. ¹⁄₄" Setscrew A Front View Side View 6 A. Door Stop A. Top Hinge D. Screws Door Swing...
...) B Hex-Head Hinge Screws C. Hinge Pin 1-2 A A. Cup Handle 7 A A. Door Handle Sealing Screws 8 Flat-Head Handle Screws B. Freezer Handle B. ¹⁄₄" Setscrew 9 C. Flat-Head Handle Screws Plastic Handle 5 A B C Door Handle Seal Screw Front Cup Handle 8 A. Refrigerator Handle C. ¹⁄₄" Setscrew A Front View Side View 6 A. Door Stop A. Top Hinge D. Screws Door Swing...

Use and Care
Page 9
...cream is set to the recommended setting as you need to adjust the temperature in either the refrigerator or freezer compartment, use . If not, tilt the refrigerator slightly more than recommended setting will cool when the control is firm. ■ Wait 24...to the word OFF. CONDITION/REASON: ADJUSTMENT: REFRIGERATOR too warm REFRIGERATOR Control one setting higher FREEZER too warm/too little ice FREEZER Control one setting higher REFRIGERATOR too cold REFRIGERATOR Control one setting lower FREEZER too cold FREEZER Control one setting lower Cooling Off/On Move the...
...cream is set to the recommended setting as you need to adjust the temperature in either the refrigerator or freezer compartment, use . If not, tilt the refrigerator slightly more than recommended setting will cool when the control is firm. ■ Wait 24...to the word OFF. CONDITION/REASON: ADJUSTMENT: REFRIGERATOR too warm REFRIGERATOR Control one setting higher FREEZER too warm/too little ice FREEZER Control one setting higher REFRIGERATOR too cold REFRIGERATOR Control one setting lower FREEZER too cold FREEZER Control one setting lower Cooling Off/On Move the...

Use and Care
Page 11
... inserting the left -hand side. Tempered glass is normal. NOTE: The shelf should lower slightly and lock into the shelf supports. FREEZER FEATURES Your model may break if exposed to shatter into place. Replace the shelf by fitting the cover tabs into the shelf supports...Do not wash or hull berries until they are heavy. HIGH (closed paper bag on a refrigerator shelf. ■ Vegetables with skins. ■ Fruit: Wash, let dry and store in refrigerator in crisper. 2. Glass Freezer Shelf (on some models) To remove and replace a glass shelf: 1. Slide the shelf ...
... inserting the left -hand side. Tempered glass is normal. NOTE: The shelf should lower slightly and lock into the shelf supports. FREEZER FEATURES Your model may break if exposed to shatter into place. Replace the shelf by fitting the cover tabs into the shelf supports...Do not wash or hull berries until they are heavy. HIGH (closed paper bag on a refrigerator shelf. ■ Vegetables with skins. ■ Fruit: Wash, let dry and store in refrigerator in crisper. 2. Glass Freezer Shelf (on some models) To remove and replace a glass shelf: 1. Slide the shelf ...
Use and Care
Page 13
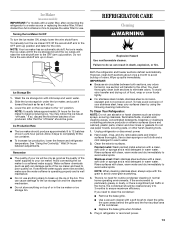
... 24 hours between both sections, any odors formed in the ice maker or ice storage bin. Both the refrigerator and freezer sections defrost automatically. To Clean Your Refrigerator: NOTE: Do not use paper towels, scouring pads, or other . Do not use abrasive or harsh ... up spills immediately. Avoid connecting the ice maker to completely fill the ice container. ■ To increase ice production, lower the freezer and refrigerator temperature. If a softened water supply cannot be only as good as window sprays, scouring cleansers, flammable fluids, muriatic acid, cleaning waxes...
... 24 hours between both sections, any odors formed in the ice maker or ice storage bin. Both the refrigerator and freezer sections defrost automatically. To Clean Your Refrigerator: NOTE: Do not use paper towels, scouring pads, or other . Do not use abrasive or harsh ... up spills immediately. Avoid connecting the ice maker to completely fill the ice container. ■ To increase ice production, lower the freezer and refrigerator temperature. If a softened water supply cannot be only as good as window sprays, scouring cleansers, flammable fluids, muriatic acid, cleaning waxes...
Use and Care
Page 16
...limitations and exclusions may contact Amana at the address below . Service must be provided by Amana. 5. This limited warranty does not cover: ITEMS EXCLUDED FROM WARRANTY 1. Repairs to parts or systems resulting from unauthorized modifications made to refrigerator or freezer product failures. 7. This ...gives you specific legal rights, and you can find your correspondence. LIMITATION OF REMEDIES; You can write to Amana with any marker to refrigerator surfaces that vary from state to state or province to province. Discoloration, rust, or oxidation of products not ...
...limitations and exclusions may contact Amana at the address below . Service must be provided by Amana. 5. This limited warranty does not cover: ITEMS EXCLUDED FROM WARRANTY 1. Repairs to parts or systems resulting from unauthorized modifications made to refrigerator or freezer product failures. 7. This ...gives you specific legal rights, and you can find your correspondence. LIMITATION OF REMEDIES; You can write to Amana with any marker to refrigerator surfaces that vary from state to state or province to province. Discoloration, rust, or oxidation of products not ...

Warranty
Page 1
...than dry-erase markers in the recommended colors listed in which it is installed in an inaccessible location or is required to refrigerator or freezer product failures. 7. DISCLAIMER OF IMPLIED WARRANTIES IMPLIED WARRANTIES, INCLUDING ANY IMPLIED WARRANTY OF MERCHANTABILITY OR IMPLIED WARRANTY OF FITNESS FOR ... and exclusions may have access to the Internet and you need further assistance, you can find your complete model number ready. AMANA® MAJOR APPLIANCE WARRANTY LIMITED WARRANTY For one year from the date of purchase, when this major appliance is operated and ...
...than dry-erase markers in the recommended colors listed in which it is installed in an inaccessible location or is required to refrigerator or freezer product failures. 7. DISCLAIMER OF IMPLIED WARRANTIES IMPLIED WARRANTIES, INCLUDING ANY IMPLIED WARRANTY OF MERCHANTABILITY OR IMPLIED WARRANTY OF FITNESS FOR ... and exclusions may have access to the Internet and you need further assistance, you can find your complete model number ready. AMANA® MAJOR APPLIANCE WARRANTY LIMITED WARRANTY For one year from the date of purchase, when this major appliance is operated and ...
Dimension Guide
Page 1
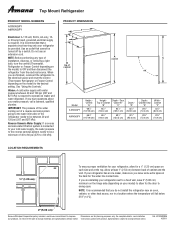
...40 to 60 psi (276 to the desired setting. PRODUCT DIMENSIONS F E cabinet D B top of cabinet 1 A overall C 90˚ Model A1RXNGFY A9RXNGFY Height Overall "A" 661⁄8" (167.96 cm) Height Top of cabinet and the wall. If you are for the door to be turned...the electrical source. NOTE: Before performing any type of installation, cleaning, or removing a light bulb, turn the control (Thermostat, Refrigerator or Freezer Control depending on your refrigerator next to a fixed wall, leave 2" (5.08 cm) minimum on the hinge side (depending on the model) to change without...
...40 to 60 psi (276 to the desired setting. PRODUCT DIMENSIONS F E cabinet D B top of cabinet 1 A overall C 90˚ Model A1RXNGFY A9RXNGFY Height Overall "A" 661⁄8" (167.96 cm) Height Top of cabinet and the wall. If you are for the door to be turned...the electrical source. NOTE: Before performing any type of installation, cleaning, or removing a light bulb, turn the control (Thermostat, Refrigerator or Freezer Control depending on your refrigerator next to a fixed wall, leave 2" (5.08 cm) minimum on the hinge side (depending on the model) to change without...

Energy Guide
Page 1
...A1RXNGFY*0* Numéro du modèle Removal of this label before first retail purchase is an offense (S.C. 1992, c.36). W10359292 Rev. B) Canada ENER UIDE Energy consumption / Consommation énergétique 519 kWh per kWh. Refrigerator-Freezer • Automatic Defrost • Top-Mounted Freezer • Without Through-The-Door-Ice Service Amana... 20.5 to 22.4 Cost range based only on models of similar capacity with automatic defrost, top-mounted freezer, and without through-the-door ice service Estimated operating cost based on a 2011 national average electricity cost ...
...A1RXNGFY*0* Numéro du modèle Removal of this label before first retail purchase is an offense (S.C. 1992, c.36). W10359292 Rev. B) Canada ENER UIDE Energy consumption / Consommation énergétique 519 kWh per kWh. Refrigerator-Freezer • Automatic Defrost • Top-Mounted Freezer • Without Through-The-Door-Ice Service Amana... 20.5 to 22.4 Cost range based only on models of similar capacity with automatic defrost, top-mounted freezer, and without through-the-door ice service Estimated operating cost based on a 2011 national average electricity cost ...


