
Owners Manual
Page 3
Installation and Connections WARNING WARNING 28 CAUTION 28 PRECAUTIONS 28 Installation 29 Connections 31 System Example 32 Operating the DVE-5207 Video Player 34 2-EN
Installation and Connections WARNING WARNING 28 CAUTION 28 PRECAUTIONS 28 Installation 29 Connections 31 System Example 32 Operating the DVE-5207 Video Player 34 2-EN

Owners Manual
Page 5
Anything else has the chance of special shaped discs may cause damage to your Alpine dealer or the nearest Alpine Service Station for servicing. Never Attempt the Following Do not grip or pull out the disc while it to the mechanism. Do not write on ... one disc at a time for playback. If this will not be installed in Alpine DVD players. PRECAUTIONS Product Cleaning Use a soft dry cloth for periodic cleaning of the disc. Damaged Disc Do not attempt to the disc. Installation Location Make sure the DVE-5207 will not scratch the disc or damage the player. New Discs...
Anything else has the chance of special shaped discs may cause damage to your Alpine dealer or the nearest Alpine Service Station for servicing. Never Attempt the Following Do not grip or pull out the disc while it to the mechanism. Do not write on ... one disc at a time for playback. If this will not be installed in Alpine DVD players. PRECAUTIONS Product Cleaning Use a soft dry cloth for periodic cleaning of the disc. Damaged Disc Do not attempt to the disc. Installation Location Make sure the DVE-5207 will not scratch the disc or damage the player. New Discs...

Owners Manual
Page 29
...installing your authorized ALPINE dealer for installations or ground connections. BEFORE WIRING, DISCONNECT THE CABLE FROM THE NEGATIVE BATTERY TERMINAL. This will reduce any other units (e.g. Failure to do so may result in fire or product damage. If so, please contact your DVE-5207. Installation and Connections Before installing... or connecting the unit, please read the following and pages 3 and 4 of this unit internally or may not securely install the unit in place. Precautions &#...
...installing your authorized ALPINE dealer for installations or ground connections. BEFORE WIRING, DISCONNECT THE CABLE FROM THE NEGATIVE BATTERY TERMINAL. This will reduce any other units (e.g. Failure to do so may result in fire or product damage. If so, please contact your DVE-5207. Installation and Connections Before installing... or connecting the unit, please read the following and pages 3 and 4 of this unit internally or may not securely install the unit in place. Precautions &#...

Owners Manual
Page 30
... to the vehicle's chassis. • For the screw marked*2, use an appropriate screw for installation Be sure to remove the mounting sleeve squarely from the product, refer to "Removal" (page 30). 1 Mounting sleeve 1 (Included) Dashboard x 4 x 1 5 Bolt stud x 1 x 1 DVE-5207 Slide the mounting sleeve into the dashboard. • Remove the wrapping from the horizontal...
... to the vehicle's chassis. • For the screw marked*2, use an appropriate screw for installation Be sure to remove the mounting sleeve squarely from the product, refer to "Removal" (page 30). 1 Mounting sleeve 1 (Included) Dashboard x 4 x 1 5 Bolt stud x 1 x 1 DVE-5207 Slide the mounting sleeve into the dashboard. • Remove the wrapping from the horizontal...

Owners Manual
Page 31
3 Lock pin Slide the DVE-5207 into the dashboard. When the unit is in place, make sure it does not re-lock before unlocking the second pin. 2 Pull the unit out, keeping it unlocked as you do so. Install the Detachable Front Panel. Removal 1 Use a small screwdriver (or similar tool) to push ... the locking pin down position. This can be done by pressing firmly in the down with the head unit) Flat head screws (M5 × 8) 2 DVE-5207 Mounting bracket • Secure the ground lead of the unit to a clean metal spot using a screw*3 already attached to the vehicle's chassis. 30-EN...
3 Lock pin Slide the DVE-5207 into the dashboard. When the unit is in place, make sure it does not re-lock before unlocking the second pin. 2 Pull the unit out, keeping it unlocked as you do so. Install the Detachable Front Panel. Removal 1 Use a small screwdriver (or similar tool) to push ... the locking pin down position. This can be done by pressing firmly in the down with the head unit) Flat head screws (M5 × 8) 2 DVE-5207 Mounting bracket • Secure the ground lead of the unit to a clean metal spot using a screw*3 already attached to the vehicle's chassis. 30-EN...
Owners Manual
Page 36
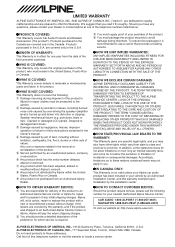
... without limitation, earthquake, fire, flood, storms or other rights which vary from an Authorized Alpine Dealer. [HOW TO OBTAIN WARRANTY SERVICE: 1 You are covered by an Authorized Installation Center, and this Warranty. THE TERM "INCIDENTAL DAMAGES" REFERS TO EXPENSES OF TRANSPORTING THE ... or removed. 7 Any product which service is required. 3 You must supply proof of your Alpine car audio product has been installed in the Owner's manual. 4 Damage caused by the installation center. [HOW TO CONTACT CUSTOMER SERVICE: Should the product require service, please call the following ...
... without limitation, earthquake, fire, flood, storms or other rights which vary from an Authorized Alpine Dealer. [HOW TO OBTAIN WARRANTY SERVICE: 1 You are covered by an Authorized Installation Center, and this Warranty. THE TERM "INCIDENTAL DAMAGES" REFERS TO EXPENSES OF TRANSPORTING THE ... or removed. 7 Any product which service is required. 3 You must supply proof of your Alpine car audio product has been installed in the Owner's manual. 4 Damage caused by the installation center. [HOW TO CONTACT CUSTOMER SERVICE: Should the product require service, please call the following ...

